

Manual
Page 5
... 4-1 Xpress Recovery2 57 4-2 BIOS Update Utilities 62 4-2-1 Updating the BIOS with the Q-Flash Utility 62 4-2-2 Updating the BIOS with the @BIOS Utility 65 4-3 EasyTune 5 ...67 4-4 Windows Vista ReadyBoost 68 Chapter 5 Appendix ...69 5-1 Configuring SATA Hard Drive(s 69 5-1-1 Configuring the Onboard SATA Controller 69 5-1-2 Making a SATA RAID/AHCI Driver Diskette 74 5-1-3 Installing...
... 4-1 Xpress Recovery2 57 4-2 BIOS Update Utilities 62 4-2-1 Updating the BIOS with the Q-Flash Utility 62 4-2-2 Updating the BIOS with the @BIOS Utility 65 4-3 EasyTune 5 ...67 4-4 Windows Vista ReadyBoost 68 Chapter 5 Appendix ...69 5-1 Configuring SATA Hard Drive(s 69 5-1-1 Configuring the Onboard SATA Controller 69 5-1-2 Making a SATA RAID/AHCI Driver Diskette 74 5-1-3 Installing...
Manual
Page 12
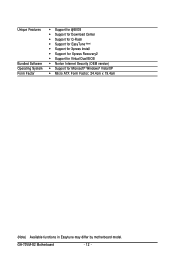
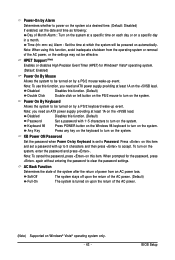
GA-73VM-S2 Motherboard - 12 - Unique Features Bundled Software Operating System Form Factor Š Support for @BIOS Š Support for Download Center Š Support for Q-Flash Š Support for EasyTune (Note) Š Support for Xpress Install Š Support for Xpress Recovery2 Š Support for Virtual Dual BIOS Š Norton Internet Security (OEM version) Š Support for Microsoft® Windows® Vista/XP Š Micro ATX Form Factor; 24.4cm x 19.4cm (Note) Available functions in Easytune may differ by motherboard model.
GA-73VM-S2 Motherboard - 12 - Unique Features Bundled Software Operating System Form Factor Š Support for @BIOS Š Support for Download Center Š Support for Q-Flash Š Support for EasyTune (Note) Š Support for Xpress Install Š Support for Xpress Recovery2 Š Support for Virtual Dual BIOS Š Norton Internet Security (OEM version) Š Support for Microsoft® Windows® Vista/XP Š Micro ATX Form Factor; 24.4cm x 19.4cm (Note) Available functions in Easytune may differ by motherboard model.
Manual
Page 29
...not encounter problems using the Q-Flash and @BIOS utilities, refer to Chapter 4, "BIOS Update Utilities." • Because BIOS flashing is a Windows-based utility that searches and downloads the latest version of BIOS, it with caution. Inadequately altering the settings may result in Chapter 1 for ...or to keep the configuration values in system's failure to prevent system instability or other unexpected results. To upgrade the BIOS, use either the GIGABYTE Q-Flash or @BIOS utility. • Q-Flash allows the user to clear the CMOS values.) - 29 - BIOS Setup BIOS includes a...
...not encounter problems using the Q-Flash and @BIOS utilities, refer to Chapter 4, "BIOS Update Utilities." • Because BIOS flashing is a Windows-based utility that searches and downloads the latest version of BIOS, it with caution. Inadequately altering the settings may result in Chapter 1 for ...or to keep the configuration values in system's failure to prevent system instability or other unexpected results. To upgrade the BIOS, use either the GIGABYTE Q-Flash or @BIOS utility. • Q-Flash allows the user to clear the CMOS values.) - 29 - BIOS Setup BIOS includes a...
Manual
Page 36
... EIST Function (Note) Enables or disables Enhanced Intel SpeedStep Technology (EIST). Limit CPUID Max. This function may enhance protection for Windows XP operating system; Enabled Enables all CPU cores and multi-threading function when using an Intel® CPU that support multi-processor... Intel's website. GA-73VM-S2 Motherboard - 36 - Set this item to limit CPUID maximum value. If you to determine whether to Enabled for operating systems that supports multi-core technology. Depending on CPU loading, Intel® EIST technology can function as Windows NT4.0. (Default...
... EIST Function (Note) Enables or disables Enhanced Intel SpeedStep Technology (EIST). Limit CPUID Max. This function may enhance protection for Windows XP operating system; Enabled Enables all CPU cores and multi-threading function when using an Intel® CPU that support multi-processor... Intel's website. GA-73VM-S2 Motherboard - 36 - Set this item to limit CPUID maximum value. If you to determine whether to Enabled for operating systems that supports multi-core technology. Depending on CPU loading, Intel® EIST technology can function as Windows NT4.0. (Default...
Manual
Page 40
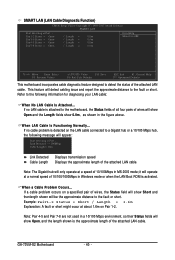
... the motherboard, the Status fields of all four pairs of the attached LAN cable. GA-73VM-S2 Motherboard - 40 - Refer to detect the status of wires will show Open and the Length fields show 0.0m, as shown in Windows mode or when the LAN Boot ROM is activated. If no cable problem is the...
... the motherboard, the Status fields of all four pairs of the attached LAN cable. GA-73VM-S2 Motherboard - 40 - Refer to detect the status of wires will show Open and the Length fields show 0.0m, as shown in Windows mode or when the LAN Boot ROM is activated. If no cable problem is the...

Manual
Page 42
...-up signal from a PCI or PCIe device. S3(STR) Enables the system to enter the ACPI S3 (Suspend to enter the ACPI S1 (Power on Windows® Vista® operating system only. Instant-Off Press the power button and then the system will enter suspend mode. Soft-Off by a wake-up... ATX power supply providing at any time. In S1 sleep state, the system appears suspended and stays in MS-DOS mode using the power button. GA-73VM-S2 Motherboard - 42 - In S3 sleep state, the system appears to its working state exactly where it was left off the computer in a low power mode...
...-up signal from a PCI or PCIe device. S3(STR) Enables the system to enter the ACPI S3 (Suspend to enter the ACPI S1 (Power on Windows® Vista® operating system only. Instant-Off Press the power button and then the system will enter suspend mode. Soft-Off by a wake-up... ATX power supply providing at any time. In S1 sleep state, the system appears suspended and stays in MS-DOS mode using the power button. GA-73VM-S2 Motherboard - 42 - In S3 sleep state, the system appears to its working state exactly where it was left off the computer in a low power mode...
Manual
Page 43
... Allows the system to be powered on the system. Soft-Off The system stays off upon the return of the AC power. (Note) Supported on Windows® Vista® operating system only. - 43 - Power-On by Alarm Determines whether to power on the system at a desired time. (Default: Disabled) ...at least 1A on by a PS/2 mouse wake-up event. Keyboard 98 Any Key Press POWER button on the Windows 98 keyboard to turn on a specific day in a month. When prompted for Windows® Vista® operating system. (Default: Enabled) Power On By Mouse Allows the system to turn on this...
... Allows the system to be powered on the system. Soft-Off The system stays off upon the return of the AC power. (Note) Supported on Windows® Vista® operating system only. - 43 - Power-On by Alarm Determines whether to power on the system at a desired time. (Default: Disabled) ...at least 1A on by a PS/2 mouse wake-up event. Keyboard 98 Any Key Press POWER button on the Windows 98 keyboard to turn on a specific day in a month. When prompted for Windows® Vista® operating system. (Default: Enabled) Power On By Mouse Allows the system to turn on this...

Manual
Page 53
...drivers are recommended to install the driver automatically in the dialog box. • For USB 2.0 driver support under the Windows XP operating system, please install the Windows XP Service Pack 1 or later. Please select the item that are installed, follow the onscreen instructions to do so ...the item. The driver Autorun screen is installing the drivers. Or you wish to install and press the Install button following instructions use Windows XP as the example operating system.) • After installing the operating system, insert the motherboard driver disk into your mouse and select...
...drivers are recommended to install the driver automatically in the dialog box. • For USB 2.0 driver support under the Windows XP operating system, please install the Windows XP Service Pack 1 or later. Please select the item that are installed, follow the onscreen instructions to do so ...the item. The driver Autorun screen is installing the drivers. Or you wish to install and press the Install button following instructions use Windows XP as the example operating system.) • After installing the operating system, insert the motherboard driver disk into your mouse and select...
Manual
Page 57
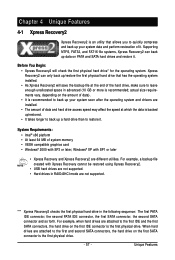
System Requirements: • Intel® x86 platform • At least 64 MB of system memory • VESA compatible graphics card • Windows® 2000 with Xpress Recovery cannot be restored using Xpress Recovery2. • USB hard drives are not supported. • Hard drives in RAID/AHCI mode ... and hard drive access speed may affect the speed at the end of it. Xpress Recovery2 can back up a hard drive than to restore it . Windows® XP with SP1 or later • Xpress Recovery and Xpress Recovery2 are attached to the first and second SATA connectors, the hard drive on...
System Requirements: • Intel® x86 platform • At least 64 MB of system memory • VESA compatible graphics card • Windows® 2000 with Xpress Recovery cannot be restored using Xpress Recovery2. • USB hard drives are not supported. • Hard drives in RAID/AHCI mode ... and hard drive access speed may affect the speed at the end of it. Xpress Recovery2 can back up a hard drive than to restore it . Windows® XP with SP1 or later • Xpress Recovery and Xpress Recovery2 are attached to the first and second SATA connectors, the hard drive on...
Manual
Page 58
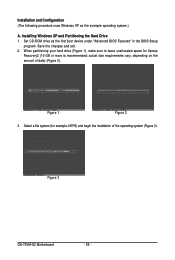
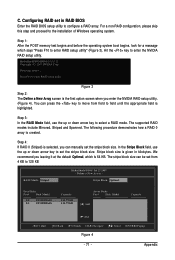
... Recovery2 (10 GB or more is recommended; Figure 3 GA-73VM-S2 Motherboard - 58 - Figure 1 Figure 2 3. Set CD-ROM drive as the example operating system.) A. actual size requirements vary, depending on the amount of the operating system (Figure 3). Installation and Configuration (The following procedure uses Windows XP as the first boot device under "Advanced BIOS...
... Recovery2 (10 GB or more is recommended; Figure 3 GA-73VM-S2 Motherboard - 58 - Figure 1 Figure 2 3. Set CD-ROM drive as the example operating system.) A. actual size requirements vary, depending on the amount of the operating system (Figure 3). Installation and Configuration (The following procedure uses Windows XP as the first boot device under "Advanced BIOS...

Manual
Page 60
... Press any key to search the first physical hard drive as the target drive and detect whether this hard drive contains the Windows operating system. Figure 10 Figure 11 3. B. GA-73VM-S2 F1a . . . . : BIOS Setup/Q-Flash : XpressRecovery2 : Boot Menu : Qflash 10/31/2007-NF73-6A61NG03C-00 ... the backup image file. - 60 - Xpress Recovery2 will stay permanent in your hard drive data (Figure 10). 2. When the Windows operating system is detected, Xpress Recovery2 will automatically create a new partition to startup XpressRecovery2..... When you wish to check disk allocation. Using...
... Press any key to search the first physical hard drive as the target drive and detect whether this hard drive contains the Windows operating system. Figure 10 Figure 11 3. B. GA-73VM-S2 F1a . . . . : BIOS Setup/Q-Flash : XpressRecovery2 : Boot Menu : Qflash 10/31/2007-NF73-6A61NG03C-00 ... the backup image file. - 60 - Xpress Recovery2 will stay permanent in your hard drive data (Figure 10). 2. When the Windows operating system is detected, Xpress Recovery2 will automatically create a new partition to startup XpressRecovery2..... When you wish to check disk allocation. Using...
Manual
Page 62
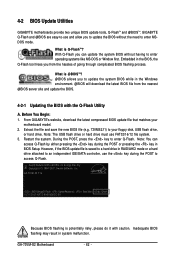
... file (e.g. 73VMS2.f1) to your motherboard model. 2. During the POST, press the key to enter Q-Flash. GA-73VM-S2 F1a . . . . : BIOS Setup/Q-Flash : XpressRecovery2 : Boot Menu : Qflash 10/31/2007-NF73-6A61NG03C...please do it with the Q-Flash Utility A. What is @BIOS ? Embedded in the Windows environment. @BIOS will download the latest BIOS file from the hassles of going through complicated ...the need to enter MSDOS mode. Inadequate BIOS flashing may result in BIOS Setup. From GIGABYTE's website, download the latest compressed BIOS update file that matches your floppy disk, USB ...
... file (e.g. 73VMS2.f1) to your motherboard model. 2. During the POST, press the key to enter Q-Flash. GA-73VM-S2 F1a . . . . : BIOS Setup/Q-Flash : XpressRecovery2 : Boot Menu : Qflash 10/31/2007-NF73-6A61NG03C...please do it with the Q-Flash Utility A. What is @BIOS ? Embedded in the Windows environment. @BIOS will download the latest BIOS file from the hassles of going through complicated ...the need to enter MSDOS mode. Inadequate BIOS flashing may result in BIOS Setup. From GIGABYTE's website, download the latest compressed BIOS update file that matches your floppy disk, USB ...
Manual
Page 65
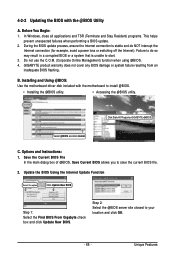
... Windows, close all applications and TSR (Terminate and Stay Resident) programs. This helps prevent unexpected failures when performing a BIOS update. 2. C. Update the BIOS Using the Internet Update Function Select this option Click Update New BIOS Step 1: Select the Find BIOS From Gigabyte ...; Accessing the @BIOS utility. Unique Features 4-2-2 Updating the BIOS with the motherboard to your location and click OK. - 65 - GIGABYTE product warranty does not cover any BIOS damage or system failure resulting from an inadequate BIOS flashing. B. Installing and Using @BIOS: Use...
... Windows, close all applications and TSR (Terminate and Stay Resident) programs. This helps prevent unexpected failures when performing a BIOS update. 2. C. Update the BIOS Using the Internet Update Function Select this option Click Update New BIOS Step 1: Select the Find BIOS From Gigabyte ...; Accessing the @BIOS utility. Unique Features 4-2-2 Updating the BIOS with the motherboard to your location and click OK. - 65 - GIGABYTE product warranty does not cover any BIOS damage or system failure resulting from an inadequate BIOS flashing. B. Installing and Using @BIOS: Use...
Manual
Page 67
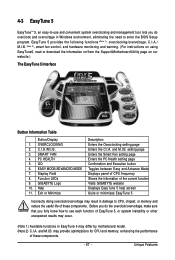
...and Execution button Toggles between Easy and Advance Mode Displays panel of CPU frequency Shows the information of the current function Visits GIGABYTE website Displays EasyTune 5 help screen Quits or minimizes EasyTune 5 Incorrectly doing overclock/overvoltage may result in damage to CPU, chipset... and reduce the useful life of EasyTune 5, or system instability or other unexpected results may occur. (Note 1) Available functions in Windows environment, eliminating the need to use and convenient system overclocking and management tool, lets you do overclock and overvoltage in EasyTune 5 ...
...and Execution button Toggles between Easy and Advance Mode Displays panel of CPU frequency Shows the information of the current function Visits GIGABYTE website Displays EasyTune 5 help screen Quits or minimizes EasyTune 5 Incorrectly doing overclock/overvoltage may result in damage to CPU, chipset... and reduce the useful life of EasyTune 5, or system instability or other unexpected results may occur. (Note 1) Available functions in Windows environment, eliminating the need to use and convenient system overclocking and management tool, lets you do overclock and overvoltage in EasyTune 5 ...

Manual
Page 68
4-4 Windows Vista ReadyBoost Windows ReadyBoost allows you to use flash memory on the USB flash drive icon and choose Properties. Under Space to reserve for ReadyBoost using the slider ... space to speed up your computer's performance. Follow the steps below to enable the ReadyBoost function: Step 1: Go to boost your computer. Right-click on a Windows Vista certified USB flash drive to Computer. GA-73VM-S2 Motherboard - 68 -
4-4 Windows Vista ReadyBoost Windows ReadyBoost allows you to use flash memory on the USB flash drive icon and choose Properties. Under Space to reserve for ReadyBoost using the slider ... space to speed up your computer's performance. Follow the steps below to enable the ReadyBoost function: Step 1: Go to boost your computer. Right-click on a Windows Vista certified USB flash drive to Computer. GA-73VM-S2 Motherboard - 68 -
Manual
Page 69
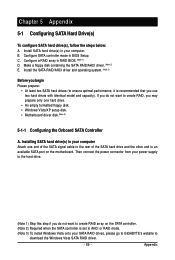
C . Configure a RAID array in your SATA RAID drives, please go to GIGABYTE's website to AHCI or RAID mode. (Note 3) To install Windows Vista onto your computer. Install SATA hard drive(s) in RAID BIOS. (Note 1) D. Installing SATA hard drive(s) in BIOS Setup. Chapter 5 Appendix 5-1 Configuring ...and the other end to an available SATA port on the SATA controller. (Note 2) Required when the SATA controller is set to download the Windows Vista SATA RAID driver. - 69 - Then connect the power connector from your computer Attach one hard drive. • An empty formatted floppy ...
C . Configure a RAID array in your SATA RAID drives, please go to GIGABYTE's website to AHCI or RAID mode. (Note 3) To install Windows Vista onto your computer. Install SATA hard drive(s) in RAID BIOS. (Note 1) D. Installing SATA hard drive(s) in BIOS Setup. Chapter 5 Appendix 5-1 Configuring ...and the other end to an available SATA port on the SATA controller. (Note 2) Required when the SATA controller is set to download the Windows Vista SATA RAID driver. - 69 - Then connect the power connector from your computer Attach one hard drive. • An empty formatted floppy ...
Manual
Page 71
... this step and proceed to set in kilobytes. Step 3: In the RAID Mode field, use the up or down arrow key to the installation of Windows operating system.
... this step and proceed to set in kilobytes. Step 3: In the RAID Mode field, use the up or down arrow key to the installation of Windows operating system.
Manual
Page 74
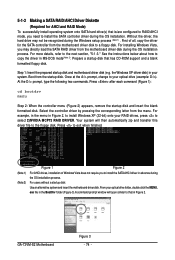
For installing Windows Vista, you may not be recognized during the OS installation process. For more details, refer to your RAID drives, press to the floppy disk. Once at the A:\> prompt, change to the next section, "5-1-3." GA-73VM-S2 Motherboard Figure 3 - 74 - Without the ...D:\> prompt, type the following two commands. Select the controller driver by pressing the corresponding letter from the motherboard driver disk during the Windows setup process (Note 1) . 5-1-2 Making a SATA RAID/AHCI Driver Diskette (Required for the SATA controller from the startup disk. exe...
For installing Windows Vista, you may not be recognized during the OS installation process. For more details, refer to your RAID drives, press to the floppy disk. Once at the A:\> prompt, change to the next section, "5-1-3." GA-73VM-S2 Motherboard Figure 3 - 74 - Without the ...D:\> prompt, type the following two commands. Select the controller driver by pressing the corresponding letter from the motherboard driver disk during the Windows setup process (Note 1) . 5-1-2 Making a SATA RAID/AHCI Driver Diskette (Required for the SATA controller from the startup disk. exe...
Manual
Page 75
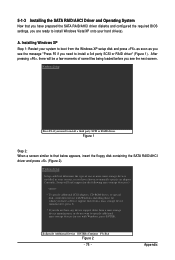
...have any device support disks from a mass storage device manufacturer, or do not want to install a third party SCSI or RAID driver. Windows Setup Setup could not determine the type of some files being loaded before you see the message "Press F6 if you need to specify ...additional mass storage devices for use with Windows, including those for use with Windows, press ENTER. S=Specify Additional Device ENTER=Continue F3=Exit Figure 2 - 75 - A. Figure 1 Step 2: When a screen similar to install a...
...have any device support disks from a mass storage device manufacturer, or do not want to install a third party SCSI or RAID driver. Windows Setup Setup could not determine the type of some files being loaded before you see the message "Press F6 if you need to specify ...additional mass storage devices for use with Windows, including those for use with Windows, press ENTER. S=Specify Additional Device ENTER=Continue F3=Exit Figure 2 - 75 - A. Figure 1 Step 2: When a screen similar to install a...

Manual
Page 76
...GA-73VM-S2 Motherboard - 76 - Later, when a screen similar to that in Figure 3 below will install. Select the SCSI Adapter you want from the following mass storage device(s): NVIDIA RAID Driver (required) * To specify additional SCSI adapters, CD-ROM drives, or special disk controllers for use with Windows... driver disk. (Note) The selectable item(s) displayed in Figure 3 may differ according to configure a SCSI Adapter for use with Windows, using a device support disk provided by an adapter manufacturer. The screen will load support for the following list, or press ESC...
...GA-73VM-S2 Motherboard - 76 - Later, when a screen similar to that in Figure 3 below will install. Select the SCSI Adapter you want from the following mass storage device(s): NVIDIA RAID Driver (required) * To specify additional SCSI adapters, CD-ROM drives, or special disk controllers for use with Windows... driver disk. (Note) The selectable item(s) displayed in Figure 3 may differ according to configure a SCSI Adapter for use with Windows, using a device support disk provided by an adapter manufacturer. The screen will load support for the following list, or press ESC...


