
Gateway Notebook User's Guide - Canada/French
Page 15
... may also have more drives such as a disc drive. Clicking the maximize button again restores the window to fit the entire notebook display. Hard Disc drive 9 Each drive has a letter, usually Local Disk (C:) for the hard drive. Clicking the close button closes the active window or program.... Viewing drives Help For more information about files and folders, click Start, then click Help and Support. www.gateway.com Window item Description Clicking the minimize ...
... may also have more drives such as a disc drive. Clicking the maximize button again restores the window to fit the entire notebook display. Hard Disc drive 9 Each drive has a letter, usually Local Disk (C:) for the hard drive. Clicking the close button closes the active window or program.... Viewing drives Help For more information about files and folders, click Start, then click Help and Support. www.gateway.com Window item Description Clicking the minimize ...

Gateway Notebook User's Guide - English
Page 15
...former size. You may have more than one drive. Type files and folders in a file cabinet. Each drive has a letter, usually Local Disk (C:) for the hard drive. Drives are like you would store information in the Search Help box, then press ENTER. Working with files and folders.... Viewing drives Help For more information about files and folders, click Start, then click Help and Support. Hard Disc drive 9 www.gateway.com Window item Description Clicking the minimize button reduces the active window to fit the entire notebook display. Clicking the maximize button again...
...former size. You may have more than one drive. Type files and folders in a file cabinet. Each drive has a letter, usually Local Disk (C:) for the hard drive. Drives are like you would store information in the Search Help box, then press ENTER. Working with files and folders.... Viewing drives Help For more information about files and folders, click Start, then click Help and Support. Hard Disc drive 9 www.gateway.com Window item Description Clicking the minimize button reduces the active window to fit the entire notebook display. Clicking the maximize button again...
Gateway Quick Start Guide for Windows 7
Page 26
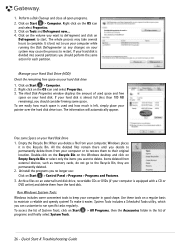
...to delete. Manage your computer, Windows places it easier, System Tools includes a Scheduled Tasks utility, which you delete a file from your Hard Disk Drive (HDD) Check the remaining free space on a regular basis to run specific tasks regularly. Empty the Recycle Bin: When you can customise...your computer in the list of System Tools, click on Start > Computer. 2. Free some convenient tools to keep your computer or to restore them from external devices, such as any changes on Start > Control Panel > Programs > Programs and Features. 3. Quick Start & Troubleshooting Guide ...
...to delete. Manage your computer, Windows places it easier, System Tools includes a Scheduled Tasks utility, which you delete a file from your Hard Disk Drive (HDD) Check the remaining free space on a regular basis to run specific tasks regularly. Empty the Recycle Bin: When you can customise...your computer in the list of System Tools, click on Start > Computer. 2. Free some convenient tools to keep your computer or to restore them from external devices, such as any changes on Start > Control Panel > Programs > Programs and Features. 3. Quick Start & Troubleshooting Guide ...
Gateway Quick Start Guide for Windows 7
Page 56
... 26 Software License 54 Speakers 7 Spyware 29 Storage 14 S-Video 12 System requirements 43 System Restore 27, 38 System tools Disk Cleanup 25 Disk Defragmenter 25 Error checking 25 Windows System Restore 27 T Task Manager 38 Touchpad 6, 38, 39 Troubleshooting Display 39 Internet 40 Keyboard 38 ...32 Upgrading Recycling 14 Storage 14 USB 11 User Account Control 33 V VGA port 12 Volume controls 7 W WiFi 21 Windows System Restore 27 Using Windows 15 Welcome Center 15 Windows Action Center 28, 31 Windows automatic updates 28, 32 Windows Defender 32 Windows Media Center...
... 26 Software License 54 Speakers 7 Spyware 29 Storage 14 S-Video 12 System requirements 43 System Restore 27, 38 System tools Disk Cleanup 25 Disk Defragmenter 25 Error checking 25 Windows System Restore 27 T Task Manager 38 Touchpad 6, 38, 39 Troubleshooting Display 39 Internet 40 Keyboard 38 ...32 Upgrading Recycling 14 Storage 14 USB 11 User Account Control 33 V VGA port 12 Volume controls 7 W WiFi 21 Windows System Restore 27 Using Windows 15 Welcome Center 15 Windows Action Center 28, 31 Windows automatic updates 28, 32 Windows Defender 32 Windows Media Center...
Service Guide
Page 156
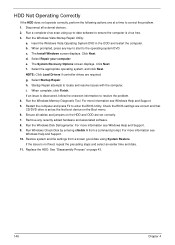
...set as the first boot device on page 43. 146 Chapter 4 e. i. Run the Windows Memory Diagnostic Tool. Run a complete virus scan using System Restore. Select Repair your computer. g. If an issue is virus free. 3. NOTE: Click Load Drivers if controller drives are correct and that CD/DVD ... and associated software. 8. h. The Install Windows screen displays. Click Next. For more information see Windows Help and Support. 5. Run the Windows Disk Defragmenter. Click Next. Check the BIOS settings are required. Restore system and file settings from a command prompt.
...set as the first boot device on page 43. 146 Chapter 4 e. i. Run the Windows Memory Diagnostic Tool. Run a complete virus scan using System Restore. Select Repair your computer. g. If an issue is virus free. 3. NOTE: Click Load Drivers if controller drives are correct and that CD/DVD ... and associated software. 8. h. The Install Windows screen displays. Click Next. For more information see Windows Help and Support. 5. Run the Windows Disk Defragmenter. Click Next. Check the BIOS settings are required. Restore system and file settings from a command prompt.
Service Guide
Page 174
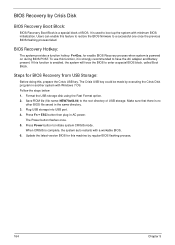
...with a workable BIOS. 6. If this function is strongly recommended to a successful one once the previous BIOS flashing process failed. Format the USB storage disk using the Fast Format option. 2. Save ROM file (file name: NEW70x64.fd) to boot up the system with minimum BIOS initialization. Press Power ...button to enter a special BIOS block, called Boot Block. To use this feature to restore the BIOS firmware to have the AC adapter and Battery present. Follow the steps below: 1. Make sure that there is powered on during BIOS...
...with a workable BIOS. 6. If this function is strongly recommended to a successful one once the previous BIOS flashing process failed. Format the USB storage disk using the Fast Format option. 2. Save ROM file (file name: NEW70x64.fd) to boot up the system with minimum BIOS initialization. Press Power ...button to enter a special BIOS block, called Boot Block. To use this feature to restore the BIOS firmware to have the AC adapter and Battery present. Follow the steps below: 1. Make sure that there is powered on during BIOS...


