Gateway Quick Start Guide for Windows 7
Page 11
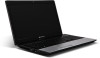
...many peripheral devices to the Internet over the terminals. Do not disassemble the battery. ✓ Do not place used on page 9). Replace only with care. The network port is limited to maintain this information, we recommend that you to use an ExpressCard/34 or ExpressCard... allows you contact a qualified technician who may be removed from the computer (for example: keyboard, printer, scanner). unplug the modem from the telephone line, the TV port from an External Card Reader on Gateway computers. It's best to use and charge your whole computer. IEEE 1394 (FireWire) -...
...many peripheral devices to the Internet over the terminals. Do not disassemble the battery. ✓ Do not place used on page 9). Replace only with care. The network port is limited to maintain this information, we recommend that you to use an ExpressCard/34 or ExpressCard... allows you contact a qualified technician who may be removed from the computer (for example: keyboard, printer, scanner). unplug the modem from the telephone line, the TV port from an External Card Reader on Gateway computers. It's best to use and charge your whole computer. IEEE 1394 (FireWire) -...
Gateway Quick Start Guide for Windows 7
Page 53
... at the heart of used batteries and will help protect the environment and reduce health hazards. Suppliers are replacing it. ENERGY STAR® PARTNERSHIP Gateway is there to remind you have removed any product, to be sorted separately for disposal separately from normal ...European law states that batteries must be easily dismantled, with a very strict procurement policy, maximum attention is replaced by the US environmental Protection Agency in 1992 as keyboard, mouse, speakers, remote control, etc. Caution: Risk of explosion if battery is given to electronic components ...
... at the heart of used batteries and will help protect the environment and reduce health hazards. Suppliers are replacing it. ENERGY STAR® PARTNERSHIP Gateway is there to remind you have removed any product, to be sorted separately for disposal separately from normal ...European law states that batteries must be easily dismantled, with a very strict procurement policy, maximum attention is replaced by the US environmental Protection Agency in 1992 as keyboard, mouse, speakers, remote control, etc. Caution: Risk of explosion if battery is given to electronic components ...
Gateway Quick Start Guide for Windows 7
Page 55
...12 Aerial 12 Audio CDs 18, 40 Audio ports 12 Autoplay 19 B Backups 14 Batteries 10, 53 Battery disposal 11, 53 Battery life 10 Replacing batteries 11 BIOS 36 Blu-ray 9, 19 Browser 23 C Cable modem 41 Cables 4, 51 Cleaning your computer 4 Codec 19 Computer environment 4...Infrared receiver 8, 12 Interference 39, 51 Internal hardware 35 Internet Connection 20 Firewall 29, 32 Internet Explorer 23 Internet Service Provider (ISP 20 K Keyboard 6, 38 L LAN (Local Area Network 21 Last Known Good Configuration 28, 36 Line-Out 12 M Maintenance HDD management 26 System tools 26...
...12 Aerial 12 Audio CDs 18, 40 Audio ports 12 Autoplay 19 B Backups 14 Batteries 10, 53 Battery disposal 11, 53 Battery life 10 Replacing batteries 11 BIOS 36 Blu-ray 9, 19 Browser 23 C Cable modem 41 Cables 4, 51 Cleaning your computer 4 Codec 19 Computer environment 4...Infrared receiver 8, 12 Interference 39, 51 Internal hardware 35 Internet Connection 20 Firewall 29, 32 Internet Explorer 23 Internet Service Provider (ISP 20 K Keyboard 6, 38 L LAN (Local Area Network 21 Last Known Good Configuration 28, 36 Line-Out 12 M Maintenance HDD management 26 System tools 26...
Service Guide
Page 7
...View 7 Left View 8 Right View 9 Bottom View 9 Indicators 10 TouchPad Basics 11 Using the Keyboard 12 Lock Keys and embedded numeric keypad 12 Windows Keys 13 Hot Keys 14 Hardware Specifications and ...Configurations 16 System Utilities 23 BIOS Setup Utility 23 Navigating the BIOS Utility 23 Gateway NV59C BIOS 24 Information 24 Main 25 Security 26 Boot 29 Exit 30 ...Utility 32 WinFlash Utility 34 Remove HDD/BIOS Password Utilities 35 Machine Disassembly and Replacement 41 Disassembly Requirements 41 Pre-disassembly Instructions 42 Disassembly Process 43 External Module ...
...View 7 Left View 8 Right View 9 Bottom View 9 Indicators 10 TouchPad Basics 11 Using the Keyboard 12 Lock Keys and embedded numeric keypad 12 Windows Keys 13 Hot Keys 14 Hardware Specifications and ...Configurations 16 System Utilities 23 BIOS Setup Utility 23 Navigating the BIOS Utility 23 Gateway NV59C BIOS 24 Information 24 Main 25 Security 26 Boot 29 Exit 30 ...Utility 32 WinFlash Utility 34 Remove HDD/BIOS Password Utilities 35 Machine Disassembly and Replacement 41 Disassembly Requirements 41 Pre-disassembly Instructions 42 Disassembly Process 43 External Module ...

Service Guide
Page 8
... Procedure 112 Replacing the CPU 112 Replacing the Thermal Module 113 Replacing the Mainboard 114 Replacing the Bluetooth Board 117 Replacing the USB Board 118 Replacing the Card Reader Board 119 Replacing the TouchPad Bracket 120 Replacing the Power Board 122 Replacing the Right Speaker Module 123 Replacing the Left Speaker Module 124 Replacing the Upper Cover 125 Replacing the Keyboard 128 Replacing the...
... Procedure 112 Replacing the CPU 112 Replacing the Thermal Module 113 Replacing the Mainboard 114 Replacing the Bluetooth Board 117 Replacing the USB Board 118 Replacing the Card Reader Board 119 Replacing the TouchPad Bracket 120 Replacing the Power Board 122 Replacing the Right Speaker Module 123 Replacing the Left Speaker Module 124 Replacing the Upper Cover 125 Replacing the Keyboard 128 Replacing the...
Service Guide
Page 53
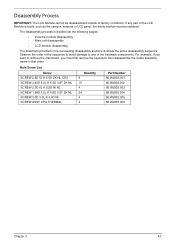
...002 86.WJ802.003 86.WJ802.004 86.WJ802.005 86.WJ802.006 Chapter 3 43 Disassembly Process IMPORTANT: The LCD Module cannot be replaced. For example, if you want to any part of factory conditions. Observe the order of the hardware components. The disassembly process is faulty..., such as the camera, antenna or LCD panel, the whole module must first remove the keyboard, then disassemble the inside assembly frame in the succeeding disassembly sections illustrate the entire disassembly sequence. If any of the sequence to avoid...
...002 86.WJ802.003 86.WJ802.004 86.WJ802.005 86.WJ802.006 Chapter 3 43 Disassembly Process IMPORTANT: The LCD Module cannot be replaced. For example, if you want to any part of factory conditions. Observe the order of the hardware components. The disassembly process is faulty..., such as the camera, antenna or LCD panel, the whole module must first remove the keyboard, then disassemble the inside assembly frame in the succeeding disassembly sections illustrate the entire disassembly sequence. If any of the sequence to avoid...

Service Guide
Page 138
Connect the Keyboard FFC to the Mainboard and close the locking latch to lock. 128 Chapter 3 Replacing the Keyboard 1. Replace the Keyboard by first lining up the bottom edge. Press down firmly to secure the cable in place. 2.
Connect the Keyboard FFC to the Mainboard and close the locking latch to lock. 128 Chapter 3 Replacing the Keyboard 1. Replace the Keyboard by first lining up the bottom edge. Press down firmly to secure the cable in place. 2.

Service Guide
Page 153
Do not replace a nondefective FRUs: Built-In Keyboard Failure If the built-in Keyboard fails, perform the following actions one at a time to correct the problem. Do not replace a non-defective FRUs: Chapter 4 143 LCD Failure If the LCD fails, perform the following actions one at a time to correct the problem.
Do not replace a nondefective FRUs: Built-In Keyboard Failure If the built-in Keyboard fails, perform the following actions one at a time to correct the problem. Do not replace a non-defective FRUs: Chapter 4 143 LCD Failure If the LCD fails, perform the following actions one at a time to correct the problem.

Service Guide
Page 219
...150 External Module Disassembly Flowchart 44 F Features 1 Flash Utility 31 FPC Cable Removing 94 FRU (Field Replaceable Unit) List 165 H Hard Disk Drive Removing 56 Replacing 129 HDTV Switch Failure 151 Hibernation mode hotkey 14 Hot Keys 12 I Indicators 10 Intermittent Problems 152... Internal Microphone Failure 145 Internal Speaker Failure 144 J Jumper and Connector Locations 159 K Keyboard Removing 60 Replacing 128 Keyboard Failure 143 L LCD Bezel Replacing 108 LCD ...
...150 External Module Disassembly Flowchart 44 F Features 1 Flash Utility 31 FPC Cable Removing 94 FRU (Field Replaceable Unit) List 165 H Hard Disk Drive Removing 56 Replacing 129 HDTV Switch Failure 151 Hibernation mode hotkey 14 Hot Keys 12 I Indicators 10 Intermittent Problems 152... Internal Microphone Failure 145 Internal Speaker Failure 144 J Jumper and Connector Locations 159 K Keyboard Removing 60 Replacing 128 Keyboard Failure 143 L LCD Bezel Replacing 108 LCD ...


