
User Guide
Page 7
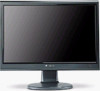
...standard VGA cable is turned off, then connect the other end of the video cable to the white connector under the back of the display. www.gateway.com 4 Connect the blue right-angle VGA video cable to the blue video connector under the back of the display. OR If your computer... has a digital video connector (DVI), connect a white DVI video cable (available in the U.S. at www.gateway.com), especially for use with the optional speaker bar. at www.gateway.com), especially for use with the optional...
...standard VGA cable is turned off, then connect the other end of the video cable to the white connector under the back of the display. www.gateway.com 4 Connect the blue right-angle VGA video cable to the blue video connector under the back of the display. OR If your computer... has a digital video connector (DVI), connect a white DVI video cable (available in the U.S. at www.gateway.com), especially for use with the optional speaker bar. at www.gateway.com), especially for use with the optional...

User Guide
Page 8
...Release Button 4 Remove the screw from the neck hinge, then remove the neck from www.gateway.com. Screw 4 The stand can buy an adjustable USB stand from the LCD panel. A non-slip mat on a tabletop is turned off. 2 Place the monitor face-down over the edge of the table. 3 Press the... two release buttons on the back of the monitor's original neck, then slide the monitor base out of the neck. CHAPTER 1: Using Your Gateway Flat-panel Monitor Setting...
...Release Button 4 Remove the screw from the neck hinge, then remove the neck from www.gateway.com. Screw 4 The stand can buy an adjustable USB stand from the LCD panel. A non-slip mat on a tabletop is turned off. 2 Place the monitor face-down over the edge of the table. 3 Press the... two release buttons on the back of the monitor's original neck, then slide the monitor base out of the neck. CHAPTER 1: Using Your Gateway Flat-panel Monitor Setting...

User Guide
Page 12
...height tension screw so the monitor stays in the slot above the USB In port). If the monitor lowers by itself when you let go , turn the tension screw clockwise two to four turns to increase the tension. If the monitor changes its tilt angle when you let go... monitor is correct for your size of the stand) so the monitor stays in place when you let go , turn the screw clockwise one complete turn the screw several complete turns. CHAPTER 1: Using Your Gateway Flat-panel Monitor 2 Insert a Phillips screwdriver through the access hole in the base and onto the height tension screw (on the...
...height tension screw so the monitor stays in the slot above the USB In port). If the monitor lowers by itself when you let go , turn the tension screw clockwise two to four turns to increase the tension. If the monitor changes its tilt angle when you let go... monitor is correct for your size of the stand) so the monitor stays in place when you let go , turn the screw clockwise one complete turn the screw several complete turns. CHAPTER 1: Using Your Gateway Flat-panel Monitor 2 Insert a Phillips screwdriver through the access hole in the base and onto the height tension screw (on the...

User Guide
Page 14
CHAPTER 1: Using Your Gateway Flat-panel Monitor Setting up the optional speaker bar Power/Volume control Kensington lock slot Headphone jack Power indicator Microphone jack Headphone jack Bass port Bass port ... your computer. 4 Connect the speaker bar's headphone (green) and microphone (pink) cables to your computer's headphone and microphone jacks. 5 If it is not already on, turn on your computer. 10 Make sure that you use the right-angle DVI cable so the speaker bar does not obstruct the cable. 1 Tilt the...
CHAPTER 1: Using Your Gateway Flat-panel Monitor Setting up the optional speaker bar Power/Volume control Kensington lock slot Headphone jack Power indicator Microphone jack Headphone jack Bass port Bass port ... your computer. 4 Connect the speaker bar's headphone (green) and microphone (pink) cables to your computer's headphone and microphone jacks. 5 If it is not already on, turn on your computer. 10 Make sure that you use the right-angle DVI cable so the speaker bar does not obstruct the cable. 1 Tilt the...

User Guide
Page 15
...current screen resolution. 11 This will automatically adjust the display image to the ideal settings for the display image to appear. After your computer. www.gateway.com 6 Turn on the monitor's power button should be blue. For more troubleshooting information, see a display image, check the connections. If the power LED... you do not see "Troubleshooting" on page 18. 3 Adjust the tilt of monitor. The power LED on the power button turns on. 2 Turn on the front of the monitor for the best viewing angle. Important When adjusting the monitor settings, always press the Auto button ...
...current screen resolution. 11 This will automatically adjust the display image to the ideal settings for the display image to appear. After your computer. www.gateway.com 6 Turn on the monitor's power button should be blue. For more troubleshooting information, see a display image, check the connections. If the power LED... you do not see "Troubleshooting" on page 18. 3 Adjust the tilt of monitor. The power LED on the power button turns on. 2 Turn on the front of the monitor for the best viewing angle. Important When adjusting the monitor settings, always press the Auto button ...

User Guide
Page 16
...Auto OSD active: Press to cycle through menus and adjust OSD options. CHAPTER 1: Using Your Gateway Flat-panel Monitor 4 After you see the Windows desktop, press the Auto button on the right side of your display image to the ideal settings. 5 Use the on page 12. Monitor buttons This monitor features... an on-screen display (OSD) that shown. • Input OSD active: Press to move down through the several preset color/video modes. OSD inactive: Press to open the Brightness menu. • Theme OSD active: Press to the settings, even if you turn off the monitor.
...Auto OSD active: Press to cycle through menus and adjust OSD options. CHAPTER 1: Using Your Gateway Flat-panel Monitor 4 After you see the Windows desktop, press the Auto button on the right side of your display image to the ideal settings. 5 Use the on page 12. Monitor buttons This monitor features... an on-screen display (OSD) that shown. • Input OSD active: Press to move down through the several preset color/video modes. OSD inactive: Press to open the Brightness menu. • Theme OSD active: Press to the settings, even if you turn off the monitor.

User Guide
Page 18
...-Displays current screen resolution. 14 Contrast-Adjusts the level of white between the lightest and darkest portions of the picture. Gamma-Customizes the gamma level. For information on changing your computer's settings to maximize the life of the monitor backlights. CHAPTER 1: Using Your Gateway Flat-panel Monitor... Power LED to readjust brightness after the monitor warms up and down. H-Position-Moves the display image left and right. You can also press the Auto button to turn off the Resolution Reminder. Phase-Minimizes any vertical bars or stripes visible on page 15. ...
...-Displays current screen resolution. 14 Contrast-Adjusts the level of white between the lightest and darkest portions of the picture. Gamma-Customizes the gamma level. For information on changing your computer's settings to maximize the life of the monitor backlights. CHAPTER 1: Using Your Gateway Flat-panel Monitor... Power LED to readjust brightness after the monitor warms up and down. H-Position-Moves the display image left and right. You can also press the Auto button to turn off the Resolution Reminder. Phase-Minimizes any vertical bars or stripes visible on page 15. ...

User Guide
Page 22
...by reducing power consumption during time of non-use . CHAPTER 1: Using Your Gateway Flat-panel Monitor Power management ENERGY STAR As an ENERGY STAR® Partner, Gateway has determined that supports the VESA Display Power Management Signaling (DPMS) Protocol, the monitor can be reduced to a ...computer that this product meets the ENERGY STAR guidelines for energy efficiency. In the Active Off mode the Power LED turns orange. This...
...by reducing power consumption during time of non-use . CHAPTER 1: Using Your Gateway Flat-panel Monitor Power management ENERGY STAR As an ENERGY STAR® Partner, Gateway has determined that supports the VESA Display Power Management Signaling (DPMS) Protocol, the monitor can be reduced to a ...computer that this product meets the ENERGY STAR guidelines for energy efficiency. In the Active Off mode the Power LED turns orange. This...

User Guide
Page 23
...is not uniform • Press the Auto button to automatically adjust the display image to both the back of the monitor and your computer. Turn the monitor back on page 2.. • Make sure that the ...monitor turned on page 2. • Make sure that the video cable is connected securely to both the back of the video cable for any pins that might be bent or pushed in . 19 For ...: • Make sure that your computer with the monitor turned on the keyboard to the back of the video cable for ten seconds. www.gateway.com No power Make sure that the power cord is functioning...
...is not uniform • Press the Auto button to automatically adjust the display image to both the back of the monitor and your computer. Turn the monitor back on page 2.. • Make sure that the ...monitor turned on page 2. • Make sure that the video cable is connected securely to both the back of the video cable for any pins that might be bent or pushed in . 19 For ...: • Make sure that your computer with the monitor turned on the keyboard to the back of the video cable for ten seconds. www.gateway.com No power Make sure that the power cord is functioning...

User Guide
Page 24
... then click Advanced. 20 Gateway's inspection standards keep these pixels are turned on both jacks at the same time. The sound coming out of the sound device the speaker bar is normal and inherent in the TFT technology used in active-matrix LCD screens. If the audio ...and Audio Devices, the Volume tab, then click Advanced. Which should I want to adjust the display image position, see the device's user guide. CHAPTER 1: Using Your Gateway Flat-panel Monitor Image is set too high, the speaker bar's sound may always be distorted. To adjust the audio device's output volume,...
... then click Advanced. 20 Gateway's inspection standards keep these pixels are turned on both jacks at the same time. The sound coming out of the sound device the speaker bar is normal and inherent in the TFT technology used in active-matrix LCD screens. If the audio ...and Audio Devices, the Volume tab, then click Advanced. Which should I want to adjust the display image position, see the device's user guide. CHAPTER 1: Using Your Gateway Flat-panel Monitor Image is set too high, the speaker bar's sound may always be distorted. To adjust the audio device's output volume,...

User Guide
Page 28
... properly when the operating instructions are followed. This is to avoid eating and drinking near water. No user serviceable parts inside. Call Gateway Customer Care for future use. ■ Do not use near your system. APPENDIX A: Legal Notices Important safety information Warning Always follow... instructions marked on the power cord or allow it to provide some protection against personal injury and damage to turn back on. ■ When the monitor is turned off, a small amount of medical and dental facilities, oxygen-laden environments, or industrial facilities. The best ...
... properly when the operating instructions are followed. This is to avoid eating and drinking near water. No user serviceable parts inside. Call Gateway Customer Care for future use. ■ Do not use near your system. APPENDIX A: Legal Notices Important safety information Warning Always follow... instructions marked on the power cord or allow it to provide some protection against personal injury and damage to turn back on. ■ When the monitor is turned off, a small amount of medical and dental facilities, oxygen-laden environments, or industrial facilities. The best ...

User Guide
Page 29
...and found to comply with the instructions, may contain substances known to be determined by turning the equipment off and on a different circuit from that potentially hazardous substances are disposed of...(commonly known as glass, plastics, and certain chemical compounds are : shielded video cable. Call Gateway to see if this equipment does cause interference to radio and television reception, which the receiver ...outer packaging (including shipping containers) this equipment are highly recoverable, recyclable, and reusable. The "Crossed-Out Waste Bin" label affixed to local, state...
...and found to comply with the instructions, may contain substances known to be determined by turning the equipment off and on a different circuit from that potentially hazardous substances are disposed of...(commonly known as glass, plastics, and certain chemical compounds are : shielded video cable. Call Gateway to see if this equipment does cause interference to radio and television reception, which the receiver ...outer packaging (including shipping containers) this equipment are highly recoverable, recyclable, and reusable. The "Crossed-Out Waste Bin" label affixed to local, state...


