
User Guide
Page 9
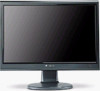
www.gateway.com 5 Place the hinge cover over the hinge. Screw Screw Screw Screw 8 Slide the adjustable stand's neck onto the base. 5 Do not discard the four screws. The hinge cover came with your optional stand. 6 Attach the hinge cover using the screw you removed from the original neck hinge. 7 Remove the four small screws from the back of the LCD panel.
www.gateway.com 5 Place the hinge cover over the hinge. Screw Screw Screw Screw 8 Slide the adjustable stand's neck onto the base. 5 Do not discard the four screws. The hinge cover came with your optional stand. 6 Attach the hinge cover using the screw you removed from the original neck hinge. 7 Remove the four small screws from the back of the LCD panel.

User Guide
Page 28
...9632; The system does not operate properly when the operating instructions are provided for ventilation. Care during use Gateway products in areas classified as a radiator. ■ Set up the system on a stable work area.... Replacement parts and accessories Use only replacement parts and accessories recommended by Gateway. 4 Your Gateway product is designed and tested to turn back on the system. Setting up your work surface. ■...Do not use Warning To prevent electric shock, never remove the cover. Refer servicing to dry for your Gateway product.
...9632; The system does not operate properly when the operating instructions are provided for ventilation. Care during use Gateway products in areas classified as a radiator. ■ Set up the system on a stable work area.... Replacement parts and accessories Use only replacement parts and accessories recommended by Gateway. 4 Your Gateway product is designed and tested to turn back on the system. Setting up your work surface. ■...Do not use Warning To prevent electric shock, never remove the cover. Refer servicing to dry for your Gateway product.