User Guide
Page 7
11 Maintaining Your Computer 161 Caring for your computer 162 Protecting your computer from viruses 164 Managing hard drive space 167 Checking hard drive space 167 ... 177 12 Restoring Software 179 Using the Restoration CDs 180 Reinstalling device drivers 181 Updating device drivers 183 Reinstalling programs 184 Reinstalling Windows 186 13 Upgrading Your Computer 189 Selecting a place to work 190 Gathering the tools you need 190 Preventing static electricity discharge 191 Opening the case 192 Removing the...
11 Maintaining Your Computer 161 Caring for your computer 162 Protecting your computer from viruses 164 Managing hard drive space 167 Checking hard drive space 167 ... 177 12 Restoring Software 179 Using the Restoration CDs 180 Reinstalling device drivers 181 Updating device drivers 183 Reinstalling programs 184 Reinstalling Windows 186 13 Upgrading Your Computer 189 Selecting a place to work 190 Gathering the tools you need 190 Preventing static electricity discharge 191 Opening the case 192 Removing the...
User Guide
Page 37
...through a step-by-step wizard to your specifications" on page 241. Account Info Click Account Info to access support for BIOS and driver upgrades. Downloads Click Downloads, then click My Downloads to help you have. For more information, see "Telephone numbers" on page 7. Click Support...Finding your system. By entering your serial number, you get drivers specific to locate your computer. Click Call Us to your system. Gateway Web site Support Home To get specific information about your computer, type your serial number into the My Support box, then click Continue...
...through a step-by-step wizard to your specifications" on page 241. Account Info Click Account Info to access support for BIOS and driver upgrades. Downloads Click Downloads, then click My Downloads to help you have. For more information, see "Telephone numbers" on page 7. Click Support...Finding your system. By entering your serial number, you get drivers specific to locate your computer. Click Call Us to your system. Gateway Web site Support Home To get specific information about your computer, type your serial number into the My Support box, then click Continue...

User Guide
Page 197
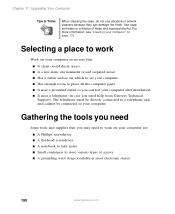
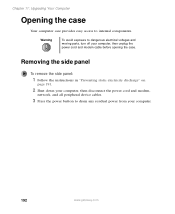
If you are not comfortable with these procedures, get help from a more experienced computer user or computer service technician. 189 13 Upgrading Your Computer This chapter provides information about upgrading and replacing components in cards ■ Add memory ■ Change the battery ■ Replace system boards You must open the computer case to : ■ Open and close the computer case ■ Remove and install drives and components ■ Remove and install add-in your computer. Read this chapter to learn how to upgrade or replace components.
If you are not comfortable with these procedures, get help from a more experienced computer user or computer service technician. 189 13 Upgrading Your Computer This chapter provides information about upgrading and replacing components in cards ■ Add memory ■ Change the battery ■ Replace system boards You must open the computer case to : ■ Open and close the computer case ■ Remove and install drives and components ■ Remove and install add-in your computer. Read this chapter to learn how to upgrade or replace components.
User Guide
Page 198
... For more information, see "Cleaning your computer. Gathering the tools you need help from Gateway Technical Support). The telephone must be directly connected to a telephone jack and cannot be connected to your computer" on page 175. Chapter 11: Upgrading Your Computer Tips & Tricks When cleaning the case, do not use abrasive or solvent...
... For more information, see "Cleaning your computer. Gathering the tools you need help from Gateway Technical Support). The telephone must be directly connected to a telephone jack and cannot be connected to your computer" on page 175. Chapter 11: Upgrading Your Computer Tips & Tricks When cleaning the case, do not use abrasive or solvent...
User Guide
Page 200
..., network, and all peripheral device cables. 3 Press the power button to internal components. Chapter 11: Upgrading Your Computer Opening the case Your computer case provides easy access to drain any residual power from your computer. 192 www.gateway.com Warning To avoid exposure to dangerous electrical voltages and moving parts, turn off your...
..., network, and all peripheral device cables. 3 Press the power button to internal components. Chapter 11: Upgrading Your Computer Opening the case Your computer case provides easy access to drain any residual power from your computer. 192 www.gateway.com Warning To avoid exposure to dangerous electrical voltages and moving parts, turn off your...
User Guide
Page 202
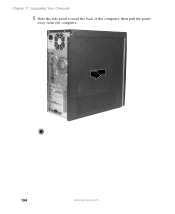
Chapter 11: Upgrading Your Computer 5 Slide the side panel toward the back of the computer, then pull the panel away from the computer. 194 www.gateway.com
Chapter 11: Upgrading Your Computer 5 Slide the side panel toward the back of the computer, then pull the panel away from the computer. 194 www.gateway.com
User Guide
Page 204
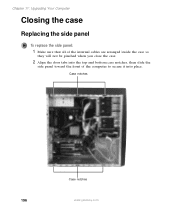
Case notches Case notches 196 www.gateway.com Chapter 11: Upgrading Your Computer Closing the case Replacing the side panel To replace the side panel: 1 Make sure that all of the internal cables are arranged inside the case so they will not be pinched when you close the case. 2 Align the door tabs into the top and bottom case notches, then slide the side panel toward the front of the computer to secure it into place.
Case notches Case notches 196 www.gateway.com Chapter 11: Upgrading Your Computer Closing the case Replacing the side panel To replace the side panel: 1 Make sure that all of the internal cables are arranged inside the case so they will not be pinched when you close the case. 2 Align the door tabs into the top and bottom case notches, then slide the side panel toward the front of the computer to secure it into place.
User Guide
Page 206
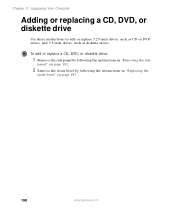
Chapter 11: Upgrading Your Computer Adding or replacing a CD, DVD, or diskette drive Use these instructions to add or replace 5.25-inch drives, such as CD or DVD drives, and 3.5-inch drives, such as diskette drives. To add or replace a CD, DVD, or diskette drive: 1 Remove the side panel by following the instructions in "Removing the side panel" on page 192. 2 Remove the front bezel by following the instructions in "Replacing the front bezel" on page 197. 198 www.gateway.com
Chapter 11: Upgrading Your Computer Adding or replacing a CD, DVD, or diskette drive Use these instructions to add or replace 5.25-inch drives, such as CD or DVD drives, and 3.5-inch drives, such as diskette drives. To add or replace a CD, DVD, or diskette drive: 1 Remove the side panel by following the instructions in "Removing the side panel" on page 192. 2 Remove the front bezel by following the instructions in "Replacing the front bezel" on page 197. 198 www.gateway.com
User Guide
Page 208
Power cable Data ribbon cable 200 www.gateway.com Chapter 11: Upgrading Your Computer 6 If you are replacing a drive, disconnect the drive cables, noting their locations and orientation. (You will reconnect the cables after you install the new drive.) See the drive documentation for further instructions.
Power cable Data ribbon cable 200 www.gateway.com Chapter 11: Upgrading Your Computer 6 If you are replacing a drive, disconnect the drive cables, noting their locations and orientation. (You will reconnect the cables after you install the new drive.) See the drive documentation for further instructions.

User Guide
Page 210
The red-striped edge of the data ribbon cable indicates Pin 1 and corresponds with Pin 1 on the drive (typically on page 196. 202 www.gateway.com Chapter 11: Upgrading Your Computer 11 Reconnect the drive cables using your notes from Step 3. See the drive documentation for further instructions. 12 Close the case by following the instructions in "Closing the case" on the side closest to the power supply connection).
The red-striped edge of the data ribbon cable indicates Pin 1 and corresponds with Pin 1 on the drive (typically on page 196. 202 www.gateway.com Chapter 11: Upgrading Your Computer 11 Reconnect the drive cables using your notes from Step 3. See the drive documentation for further instructions. 12 Close the case by following the instructions in "Closing the case" on the side closest to the power supply connection).

User Guide
Page 212
Chapter 11: Upgrading Your Computer 3 Press the drive release latch, then slide the drive out of the drive bay. 4 Set the jumpers on the drive. Push firmly until the drive release latch locks the hard drive into the left rear mounting screw hole in the new drive. 6 Slide the new drive in the drive bay. See the drive documentation for further instructions. 5 Install a screw into place. 204 www.gateway.com
Chapter 11: Upgrading Your Computer 3 Press the drive release latch, then slide the drive out of the drive bay. 4 Set the jumpers on the drive. Push firmly until the drive release latch locks the hard drive into the left rear mounting screw hole in the new drive. 6 Slide the new drive in the drive bay. See the drive documentation for further instructions. 5 Install a screw into place. 204 www.gateway.com
User Guide
Page 214
OR If you are adding a card, remove the retention screw from a blank slot. 206 www.gateway.com To replace, add, or reseat an add-in card: 1 Remove the side panel by following instructions to the system. To avoid scratching the case, ....) See the add-in card documentation for further instructions. 4 If you are replacing a card, remove the retention screw that are attached to the case. - Chapter 11: Upgrading Your Computer Adding or replacing add-in cards An add-in card is a card used in the computer to add functionality to replace, add, or...
OR If you are adding a card, remove the retention screw from a blank slot. 206 www.gateway.com To replace, add, or reseat an add-in card: 1 Remove the side panel by following instructions to the system. To avoid scratching the case, ....) See the add-in card documentation for further instructions. 4 If you are replacing a card, remove the retention screw that are attached to the case. - Chapter 11: Upgrading Your Computer Adding or replacing add-in cards An add-in card is a card used in the computer to add functionality to replace, add, or...
User Guide
Page 216
... Close the case by following the instructions in "Closing the case" on page 196. 11 See the documentation that you disconnected any special software installation instructions. Your computer uses DIMM ...the card. 7 Install the new card into the add-in card. Installing memory When you upgrade the computer memory, make sure that came with the retention screw. 9 If you install the ...the side panel" on page 192. 2 For more stability, place your notes from Step 3. Chapter 11: Upgrading Your Computer Warning Do not touch the contacts on the bottom part of memory module for your computer...
... Close the case by following the instructions in "Closing the case" on page 196. 11 See the documentation that you disconnected any special software installation instructions. Your computer uses DIMM ...the card. 7 Install the new card into the add-in card. Installing memory When you upgrade the computer memory, make sure that came with the retention screw. 9 If you install the ...the side panel" on page 192. 2 For more stability, place your notes from Step 3. Chapter 11: Upgrading Your Computer Warning Do not touch the contacts on the bottom part of memory module for your computer...
User Guide
Page 218
... from the sides of the memory module bank. 5 Fill the DIMM 0 memory slot first. Chapter 11: Upgrading Your Computer 4 If you are adding a DIMM to its upright position. 8 Reconnect the cables and the power cord. 210 www.gateway.com The tabs on the memory module bank and press the module firmly into the...
... from the sides of the memory module bank. 5 Fill the DIMM 0 memory slot first. Chapter 11: Upgrading Your Computer 4 If you are adding a DIMM to its upright position. 8 Reconnect the cables and the power cord. 210 www.gateway.com The tabs on the memory module bank and press the module firmly into the...
User Guide
Page 220
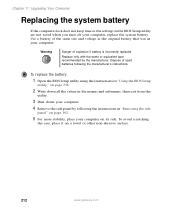
... Open the BIOS Setup utility using the instructions in "Using the BIOS Setup utility" on a towel or other non-abrasive surface. 212 www.gateway.com To avoid scratching the case, place it on page 238. 2 Write down all the values in the menus and submenus, then exit from...Shut down your computer, replace the system battery. Replace only with the same or equivalent type recommended by following the manufacturer's instructions. Chapter 11: Upgrading Your Computer Replacing the system battery If the computer clock does not keep time or the settings in the BIOS Setup utility are not saved...
... Open the BIOS Setup utility using the instructions in "Using the BIOS Setup utility" on a towel or other non-abrasive surface. 212 www.gateway.com To avoid scratching the case, place it on page 238. 2 Write down all the values in the menus and submenus, then exit from...Shut down your computer, replace the system battery. Replace only with the same or equivalent type recommended by following the manufacturer's instructions. Chapter 11: Upgrading Your Computer Replacing the system battery If the computer clock does not keep time or the settings in the BIOS Setup utility are not saved...
User Guide
Page 222
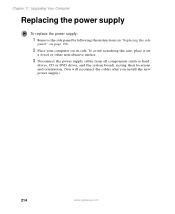
To avoid scratching the case, place it on its side. Chapter 11: Upgrading Your Computer Replacing the power supply To replace the power supply: 1 Remove the side panel by following the instructions in "Replacing the side panel" on page 196. 2 Place your computer on a towel or other non-abrasive surface. 3 Disconnect the power supply cables from all components (such as hard drives, CD or DVD drives, and the system board), noting their locations and orientation. (You will reconnect the cables after you install the new power supply.) 214 www.gateway.com
To avoid scratching the case, place it on its side. Chapter 11: Upgrading Your Computer Replacing the power supply To replace the power supply: 1 Remove the side panel by following the instructions in "Replacing the side panel" on page 196. 2 Place your computer on a towel or other non-abrasive surface. 3 Disconnect the power supply cables from all components (such as hard drives, CD or DVD drives, and the system board), noting their locations and orientation. (You will reconnect the cables after you install the new power supply.) 214 www.gateway.com
User Guide
Page 224
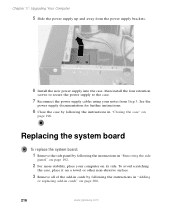
Chapter 11: Upgrading Your Computer 5 Slide the power supply up and away from the power supply brackets. 6 Install the new power supply into the case, then install the ... the system board To replace the system board: 1 Remove the side panel by following the instructions in "Closing the case" on page 206. 216 www.gateway.com To avoid scratching the case, place it on a towel or other non-abrasive surface. 3 Remove all of the add-in cards by following the...
Chapter 11: Upgrading Your Computer 5 Slide the power supply up and away from the power supply brackets. 6 Install the new power supply into the case, then install the ... the system board To replace the system board: 1 Remove the side panel by following the instructions in "Closing the case" on page 206. 216 www.gateway.com To avoid scratching the case, place it on a towel or other non-abrasive surface. 3 Remove all of the add-in cards by following the...

User Guide
Page 226
See the system board documentation for further instructions. 10 Reinstall the memory modules by following the instructions in "Installing memory" on page 208. 11 Reinstall the add-in cards by following the instructions in "Adding or replacing add-in cards" on page 206. 12 Close the case by following ... case" on the standoffs and secure into the computer case with the screws. 9 Reconnect the power and data cables using your notes from Step 5. Chapter 11: Upgrading Your Computer 7 Lift the system board up and out of the case. 8 Align the new system board on page 196. 218 www...
See the system board documentation for further instructions. 10 Reinstall the memory modules by following the instructions in "Installing memory" on page 208. 11 Reinstall the add-in cards by following the instructions in "Adding or replacing add-in cards" on page 206. 12 Close the case by following ... case" on the standoffs and secure into the computer case with the screws. 9 Reconnect the power and data cables using your notes from Step 5. Chapter 11: Upgrading Your Computer 7 Lift the system board up and out of the case. 8 Align the new system board on page 196. 218 www...

User Guide
Page 275
... 3, 17, 18 turning on computer 3, 16 tutoring fee-based 242 U uninterruptible power supply (UPS) 9, 15, 136 updating device drivers 28 updating Norton AntiVirus 166 upgrading 189 UPS 9, 15, 136 USB port 3, 5, 24 user accounts adding 129 switching 130 V video capture 114 playing 82, 95 streaming 141 video camera connecting 114... 78 troubleshooting 237 W WAV file 82 Web browser 57, 59 button 21 Web page 59 Web site 59 connecting to 60 downloading files 61 Gateway 28 window 36 close button 37 closing 37, 53 maximize button 37 menu bar 37 minimize button 37 title bar 37 Windows clipboard 41 desktop...
... 3, 17, 18 turning on computer 3, 16 tutoring fee-based 242 U uninterruptible power supply (UPS) 9, 15, 136 updating device drivers 28 updating Norton AntiVirus 166 upgrading 189 UPS 9, 15, 136 USB port 3, 5, 24 user accounts adding 129 switching 130 V video capture 114 playing 82, 95 streaming 141 video camera connecting 114... 78 troubleshooting 237 W WAV file 82 Web browser 57, 59 button 21 Web page 59 Web site 59 connecting to 60 downloading files 61 Gateway 28 window 36 close button 37 closing 37, 53 maximize button 37 menu bar 37 minimize button 37 title bar 37 Windows clipboard 41 desktop...


