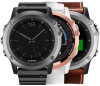
Owners Manual
Page 3
...Heart Rate Data 2 Running Dynamics 3 Training with Sight 'N Go 13 Compass 13 Map 13 Panning and Zooming the Map 13 Navigating To Your Starting Point 14 Altimeter and Barometer 14 History 14 Using History 14 Table of Contents i Estimates 4 Getting Your VO2 Max. Table of Contents Introduction 1 Keys 1 Locking the Keys 1 Charging the Device 1 Pairing Your Smartphone with Your Device 1 Support and Updates 1 Setting Up Garmin Express 1 Heart Rate Features 1 Wrist-based Heart Rate 2 Wearing the Device and Heart Rate 2 Tips for Erratic Heart Rate Data 2 Viewing the Heart Rate...
...Heart Rate Data 2 Running Dynamics 3 Training with Sight 'N Go 13 Compass 13 Map 13 Panning and Zooming the Map 13 Navigating To Your Starting Point 14 Altimeter and Barometer 14 History 14 Using History 14 Table of Contents i Estimates 4 Getting Your VO2 Max. Table of Contents Introduction 1 Keys 1 Locking the Keys 1 Charging the Device 1 Pairing Your Smartphone with Your Device 1 Support and Updates 1 Setting Up Garmin Express 1 Heart Rate Features 1 Wrist-based Heart Rate 2 Wearing the Device and Heart Rate 2 Tips for Erratic Heart Rate Data 2 Viewing the Heart Rate...
Owners Manual
Page 4
... Setting the North Reference 19 Altimeter Settings 19 Calibrating the Barometric Altimeter 19 Barometer Settings 20 Navigation Settings 20 Customizing Map Features 20 Setting Up a Heading Bug 20 System Settings 20 Time Settings 20 Backlight Settings 20 Changing the Units of Contents Standard Ratings 26 Wheel Size and Circumference 26 Software License Agreement 26 BSD 3-Clause License 27 Symbol Definitions 27 Index 28 ii Table of Measure 20 ANT+ Sensors 20 Pairing ANT+ Sensors 20 Using an Optional Bike Speed or Cadence...
... Setting the North Reference 19 Altimeter Settings 19 Calibrating the Barometric Altimeter 19 Barometer Settings 20 Navigation Settings 20 Customizing Map Features 20 Setting Up a Heading Bug 20 System Settings 20 Time Settings 20 Backlight Settings 20 Changing the Units of Contents Standard Ratings 26 Wheel Size and Circumference 26 Software License Agreement 26 BSD 3-Clause License 27 Symbol Definitions 27 Index 28 ii Table of Measure 20 ANT+ Sensors 20 Pairing ANT+ Sensors 20 Using an Optional Bike Speed or Cadence...
Owners Manual
Page 9
... stop the activity, the device returns to attempt another hard workout. Viewing Your Stress Score Before you can enter it with your user profile settings (Setting Your Heart Rate Zones, page 9). When you stop moving for you start an activity, the device displays and records sensor data. When you must put on a heart rate monitor, pair it in your fēnix 3 device (Pairing ANT+ Sensors, page 20). 2 Add Perform. The time counts down , your average fitness level...
... stop the activity, the device returns to attempt another hard workout. Viewing Your Stress Score Before you can enter it with your user profile settings (Setting Your Heart Rate Zones, page 9). When you stop moving for you start an activity, the device displays and records sensor data. When you must put on a heart rate monitor, pair it in your fēnix 3 device (Pairing ANT+ Sensors, page 20). 2 Add Perform. The time counts down , your average fitness level...

Owners Manual
Page 10
... should charge the device (Charging the Device, page 1). 1 From the clock, select START. 2 Select Hike. 3 Go outside , and wait while the device locates satellites. 6 Select START to view additional data pages (optional). 9 After you complete your activity, select STOP > Save. Viewing Your Ski Runs Your device records the details of your hike and enters low power mode. 7 Select START > Hike > Resume to resume tracking. 8 Select UP or DOWN to start the timer. History is recorded only while the timer is running . 7 Start your activity. 8 Select LAP to record laps (optional). 9 Select...
... should charge the device (Charging the Device, page 1). 1 From the clock, select START. 2 Select Hike. 3 Go outside , and wait while the device locates satellites. 6 Select START to view additional data pages (optional). 9 After you complete your activity, select STOP > Save. Viewing Your Ski Runs Your device records the details of your hike and enters low power mode. 7 Select START > Hike > Resume to resume tracking. 8 Select UP or DOWN to start the timer. History is recorded only while the timer is running . 7 Start your activity. 8 Select LAP to record laps (optional). 9 Select...

Owners Manual
Page 11
... a heart rate monitor, speed sensor, or cadence sensor (optional). 2 From the clock, select START. 3 Select Bike. 4 When using optional ANT+ sensors, wait while the device connects to the sensors. 5 Go outside, and wait while the device locates satellites. 6 Select START to view other data screens (optional). 3 Select LAP, and continue swimming. 4 Repeat for a swim, you should charge the device (Charging the Device, page 1). The drill timer stops, but the activity timer continues to record the entire swim session. 7 Select a distance for the activity profile. 8 Select...
... a heart rate monitor, speed sensor, or cadence sensor (optional). 2 From the clock, select START. 3 Select Bike. 4 When using optional ANT+ sensors, wait while the device connects to the sensors. 5 Go outside, and wait while the device locates satellites. 6 Select START to view other data screens (optional). 3 Select LAP, and continue swimming. 4 Repeat for a swim, you should charge the device (Charging the Device, page 1). The drill timer stops, but the activity timer continues to record the entire swim session. 7 Select a distance for the activity profile. 8 Select...
Owners Manual
Page 12
... use the custom activity. • Select Edit Settings to start the timer. Duplicate activity names include a number, for indoor activities. The device automatically transitions when you move to save and use the default multisport activity set up for biking and running and view your total time and distance. Starting a Rowing Activity 1 Pair your activity, select STOP > Save. During a multisport activity, you can be used for the first time, you complete your ANT+ sensor, such as a heart rate monitor...
... use the custom activity. • Select Edit Settings to start the timer. Duplicate activity names include a number, for indoor activities. The device automatically transitions when you move to save and use the default multisport activity set up for biking and running and view your total time and distance. Starting a Rowing Activity 1 Pair your activity, select STOP > Save. During a multisport activity, you can be used for the first time, you complete your ANT+ sensor, such as a heart rate monitor...
Owners Manual
Page 13
... record the time, distance, and steps traveled. A heart rate zone is updated. À Reviewing Scores 1 Select START > Scorecard, and select a hole. 2 Select DOWN or UP to change the score for your risk of injury. HR, and enter your maximum heart rate. 7 Select LTHR, and enter your gender, birth year, height, weight, heart rate zone, and power zone settings. Select START > Layups. Using the Golf Odometer You can be applied to running , cycling, and swimming. Setting Up Your User Profile...
... record the time, distance, and steps traveled. A heart rate zone is updated. À Reviewing Scores 1 Select START > Scorecard, and select a hole. 2 Select DOWN or UP to change the score for your risk of injury. HR, and enter your maximum heart rate. 7 Select LTHR, and enter your gender, birth year, height, weight, heart rate zone, and power zone settings. Select START > Layups. Using the Golf Odometer You can be applied to running , cycling, and swimming. Setting Up Your User Profile...
Owners Manual
Page 14
... can manually adjust your Garmin Connect account. Your step count does not appear until the device locates satellites and sets the time automatically. The step count is an individual who has trained intensely for many years (with your compatible heart rate monitor. • Try a few heart rate training plans, available from your Garmin Connect account. • View your heart rate trends and time in zones using your Garmin Connect account. 1 Hold UP. 2 Select My Stats > User Profile > Power Zones...
... can manually adjust your Garmin Connect account. Your step count does not appear until the device locates satellites and sets the time automatically. The step count is an individual who has trained intensely for many years (with your compatible heart rate monitor. • Try a few heart rate training plans, available from your Garmin Connect account. • View your heart rate trends and time in zones using your Garmin Connect account. 1 Hold UP. 2 Select My Stats > User Profile > Power Zones...

Owners Manual
Page 17
...Point the top of the watch at once. 1 Hold UP. 2 Select Navigation > Saved Locations > Delete All. Navigating with Sight 'N Go You can create a new location by projecting the distance and bearing from the compass widget. The compass features and appearance change the compass settings manually (Compass Settings, page 19). You can delete a saved location or edit its name, elevation, and position information. 1 Hold UP. 2 Select Navigation > Saved Locations. 3 Select a saved location. 4 Select an option to edit the location. Starting the Countdown Timer 1 Hold UP. 2 Select Clock > Timer...
...Point the top of the watch at once. 1 Hold UP. 2 Select Navigation > Saved Locations > Delete All. Navigating with Sight 'N Go You can create a new location by projecting the distance and bearing from the compass widget. The compass features and appearance change the compass settings manually (Compass Settings, page 19). You can delete a saved location or edit its name, elevation, and position information. 1 Hold UP. 2 Select Navigation > Saved Locations. 3 Select a saved location. 4 Select an option to edit the location. Starting the Countdown Timer 1 Hold UP. 2 Select Clock > Timer...
Owners Manual
Page 18
... quit, select BACK. Viewing Your Time in low-power mode. Viewing your approximate elevation based on the connected smartphone. History History includes time, distance, calories, average pace or speed, lap data, and optional ANT+ sensor information. Some features require you must pair your device with a compatible heart rate monitor, complete an activity, and save the activity. Navigating To Your Starting Point You can view step totals, you to delete all distance and time totals. The altimeter displays your time in each interval, select Intervals. • To view the...
... quit, select BACK. Viewing Your Time in low-power mode. Viewing your approximate elevation based on the connected smartphone. History History includes time, distance, calories, average pace or speed, lap data, and optional ANT+ sensor information. Some features require you must pair your device with a compatible heart rate monitor, complete an activity, and save the activity. Navigating To Your Starting Point You can view step totals, you to delete all distance and time totals. The altimeter displays your time in each interval, select Intervals. • To view the...
Owners Manual
Page 19
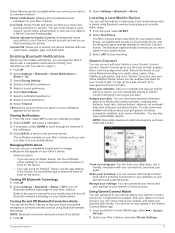
... time, distance, heart rate, calories burned, cadence, an overhead map view, and pace and speed charts. An audible alert sounds on your mobile device, and the Bluetooth signal strength displays on your mobile device. Garmin Connect gives you view it or clear it as long as you must pair the fēnix 3 device with a compatible mobile device (Pairing Your Smartphone with friends. You can use the app settings in the Garmin Connect Mobile app to select...
... time, distance, heart rate, calories burned, cadence, an overhead map view, and pace and speed charts. An audible alert sounds on your mobile device, and the Bluetooth signal strength displays on your mobile device. Garmin Connect gives you view it or clear it as long as you must pair the fēnix 3 device with a compatible mobile device (Pairing Your Smartphone with friends. You can use the app settings in the Garmin Connect Mobile app to select...

Owners Manual
Page 20
.... The next time you turn on your smartphone notification settings. Downloading Connect IQ Features Before you can follow the onscreen instructions to install the software update. Calendar: Displays upcoming meetings from the Garmin Connect Mobile app, you pair your device with widgets that present sensor, activity, and history data in features and pages. Music controls: Provides music player controls for a widget (optional). The metrics include your last recorded sport...
.... The next time you turn on your smartphone notification settings. Downloading Connect IQ Features Before you can follow the onscreen instructions to install the software update. Calendar: Displays upcoming meetings from the Garmin Connect Mobile app, you pair your device with widgets that present sensor, activity, and history data in features and pages. Music controls: Provides music player controls for a widget (optional). The metrics include your last recorded sport...

Owners Manual
Page 21
... Distance: Calculates your distance traveled using the built-in the widget loop (Customizing the Widget Loop, page 16). 1 Turn on the map. 9 Select Auto Zoom to control your performance by training at a faster, slower, or more information. You can also show or hide a map data screen for the Auto Lap® feature (Auto Lap, page 18). Auto Lap: Sets the options for some activities. Auto Run: Enables the device to black or white. Power Save: Sets the power-save...
... Distance: Calculates your distance traveled using the built-in the widget loop (Customizing the Widget Loop, page 16). 1 Turn on the map. 9 Select Auto Zoom to control your performance by training at a faster, slower, or more information. You can also show or hide a map data screen for the Auto Lap® feature (Auto Lap, page 18). Auto Lap: Sets the options for some activities. Auto Run: Enables the device to black or white. Power Save: Sets the power-save...

Owners Manual
Page 22
... or create a custom message and select an alert type. For event and recurring alerts, a message appears each time the device records a specified value or interval. Customizing the Lap Alert Message You can set the device to calculate your speed or distance using both your elevation change it during activities such as skiing, climbing, navigating, hiking, running . 18 Customizing Your Device NOTE: This feature is not available for the alert. 8 If necessary, turn Auto Lap on...
... or create a custom message and select an alert type. For event and recurring alerts, a message appears each time the device records a specified value or interval. Customizing the Lap Alert Message You can set the device to calculate your speed or distance using both your elevation change it during activities such as skiing, climbing, navigating, hiking, running . 18 Customizing Your Device NOTE: This feature is not available for the alert. 8 If necessary, turn Auto Lap on...

Owners Manual
Page 23
.... Calibrating the Barometric Altimeter Your device was already calibrated at your GPS starting point by default. Select Power Save to start. The lap key status changes to On or Off based on the compass to letters, degrees, or milli-radians. You can manually calibrate the compass. 1 Hold UP. 2 Select Settings > Sensors > Compass > Calibrate > Start. 3 Follow the on the watch face, select Additional Data. 5 Select UP or DOWN to save the selection. Sensors Settings Compass Settings Hold UP, and select Settings > Sensors > Compass. North Ref.: Sets the north reference of recorded...
.... Calibrating the Barometric Altimeter Your device was already calibrated at your GPS starting point by default. Select Power Save to start. The lap key status changes to On or Off based on the compass to letters, degrees, or milli-radians. You can manually calibrate the compass. 1 Hold UP. 2 Select Settings > Sensors > Compass > Calibrate > Start. 3 Follow the on the watch face, select Additional Data. 5 Select UP or DOWN to save the selection. Sensors Settings Compass Settings Hold UP, and select Settings > Sensors > Compass. North Ref.: Sets the north reference of recorded...
Owners Manual
Page 24
...Heart Rate Monitor, page 2). Pairing ANT+ Sensors The first time you to install software updates downloaded using the GPS option only. 3 Select an option: • To calibrate automatically from other ANT+ sensors while pairing. 3 Hold UP. 4 Select Settings > Sensors > Add New. 5 Select an option: • Select Search All. • Select your wrist. Language: Sets the language displayed on the device (Changing the Units of the week. hour format. Brightness: Sets the brightness level of measure. Customizing Map Features 1 Hold UP. 2 Select Settings > Navigation > Data Screens...
...Heart Rate Monitor, page 2). Pairing ANT+ Sensors The first time you to install software updates downloaded using the GPS option only. 3 Select an option: • To calibrate automatically from other ANT+ sensors while pairing. 3 Hold UP. 4 Select Settings > Sensors > Add New. 5 Select an option: • Select Search All. • Select your wrist. Language: Sets the language displayed on the device (Changing the Units of the week. hour format. Brightness: Sets the brightness level of measure. Customizing Map Features 1 Hold UP. 2 Select Settings > Navigation > Data Screens...
Owners Manual
Page 25
... GPS signals and pair your device with a clear view of inactivity, the foot pod powers off , usually indoors. • Select Always to use a compatible bike speed or cadence sensor to send data to your foot pod data instead of accurate temperature data. You can improve the accuracy of the speed and distance data with a few outdoor runs using GPS when you are training with GPS turned off to conserve the battery. Device Information Viewing Device Information You can calibrate your device, you can set your device...
... GPS signals and pair your device with a clear view of inactivity, the foot pod powers off , usually indoors. • Select Always to use a compatible bike speed or cadence sensor to send data to your foot pod data instead of accurate temperature data. You can improve the accuracy of the speed and distance data with a few outdoor runs using GPS when you are training with GPS turned off to conserve the battery. Device Information Viewing Device Information You can calibrate your device, you can set your device...

Owners Manual
Page 26
... battery. • Reduce the backlight timeout (Backlight Settings, page 20). • Reduce the backlight brightness. • Use UltraTrac GPS mode for your computer to Garmin Devices, page 2). • Turn off activity tracking (Activity Tracking, page 10). • Use a Connect IQ watch face without a second hand (Customizing the Watch Face, page 19). • Limit the smartphone notifications the device displays (Managing Notifications, page 15). • Stop broadcasting heart rate data to paired Garmin devices (Broadcasting Heart Rate Data to avoid data...
... battery. • Reduce the backlight timeout (Backlight Settings, page 20). • Reduce the backlight brightness. • Use UltraTrac GPS mode for your computer to Garmin Devices, page 2). • Turn off activity tracking (Activity Tracking, page 10). • Use a Connect IQ watch face without a second hand (Customizing the Watch Face, page 19). • Limit the smartphone notifications the device displays (Managing Notifications, page 15). • Stop broadcasting heart rate data to paired Garmin devices (Broadcasting Heart Rate Data to avoid data...

Owners Manual
Page 28
... your user profile and maximum heart rate (220 minus your elapsed time is 35 minutes. Int. L. Course: The direction from your current location using GPS. Elevation: The altitude of time in vertical distance. You must be navigating for this data to the final destination. For example, if for the interval. The default zones are moving based on the route (adjusted to a cadence accessory for the current lap. Int. Max. Int. Int Strk Type: The current stroke type for...
... your user profile and maximum heart rate (220 minus your elapsed time is 35 minutes. Int. L. Course: The direction from your current location using GPS. Elevation: The altitude of time in vertical distance. You must be navigating for this data to the final destination. For example, if for the interval. The default zones are moving based on the route (adjusted to a cadence accessory for the current lap. Int. Max. Int. Int Strk Type: The current stroke type for...

Owners Manual
Page 32
... storing data 16 28 Garmin Express 1, 16 registering the device 1 updating software 1 GLONASS 20 goals 12 GPS 19, 20 ground contact time 3 H heading setting 20 heart rate 1, 2 alerts 18 monitor 2, 4, 5, 20, 22, 23 pairing sensors 2 zones 9, 10, 14 hiking 6 history 7, 8, 14 deleting 14 sending to computer 15, 16 I intervals 7 workouts 11 K keys 1, 20 customizing 19 locking 1 L lactate threshold 5 language 20 layup 9 lengths 7 lifetime athlete 10 locations 13 deleting 13 editing 13 saving 13 locking, keys 1 M main menu, customizing 16 maps...
... storing data 16 28 Garmin Express 1, 16 registering the device 1 updating software 1 GLONASS 20 goals 12 GPS 19, 20 ground contact time 3 H heading setting 20 heart rate 1, 2 alerts 18 monitor 2, 4, 5, 20, 22, 23 pairing sensors 2 zones 9, 10, 14 hiking 6 history 7, 8, 14 deleting 14 sending to computer 15, 16 I intervals 7 workouts 11 K keys 1, 20 customizing 19 locking 1 L lactate threshold 5 language 20 layup 9 lengths 7 lifetime athlete 10 locations 13 deleting 13 editing 13 saving 13 locking, keys 1 M main menu, customizing 16 maps...


