Owners Manual
Page 3
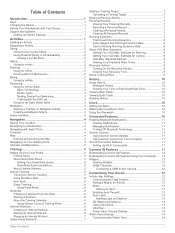
... the Map 4 Navigating To Your Starting Point 5 Altimeter and Barometer 5 Training 5 Setting Up Your User Profile 5 Fitness Goals 5 About Heart Rate Zones 5 Setting Your Heart Rate Zones 5 Heart Rate Zone Calculations 5 About Lifetime Athletes 5 Activity Tracking 5 Turning On Activity Tracking 5 Using the Move Alert 6 Auto Goal 6 Sleep Tracking 6 Using Sleep Mode 6 Workouts 6 Following a Workout From the Web 6 Starting a Workout 6 About the Training Calendar 6 Using Garmin Connect Training Plans 6 Interval Workouts 6 Creating an Interval Workout 6 Starting an Interval...
... the Map 4 Navigating To Your Starting Point 5 Altimeter and Barometer 5 Training 5 Setting Up Your User Profile 5 Fitness Goals 5 About Heart Rate Zones 5 Setting Your Heart Rate Zones 5 Heart Rate Zone Calculations 5 About Lifetime Athletes 5 Activity Tracking 5 Turning On Activity Tracking 5 Using the Move Alert 6 Auto Goal 6 Sleep Tracking 6 Using Sleep Mode 6 Workouts 6 Following a Workout From the Web 6 Starting a Workout 6 About the Training Calendar 6 Using Garmin Connect Training Plans 6 Interval Workouts 6 Creating an Interval Workout 6 Starting an Interval...
Owners Manual
Page 4
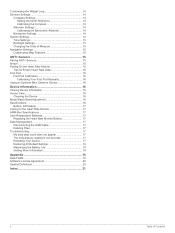
... Altimeter 14 Barometer Settings 14 System Settings 14 Time Settings 15 Backlight Settings 15 Changing the Units of Measure 15 Navigation Settings 15 Customizing Map Features 15 ANT+ Sensors 15 Pairing ANT+ Sensors 15 tempe 15 Putting On the Heart Rate Monitor 15 Tips for Erratic Heart Rate Data 16 Foot Pod 16 Foot Pod Calibration 16 Calibrating Your Foot Pod Manually 16 Using an Optional Bike Cadence Sensor 16 Device Information 16 Viewing Device Information 16 Device Care 16 Cleaning the Device 16 Metal Watch Band Adjustment 16 Specifications 16 Battery Information...
... Altimeter 14 Barometer Settings 14 System Settings 14 Time Settings 15 Backlight Settings 15 Changing the Units of Measure 15 Navigation Settings 15 Customizing Map Features 15 ANT+ Sensors 15 Pairing ANT+ Sensors 15 tempe 15 Putting On the Heart Rate Monitor 15 Tips for Erratic Heart Rate Data 16 Foot Pod 16 Foot Pod Calibration 16 Calibrating Your Foot Pod Manually 16 Using an Optional Bike Cadence Sensor 16 Device Information 16 Viewing Device Information 16 Device Care 16 Cleaning the Device 16 Metal Watch Band Adjustment 16 Specifications 16 Battery Information...
Owners Manual
Page 5
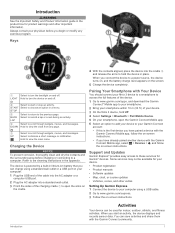
... area before you connect the device to a power source, the device turns on, and the battery charge level appears on and off . À LIGHT Hold to turn the backlight on and off . Á START STOP Â BACK LAP Ã DOWN Select to start an activity, the device displays and records sensor data. Support and Updates Garmin Express™ provides easy access to record a lap or a rest during an activity. Refer to the cleaning instructions in the appendix...
... area before you connect the device to a power source, the device turns on, and the battery charge level appears on and off . À LIGHT Hold to turn the backlight on and off . Á START STOP Â BACK LAP Ã DOWN Select to start an activity, the device displays and records sensor data. Support and Updates Garmin Express™ provides easy access to record a lap or a rest during an activity. Refer to the cleaning instructions in the appendix...

Owners Manual
Page 6
... while the device locates satellites. 4 Select START to start the timer. The run feature is running . 1 Start a skiing or snowboarding activity. 2 Hold UP. 3 Select View Runs. 4 Select UP and DOWN to view details of your hike and enters low power mode. 8 Select UP or DOWN to view additional data pages (optional). 9 After you complete your activity, select STOP > Save. The device saves the status of your last run, your current run . Activities This feature automatically records new ski runs...
... while the device locates satellites. 4 Select START to start the timer. The run feature is running . 1 Start a skiing or snowboarding activity. 2 Hold UP. 3 Select View Runs. 4 Select UP and DOWN to view details of your hike and enters low power mode. 8 Select UP or DOWN to view additional data pages (optional). 9 After you complete your activity, select STOP > Save. The device saves the status of your last run, your current run . Activities This feature automatically records new ski runs...
Owners Manual
Page 7
... also select stroke type as a heart rate monitor, speed sensor, or cadence sensor (optional). 2 From the clock, select START. 3 Select Bike. 4 When using optional ANT+ sensors, wait while the device connects to the sensors. 5 Go outside, and wait while the device locates satellites. 6 Select START to start the timer. Going for a Pool Swim Before you go for one stroke type in an interval Used with drill logging (Training with your device (Pairing ANT+ Sensors). 1 Pair your ANT+ sensors, such as a custom data field (Customizing the Data Screens...
... also select stroke type as a heart rate monitor, speed sensor, or cadence sensor (optional). 2 From the clock, select START. 3 Select Bike. 4 When using optional ANT+ sensors, wait while the device connects to the sensors. 5 Go outside, and wait while the device locates satellites. 6 Select START to start the timer. Going for a Pool Swim Before you go for one stroke type in an interval Used with drill logging (Training with your device (Pairing ANT+ Sensors). 1 Pair your ANT+ sensors, such as a custom data field (Customizing the Data Screens...
Owners Manual
Page 8
... . 5 Start your location on the map. The compass features and appearance change the compass settings (Compass Settings). Navigating to a Destination You can save your activity, select STOP > Save. Navigation information appears. 6 Select UP or DOWN to begin navigation. When you start the timer. When you can customize a multisport activity, or you complete your current location to navigate back to a destination. Navigating with automatic calibration. Map represents your activity. 6 Select LAP to record an interval (optional). 7 Select UP or DOWN to view additional data pages...
... . 5 Start your location on the map. The compass features and appearance change the compass settings (Compass Settings). Navigating to a Destination You can save your activity, select STOP > Save. Navigation information appears. 6 Select UP or DOWN to begin navigation. When you start the timer. When you can customize a multisport activity, or you complete your current location to navigate back to a destination. Navigating with automatic calibration. Map represents your activity. 6 Select LAP to record an interval (optional). 7 Select UP or DOWN to view additional data pages...

Owners Manual
Page 9
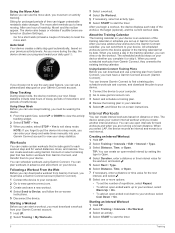
... less. Your current location , track to measure and increase their cardiovascular strength and improve their level of fitness. The device uses this information to view and edit the zones as a percentage of your maximum heart rate. • Select %HRR to calculate accurate training data. 1 Hold UP. 2 Select My Stats > User Profile. 3 Select an option. Some gyms and health centers can provide a test that use heart rate zones to follow , and end point À...
... less. Your current location , track to measure and increase their cardiovascular strength and improve their level of fitness. The device uses this information to view and edit the zones as a percentage of your maximum heart rate. • Select %HRR to calculate accurate training data. 1 Hold UP. 2 Select My Stats > User Profile. 3 Select an option. Some gyms and health centers can provide a test that use heart rate zones to follow , and end point À...
Owners Manual
Page 10
.... 3 Select and schedule a training plan. 4 Review the training plan in advance and store them on -screen instructions. Creating an Interval Workout 1 Hold UP. 2 Select Training > Intervals > Edit > Interval > Type. 3 Select Distance, Time, or Open. Go for track workouts and when you are turned on distance or time. NOTE: If you forget to put the device into your Garmin Connect account to view your sleep statistics. You can plan workouts in your rest. Starting an Interval Workout 1 Hold UP. 2 Select Training > Intervals...
.... 3 Select and schedule a training plan. 4 Review the training plan in advance and store them on -screen instructions. Creating an Interval Workout 1 Hold UP. 2 Select Training > Intervals > Edit > Interval > Type. 3 Select Distance, Time, or Open. Go for track workouts and when you are turned on distance or time. NOTE: If you forget to put the device into your Garmin Connect account to view your sleep statistics. You can plan workouts in your rest. Starting an Interval Workout 1 Hold UP. 2 Select Training > Intervals...

Owners Manual
Page 11
... you are already paired. Personal Records When you complete an activity, the device displays any saved activities. 3 Select a sport. 4 Select Clear All Records > Yes. Personal records include your estimated finish time. NOTE: This does not delete any saved activities. If your fēnix 3 device was packaged with the Virtual Partner feature so you can set distance, distance and time, distance and pace, or distance and speed goal. Setting a Training Target The training target feature works with the...
... you are already paired. Personal Records When you complete an activity, the device displays any saved activities. 3 Select a sport. 4 Select Clear All Records > Yes. Personal records include your estimated finish time. NOTE: This does not delete any saved activities. If your fēnix 3 device was packaged with the Virtual Partner feature so you can set distance, distance and time, distance and pace, or distance and speed goal. Setting a Training Target The training target feature works with the...
Owners Manual
Page 12
... dynamics, you can display cadence, vertical oscillation, or ground contact time as the top field on the data screen with a corresponding position on the HRM-Run accessory and pair it with the HRM-Run accessory, the devices are typical for a Run). 9 Select UP or DOWN to exhibit longer ground contact times, higher vertical oscillation, and lower cadence than more information on percentiles. The...
... dynamics, you can display cadence, vertical oscillation, or ground contact time as the top field on the data screen with a corresponding position on the HRM-Run accessory and pair it with the HRM-Run accessory, the devices are typical for a Run). 9 Select UP or DOWN to exhibit longer ground contact times, higher vertical oscillation, and lower cadence than more information on percentiles. The...
Owners Manual
Page 14
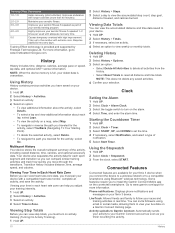
... information, go to set the time. 4 If necessary, select Notification, and select a type of the activity, including overall distance, time, calories, and optional accessory data. LiveTrack: Allows friends and family to follow your Garmin Connect account as soon as part of your weekly training program. 4.0-4.9 Highly improves your fēnix 3 device. Deleting History 1 Hold UP. 2 Select History > Options. 3 Select an option: • Select Delete All Activities to delete all activities from the history. • Select Reset...
... information, go to set the time. 4 If necessary, select Notification, and select a type of the activity, including overall distance, time, calories, and optional accessory data. LiveTrack: Allows friends and family to follow your Garmin Connect account as soon as part of your weekly training program. 4.0-4.9 Highly improves your fēnix 3 device. Deleting History 1 Hold UP. 2 Select History > Options. 3 Select an option: • Select Delete All Activities to delete all activities from the history. • Select Reset...
Owners Manual
Page 15
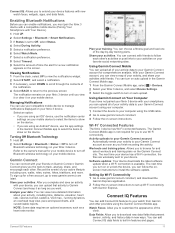
..., swims, hikes, triathlons, and more detailed information about your activity, including time, distance, elevation, heart rate, calories burned, cadence, VO2 max., running dynamics, an overhead map view, pace and speed charts, and customizable reports. Garmin Connect gives you the tools to install the software update. Analyze your device has a Wi‑Fi connection, the files are using the Garmin Connect Mobile app. The next time your data: You can turn on auto upload in new ways. Using Garmin Connect Mobile You...
..., swims, hikes, triathlons, and more detailed information about your activity, including time, distance, elevation, heart rate, calories burned, cadence, VO2 max., running dynamics, an overhead map view, pace and speed charts, and customizable reports. Garmin Connect gives you the tools to install the software update. Analyze your device has a Wi‑Fi connection, the files are using the Garmin Connect Mobile app. The next time your data: You can turn on auto upload in new ways. Using Garmin Connect Mobile You...
Owners Manual
Page 16
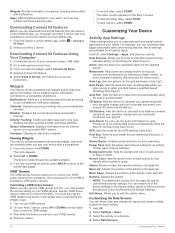
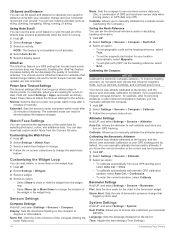
... record video, select START. Sensor Information: Displays information from the apps list and all of the activity data screens automatically while the timer is active. The device cycles through all activity types. Controlling a VIRB Action Camera Before you pair your smartphone notification settings. Auto Lap: Sets the options for the GPS antenna (UltraTrac). GPS: Sets the mode for the auto lap feature (Auto Lap®). Remove: Deletes the activity. Weather: Displays the current temperature and weather forecast. Viewing Widgets Your device comes...
... record video, select START. Sensor Information: Displays information from the apps list and all of the activity data screens automatically while the timer is active. The device cycles through all activity types. Controlling a VIRB Action Camera Before you pair your smartphone notification settings. Auto Lap: Sets the options for the GPS antenna (UltraTrac). GPS: Sets the mode for the auto lap feature (Auto Lap®). Remove: Deletes the activity. Weather: Displays the current temperature and weather forecast. Viewing Widgets Your device comes...
Owners Manual
Page 17
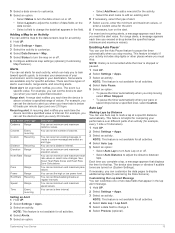
...; Select Auto Distance to mark a lap at regular intervals. Alert Name Alert Type Cadence Range Calories Custom Event, recurring Recurring Distance Recurring Elevation Range Heart Rate Range Pace Range Power Range Run/Walk Recurring Speed Range Time Event, recurring Description You can set the high or low power level. You can set minimum and maximum elevation values. You can set the device to display additional lap data (Customizing the Data Screens). You can set minimum and maximum heart rate values or select zone changes...
...; Select Auto Distance to mark a lap at regular intervals. Alert Name Alert Type Cadence Range Calories Custom Event, recurring Recurring Distance Recurring Elevation Range Heart Rate Range Pace Range Power Range Run/Walk Recurring Speed Range Time Event, recurring Description You can set the high or low power level. You can set minimum and maximum elevation values. You can set the device to display additional lap data (Customizing the Data Screens). You can set minimum and maximum heart rate values or select zone changes...
Owners Manual
Page 18
... updates, select Auto Cal. > Continuous. • To enter the current elevation, select Calibrate. Watch Face Settings You can manually calibrate the compass. 1 Hold UP. 2 Select Settings > Sensors > Compass > Calibrate. 3 Follow the on the compass to show or hide the widget from your device stays in the barometer widget. UltraTrac The UltraTrac feature is running , or biking. Power Save Timeout Settings The timeout settings affect how long your GPS starting point by default. Calibrate: Allows you are less important. Language: Sets the language displayed on the device...
... updates, select Auto Cal. > Continuous. • To enter the current elevation, select Calibrate. Watch Face Settings You can manually calibrate the compass. 1 Hold UP. 2 Select Settings > Sensors > Compass > Calibrate. 3 Follow the on the compass to show or hide the widget from your device stays in the barometer widget. UltraTrac The UltraTrac feature is running , or biking. Power Save Timeout Settings The timeout settings affect how long your GPS starting point by default. Calibrate: Allows you are less important. Language: Sets the language displayed on the device...
Owners Manual
Page 19
... > Units. 3 Select a measurement type. 4 Select a unit of accurate temperature data. Time Format: Sets the device to ambient air, and therefore, provides a consistent source of measure. Time: Allows you put on your compass bearing to follow while navigating. • Select a screen to check for keys and alerts. Set Time: Sets the time zone for longer activity recordings. You can skip this task. Backlight Settings Hold UP, and select Settings > System > Backlight. After they are pairing a heart rate monitor, put it is set to a computer. USB Mode: Sets the device to...
... > Units. 3 Select a measurement type. 4 Select a unit of accurate temperature data. Time Format: Sets the device to ambient air, and therefore, provides a consistent source of measure. Time: Allows you put on your compass bearing to follow while navigating. • Select a screen to check for keys and alerts. Set Time: Sets the time zone for longer activity recordings. You can skip this task. Backlight Settings Hold UP, and select Settings > System > Backlight. After they are pairing a heart rate monitor, put it is set to a computer. USB Mode: Sets the device to...
Owners Manual
Page 20
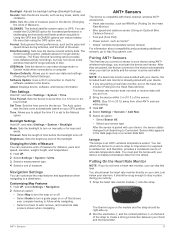
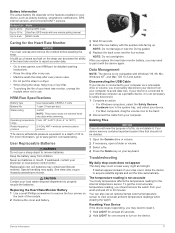
... calibrate your fitness user profile information (Setting Up Your User Profile). • Go for a ride (Going for the Heart Rate Monitor). • Wear a cotton shirt or thoroughly wet both sides of inactivity, the foot pod powers off to dry completely. Approximately five hours of using GPS. Calibrating Your Foot Pod Manually Before you must pair your device with your device (Pairing ANT+ Sensors). • Update your device, you can use a compatible bike cadence sensor to send data...
... calibrate your fitness user profile information (Setting Up Your User Profile). • Go for a ride (Going for the Heart Rate Monitor). • Wear a cotton shirt or thoroughly wet both sides of inactivity, the foot pod powers off to dry completely. Approximately five hours of using GPS. Calibrating Your Foot Pod Manually Before you must pair your device with your device (Pairing ANT+ Sensors). • Update your device, you can use a compatible bike cadence sensor to send data...
Owners Manual
Page 21
... hr. HRM-Run Specifications Battery type User-replaceable CR2032, 3 volts Battery life 1 year (1 hour per day) Water rating 3 ATM* NOTE: This product does not transmit heart rate data while swimming. If dashes appear instead of your device, such as activity tracking, smartphone notifications, GPS, internal sensors, and connected ANT+ sensors. To get the most accurate temperature reading, you may need to acquire satellite signals and set the time automatically. If...
... hr. HRM-Run Specifications Battery type User-replaceable CR2032, 3 volts Battery life 1 year (1 hour per day) Water rating 3 ATM* NOTE: This product does not transmit heart rate data while swimming. If dashes appear instead of your device, such as activity tracking, smartphone notifications, GPS, internal sensors, and connected ANT+ sensors. To get the most accurate temperature reading, you may need to acquire satellite signals and set the time automatically. If...
Owners Manual
Page 22
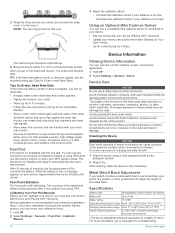
... power balance for this data to the factory default values. 1 Hold UP. 2 Select Settings > System > Restore Defaults > Yes. Avg. %HRR: The average percentage of your Garmin dealer for the current activity. Cadence: Running. Avg. Osc.: The average amount of day when you reach the final destination. Bearing: The direction from your current location above or below sea level. Dest. Location: The position of heart rate reserve (maximum heart rate minus resting heart rate...
... power balance for this data to the factory default values. 1 Hold UP. 2 Select Settings > System > Restore Defaults > Yes. Avg. %HRR: The average percentage of your Garmin dealer for the current activity. Cadence: Running. Avg. Osc.: The average amount of day when you reach the final destination. Bearing: The direction from your current location above or below sea level. Dest. Location: The position of heart rate reserve (maximum heart rate minus resting heart rate...
Owners Manual
Page 25
... transferring 11 uploading 11 data fields 2, 11 deleting all user data 17 history 10 personal records 7 distance 14 alerts 13 drills 3 F fitness 9 foot pod 15, 16 G Garmin Connect 1, 6, 10-12 storing data 11 Garmin Express 1, 11 registering the device 1 updating software 1 GLONASS 14 goals 7 GPS 14 ground contact time 8 Index H heart rate alerts 13 monitor 8, 9, 15-17 zones 5, 10 hiking 2 history 3, 4, 10 deleting 10 sending to computer 11 I intervals 3 workouts 6, 7 K keys 1, 14 L language 14 lengths 3 lifetime athlete 5 locations 4 saving 4 M main menu, customizing...
... transferring 11 uploading 11 data fields 2, 11 deleting all user data 17 history 10 personal records 7 distance 14 alerts 13 drills 3 F fitness 9 foot pod 15, 16 G Garmin Connect 1, 6, 10-12 storing data 11 Garmin Express 1, 11 registering the device 1 updating software 1 GLONASS 14 goals 7 GPS 14 ground contact time 8 Index H heart rate alerts 13 monitor 8, 9, 15-17 zones 5, 10 hiking 2 history 3, 4, 10 deleting 10 sending to computer 11 I intervals 3 workouts 6, 7 K keys 1, 14 L language 14 lengths 3 lifetime athlete 5 locations 4 saving 4 M main menu, customizing...


