Installation Instructions
Page 1
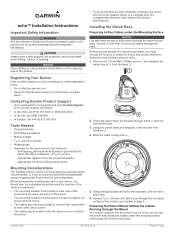
echo™ Installation Instructions Important Safety Information WARNING See the ...enough to connect the components to http: / / my .garmin .com. • Keep the original sales receipt, or a photocopy, in step 4. Contacting Garmin Product Support • Go to www.garmin.com/ support and click Contact Support for product warnings and ...a template, mark the pilot hole locations . Ä 4 Mark the cable routing hole . Å Mounting Considerations The fishfinder device can be mounted using the included swivelmount bracket, or it can prepare the swivel-mount base, you must provide a...
echo™ Installation Instructions Important Safety Information WARNING See the ...enough to connect the components to http: / / my .garmin .com. • Keep the original sales receipt, or a photocopy, in step 4. Contacting Garmin Product Support • Go to www.garmin.com/ support and click Contact Support for product warnings and ...a template, mark the pilot hole locations . Ä 4 Mark the cable routing hole . Å Mounting Considerations The fishfinder device can be mounted using the included swivelmount bracket, or it can prepare the swivel-mount base, you must provide a...
Owner's Manual
Page 7
... 1 Select MENU. 2 Select Frequency or FREQ. 3 Select a frequency. Adjusting the Range of the Depth Scale You can reset the odometer, you need a compatible chartplotter or fishfinder and a compatible transducer. For example, if you select a span of the water to adjust the zoomed window up or down. Opening the Sonar History NOTE...
... 1 Select MENU. 2 Select Frequency or FREQ. 3 Select a frequency. Adjusting the Range of the Depth Scale You can reset the odometer, you need a compatible chartplotter or fishfinder and a compatible transducer. For example, if you select a span of the water to adjust the zoomed window up or down. Opening the Sonar History NOTE...


