
Declaration of Conformity
Page 1
... Radio equipment to be used in the 1 GHz to which Conformity is Declared: EN 60950-1:2006 Information Technology Equipment. GARMIN (Europe) Ltd. Safety General Requirements EN 60945: 2002 Maritime navigation and radio communications equipment and systems. General Requirements. ...EN 301 489-3 Electromagnetic compatibility and Radio spectrum Matters (ERM); Information Technology Equipment GPSMAP 62 GPSMAP 62S GPSMAP 62St The undersigned does hereby declare that the equipment complies with the above Directives Dan Payne Quality Manager Garmin (Europe) Ltd. Date: 24th June 2010
... Radio equipment to be used in the 1 GHz to which Conformity is Declared: EN 60950-1:2006 Information Technology Equipment. GARMIN (Europe) Ltd. Safety General Requirements EN 60945: 2002 Maritime navigation and radio communications equipment and systems. General Requirements. ...EN 301 489-3 Electromagnetic compatibility and Radio spectrum Matters (ERM); Information Technology Equipment GPSMAP 62 GPSMAP 62S GPSMAP 62St The undersigned does hereby declare that the equipment complies with the above Directives Dan Payne Quality Manager Garmin (Europe) Ltd. Date: 24th June 2010
Owner's Manual
Page 1
GPSMAP® 62 series owner's manual For use with the GPSMAP 62, 62s and, 62st
GPSMAP® 62 series owner's manual For use with the GPSMAP 62, 62s and, 62st
Owner's Manual
Page 5
... your device the first time, you should select a series of items in order, for product warnings and other important information. Calibrate the compass (page 13). GPSMAP 62 Series Owner's Manual 1 Install the batteries (page 3). 2. Mark a waypoint (page 5). 5. Use the Rocker to know the basic features. 1.
... your device the first time, you should select a series of items in order, for product warnings and other important information. Calibrate the compass (page 13). GPSMAP 62 Series Owner's Manual 1 Install the batteries (page 3). 2. Mark a waypoint (page 5). 5. Use the Rocker to know the basic features. 1.
Owner's Manual
Page 6
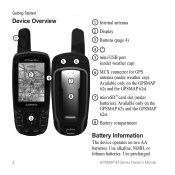
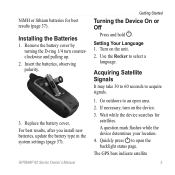
Use alkaline, NiMH, or lithium batteries. Available only on two AA batteries. Use precharged GPSMAP 62 Series Owner's Manual Getting Started Device Overview 1 56 2 4 7 8 3 2 1 Internal antenna 2 Display 3 Buttons (page 4) 4 5 mini-USB port (under weather cap) 6 MCX connector for GPS antenna (under batteries). Available only on the GPSMAP 62s and the GPSMAP 62st. 8 Battery compartment Battery Information The device operates on the GPSMAP 62s and the GPSMAP 62st. 7 microSD™ card slot (under weather cap).
Use alkaline, NiMH, or lithium batteries. Available only on two AA batteries. Use precharged GPSMAP 62 Series Owner's Manual Getting Started Device Overview 1 56 2 4 7 8 3 2 1 Internal antenna 2 Display 3 Buttons (page 4) 4 5 mini-USB port (under weather cap) 6 MCX connector for GPS antenna (under batteries). Available only on the GPSMAP 62s and the GPSMAP 62st. 8 Battery compartment Battery Information The device operates on the GPSMAP 62s and the GPSMAP 62st. 7 microSD™ card slot (under weather cap).
Owner's Manual
Page 7
... 37). For best results, after you install new batteries, update the battery type in the system settings (page 37). NiMH or lithium batteries for satellites. GPSMAP 62 Series Owner's Manual Getting Started Turning the Device On or Off Press and hold . If necessary, turn counterclockwise and pulling up. 2.
... 37). For best results, after you install new batteries, update the battery type in the system settings (page 37). NiMH or lithium batteries for satellites. GPSMAP 62 Series Owner's Manual Getting Started Turning the Device On or Off Press and hold . If necessary, turn counterclockwise and pulling up. 2.
Owner's Manual
Page 8
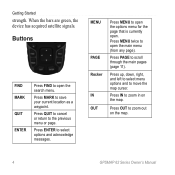
... the previous menu or page. Press IN to open . Getting Started strength. Buttons FIND MARK QUIT ENTER Press FIND to zoom in on the map. 4 GPSMAP 62 Series Owner's Manual Press QUIT to cancel or return to select options and acknowledge messages. Press PAGE to save your current location as a waypoint. Press...
... the previous menu or page. Press IN to open . Getting Started strength. Buttons FIND MARK QUIT ENTER Press FIND to zoom in on the map. 4 GPSMAP 62 Series Owner's Manual Press QUIT to cancel or return to select options and acknowledge messages. Press PAGE to save your current location as a waypoint. Press...
Owner's Manual
Page 9
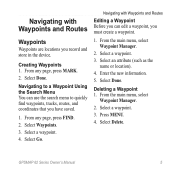
... with Waypoints and Routes Editing a Waypoint Before you can use the search menu to quickly find waypoints, tracks, routes, and coordinates that you have saved. 1. GPSMAP 62 Series Owner's Manual 5
... with Waypoints and Routes Editing a Waypoint Before you can use the search menu to quickly find waypoints, tracks, routes, and coordinates that you have saved. 1. GPSMAP 62 Series Owner's Manual 5
Owner's Manual
Page 10
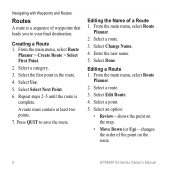
.... 3. Select an option: • Review-shows the point on the map. • Move Down (or Up)-changes the order of the point on the route. 6 GPSMAP 62 Series Owner's Manual Select the first point in the route. 4. A route must contain at least two points. 7. From the main menu, select Route Planner. 2. Enter...
.... 3. Select an option: • Review-shows the point on the map. • Move Down (or Up)-changes the order of the point on the route. 6 GPSMAP 62 Series Owner's Manual Select the first point in the route. 4. A route must contain at least two points. 7. From the main menu, select Route Planner. 2. Enter...
Owner's Manual
Page 11
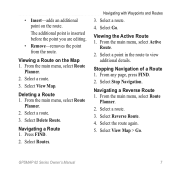
... Route 1. From any page, press FIND. 2. Select a route. 3. Select a route. 3. • Insert-adds an additional point on the Map 1. Deleting a Route 1. Select the route again. 5. GPSMAP 62 Series Owner's Manual 7 Select a route. 3. Navigating a Reverse Route 1. Select Reverse Route. 4. Select Go. From the main menu, select Route Planner. 2. The additional point is inserted...
... Route 1. From any page, press FIND. 2. Select a route. 3. Select a route. 3. • Insert-adds an additional point on the Map 1. Deleting a Route 1. Select the route again. 5. GPSMAP 62 Series Owner's Manual 7 Select a route. 3. Navigating a Reverse Route 1. Select Reverse Route. 4. Select Go. From the main menu, select Route Planner. 2. The additional point is inserted...

Owner's Manual
Page 12
Select Addresses. 3. Enter the city or postal code. Select Go. 8 GPSMAP 62 Series Owner's Manual Press FIND. 2. Select the city. 6. NOTE: Not all map data provides postal code searching. 5. Finding an Address with Waypoints and Routes ...and other locations. Enter the country. 4. Enter the house number. 7. Navigating with City Navigator® You can use optional City Navigator maps to http://buy.garmin.com or contact your Garmin dealer. Enter the street. 8. The detailed maps contain millions of points of interest, such as restaurants, hotels, and auto services. 1.
Select Addresses. 3. Enter the city or postal code. Select Go. 8 GPSMAP 62 Series Owner's Manual Press FIND. 2. Select the city. 6. NOTE: Not all map data provides postal code searching. 5. Finding an Address with Waypoints and Routes ...and other locations. Enter the country. 4. Enter the house number. 7. Navigating with City Navigator® You can use optional City Navigator maps to http://buy.garmin.com or contact your Garmin dealer. Enter the street. 8. The detailed maps contain millions of points of interest, such as restaurants, hotels, and auto services. 1.
Owner's Manual
Page 13
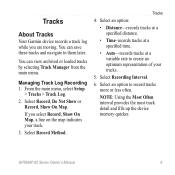
Select Record Method. NOTE: Using the Most Often interval provides the most track detail and fills up the device memory quicker. GPSMAP 62 Series Owner's Manual 9 Tracks About Tracks Your Garmin device records a track log while you select Record, Show On Map, a line on the map indicates your tracks. 5. From the main menu, select...
Select Record Method. NOTE: Using the Most Often interval provides the most track detail and fills up the device memory quicker. GPSMAP 62 Series Owner's Manual 9 Tracks About Tracks Your Garmin device records a track log while you select Record, Show On Map, a line on the map indicates your tracks. 5. From the main menu, select...
Owner's Manual
Page 14
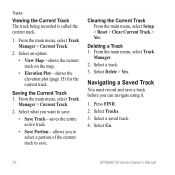
Clearing the Current Track From the main menu, select Setup > Reset > Clear Current Track > Yes. Select Tracks. 3. Select Go. 10 GPSMAP 62 Series Owner's Manual From the main menu, select Track Manager > Current Track. 2. Select what you want to save: • Save Track-saves the entire active ...
Clearing the Current Track From the main menu, select Setup > Reset > Clear Current Track > Yes. Select Tracks. 3. Select Go. 10 GPSMAP 62 Series Owner's Manual From the main menu, select Track Manager > Current Track. 2. Select what you want to save: • Save Track-saves the entire active ...
Owner's Manual
Page 15
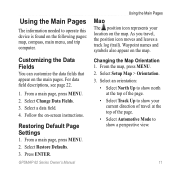
... and symbols also appear on the main pages. From a main page, press meNu. 2. Select Restore Defaults. 3. From the map, press MENU. 2. Select Setup Map > Orientation. 3. GPSMAP 62 Series Owner's Manual Using the Main Pages Map The position icon represents your current direction of the page. • Select Track Up to show a perspective...
... and symbols also appear on the main pages. From a main page, press meNu. 2. Select Restore Defaults. 3. From the map, press MENU. 2. Select Setup Map > Orientation. 3. GPSMAP 62 Series Owner's Manual Using the Main Pages Map The position icon represents your current direction of the page. • Select Track Up to show a perspective...
Owner's Manual
Page 16
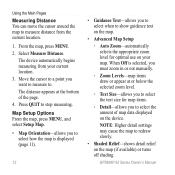
... the amount of the page. 4. note: Higher detail settings may cause the map to redraw slowly. • Shaded Relief-shows detail relief on the device. GPSMAP 62 Series Owner's Manual Select Measure Distance. Map Setup Options From the map, press menu, and select Setup Map. • Map Orientation-allows you to select...
... the amount of the page. 4. note: Higher detail settings may cause the map to redraw slowly. • Shaded Relief-shows detail relief on the device. GPSMAP 62 Series Owner's Manual Select Measure Distance. Map Setup Options From the map, press menu, and select Setup Map. • Map Orientation-allows you to select...
Owner's Manual
Page 17
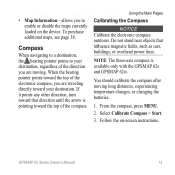
...page 38. Using the Main Pages Calibrating the Compass notice Calibrate the electronic compass outdoors. You should calibrate the compass after moving . GPSMAP 62 Series Owner's Manual 13 Select Calibrate Compass > Start. 3. Follow the on the device. From the compass, press MENU. 2. When...currently loaded on -screen instructions. Do not stand near objects that direction until the arrow is available only with the GPSMAP 62s and GPSMAP 62st. note: The three-axis compass is pointing toward your destination, regardless of the direction you are traveling directly toward ...
...page 38. Using the Main Pages Calibrating the Compass notice Calibrate the electronic compass outdoors. You should calibrate the compass after moving . GPSMAP 62 Series Owner's Manual 13 Select Calibrate Compass > Start. 3. Follow the on the device. From the compass, press MENU. 2. When...currently loaded on -screen instructions. Do not stand near objects that direction until the arrow is available only with the GPSMAP 62s and GPSMAP 62st. note: The three-axis compass is pointing toward your destination, regardless of the direction you are traveling directly toward ...
Owner's Manual
Page 18
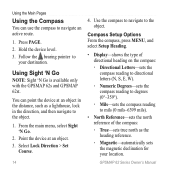
..., and then navigate to the object. Using Sight 'N Go NOTE: Sight 'N Go is available only with the GPSMAP 62s and GPSMAP 62st. You can use the compass to navigate an active route. 1. Select Lock Direction > Set Course. 14 4. GPSMAP 62 Series Owner's Manual Hold the device level. 3. Use the compass to navigate to the object. 1. Using...
..., and then navigate to the object. Using Sight 'N Go NOTE: Sight 'N Go is available only with the GPSMAP 62s and GPSMAP 62st. You can use the compass to navigate an active route. 1. Select Lock Direction > Set Course. 14 4. GPSMAP 62 Series Owner's Manual Hold the device level. 3. Use the compass to navigate to the object. 1. Using...

Owner's Manual
Page 19
...;). ◦◦ User-sets the magnetic variation value. • Go To Line/Pointer-allows you to select how the course is available only with the GPSMAP 62s and GPSMAP 62st. Follow the on-screen instructions. From the elevation plot, press menu...
...;). ◦◦ User-sets the magnetic variation value. • Go To Line/Pointer-allows you to select how the course is available only with the GPSMAP 62s and GPSMAP 62st. Follow the on-screen instructions. From the elevation plot, press menu...
Owner's Manual
Page 20
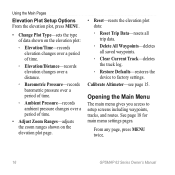
Calibrate Altimeter-see page 15. From any page, press MENU twice. 16 GPSMAP 62 Series Owner's Manual Using the Main Pages Elevation Plot Setup Options From the elevation plot, press menu. • Change Plot Type-sets the type of ...
Calibrate Altimeter-see page 15. From any page, press MENU twice. 16 GPSMAP 62 Series Owner's Manual Using the Main Pages Elevation Plot Setup Options From the elevation plot, press menu. • Change Plot Type-sets the type of ...

Owner's Manual
Page 21
... to zero. For accurate information, reset the trip information before beginning a trip. • Big Numbers-changes the size of the numbers shown on the dashboard. GPSMAP 62 Series Owner's Manual 17 Trip Computer The trip computer displays your current speed, average speed, maximum speed, trip odometer, and other helpful statistics. note: Your...
... to zero. For accurate information, reset the trip information before beginning a trip. • Big Numbers-changes the size of the numbers shown on the dashboard. GPSMAP 62 Series Owner's Manual 17 Trip Computer The trip computer displays your current speed, average speed, maximum speed, trip odometer, and other helpful statistics. note: Your...
Owner's Manual
Page 22
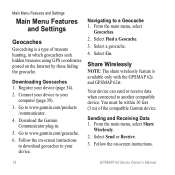
... treasures using GPS coordinates posted on -screen instructions. 18 GPSMAP 62 Series Owner's Manual From the main menu, select Geocaches. 2. From the main menu, select Share Wirelessly. 2. Go to your device to www.garmin.com/geocache. 6. Select Go. Downloading Geocaches 1. Navigating to... a geocache. 4. Main Menu Features and Settings Main Menu Features and Settings Geocaches Geocaching is available only with the GPSMAP 62s and GPSMAP 62st. Go to your device (page 34). 2. Select Find a Geocache. 3. Share Wirelessly note: The share wirelessly feature is a type ...
... treasures using GPS coordinates posted on -screen instructions. 18 GPSMAP 62 Series Owner's Manual From the main menu, select Geocaches. 2. From the main menu, select Share Wirelessly. 2. Go to your device to www.garmin.com/geocache. 6. Select Go. Downloading Geocaches 1. Navigating to... a geocache. 4. Main Menu Features and Settings Main Menu Features and Settings Geocaches Geocaching is available only with the GPSMAP 62s and GPSMAP 62st. Go to your device (page 34). 2. Select Find a Geocache. 3. Share Wirelessly note: The share wirelessly feature is a type ...


