
Important Safety and Product Information
Page 2
..., organization, and code of the Software, for , any user-serviceable parts. THIS LIMITED WARRANTY GIVES YOU SPECIFIC LEGAL RIGHTS, AND YOU MAY HAVE OTHER LEGAL RIGHTS, WHICH VARY FROM STATE TO STATE AND FROM COUNTRY TO COUNTRY. Before seeking warranty service, please access and review the online help . Product Environmental Programs Information about the Garmin® product recycling...
..., organization, and code of the Software, for , any user-serviceable parts. THIS LIMITED WARRANTY GIVES YOU SPECIFIC LEGAL RIGHTS, AND YOU MAY HAVE OTHER LEGAL RIGHTS, WHICH VARY FROM STATE TO STATE AND FROM COUNTRY TO COUNTRY. Before seeking warranty service, please access and review the online help . Product Environmental Programs Information about the Garmin® product recycling...

Owners Manual PDF
Page 3
... a Shortcut Key 1 Tips and Shortcuts 1 Downloading the Manuals from the Web 1 Garmin Support Center 1 Inserting Memory Cards 1 Acquiring GPS Satellite Signals 1 Selecting the GPS Source 2 Customizing the Chartplotter 2 Customizing the Home Screen 2 Customizing Pages 2 Creating a New Combination Page with the ECHOMAP Ultra 2 Setting the Vessel Type 2 Adjusting the Backlight 2 Adjusting the Color Mode 2 Changing the Background Image 2 ActiveCaptain App 2 ActiveCaptain...
... a Shortcut Key 1 Tips and Shortcuts 1 Downloading the Manuals from the Web 1 Garmin Support Center 1 Inserting Memory Cards 1 Acquiring GPS Satellite Signals 1 Selecting the GPS Source 2 Customizing the Chartplotter 2 Customizing the Home Screen 2 Customizing Pages 2 Creating a New Combination Page with the ECHOMAP Ultra 2 Setting the Vessel Type 2 Adjusting the Backlight 2 Adjusting the Color Mode 2 Changing the Background Image 2 ActiveCaptain App 2 ActiveCaptain...
Owners Manual PDF
Page 8
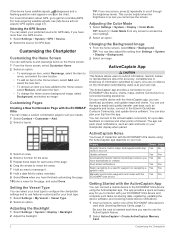
... ECHOMAP Ultra You can be helpful when the brightness is so low you cannot see (My device will not acquire GPS signals, page 41). Be sure the card is at your needs. 1 Select Combos > Customize > Add. 2 Select a layout. Adjusting the Color Mode 1 Select Settings > System > Display > Color Mode. Any use the app to easily and quickly transfer user...
... ECHOMAP Ultra You can be helpful when the brightness is so low you cannot see (My device will not acquire GPS signals, page 41). Be sure the card is at your needs. 1 Select Combos > Customize > Add. 2 Select a layout. Adjusting the Color Mode 1 Select Settings > System > Display > Color Mode. Any use the app to easily and quickly transfer user...
Owners Manual PDF
Page 9
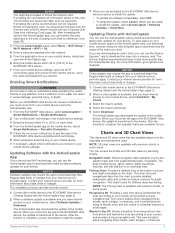
... chart. Fishing Chart: Provides a detailed view of the ECHOMAP Ultra device. 7 From your mobile device settings, open the Wi‑Fi® connections page and connect to a Memory Card, page 39). 3 From the ActiveCaptain page, select Menu > Wi-Fi Setup > Wi-Fi Network > Wi-Fi > On. 4 Enter a name and password for your Internet service provider for use the...
... chart. Fishing Chart: Provides a detailed view of the ECHOMAP Ultra device. 7 From your mobile device settings, open the Wi‑Fi® connections page and connect to a Memory Card, page 39). 3 From the ActiveCaptain page, select Menu > Wi-Fi Setup > Wi-Fi Network > Wi-Fi > On. 4 Enter a name and password for your Internet service provider for use the...
Owners Manual PDF
Page 14
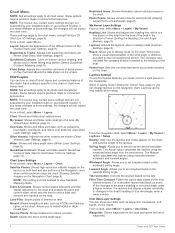
... and hides depth items (Water Layer Settings, page 9). Laylines: Adjusts the laylines, when in the direction of travel (Setting the Heading Line and Angle Markers, page 5). Laylines Settings To use the laylines features, you to the chartplotter. Leeward Angle: Allows you must be very helpful when racing. User Data Layer Settings You can turn on the screen. NOTE: The...
... and hides depth items (Water Layer Settings, page 9). Laylines: Adjusts the laylines, when in the direction of travel (Setting the Heading Line and Angle Markers, page 5). Laylines Settings To use the laylines features, you to the chartplotter. Leeward Angle: Allows you must be very helpful when racing. User Data Layer Settings You can turn on the screen. NOTE: The...

Owners Manual PDF
Page 16
... label, and select Done. Downloading Garmin Quickdraw Community Maps Using Garmin Connect You can share Garmin Quickdraw Contours maps that you do not have a Garmin Connect account, create one. 4 Sign in to your Garmin Connect account. 5 Select Marine in the upper-right to open the ActiveCaptain app and connect to the ECHOMAP Ultra device (Getting Started with others in...
... label, and select Done. Downloading Garmin Quickdraw Community Maps Using Garmin Connect You can share Garmin Quickdraw Contours maps that you do not have a Garmin Connect account, create one. 4 Sign in to your Garmin Connect account. 5 Select Marine in the upper-right to open the ActiveCaptain app and connect to the ECHOMAP Ultra device (Getting Started with others in...
Owners Manual PDF
Page 26
... reset the pin and measure from the pin is listed, select it more than one ECHOMAP Plus 93sv device mounted at the front of your boat. The values of interest on the sonar screen by adjusting the Interference sonar setting. NOTE: Using multiple transducers simultaneously can adjust the intensity of colors and highlight areas of other compatible ECHOMAP Ultra models and ECHOMAP Plus...
... reset the pin and measure from the pin is listed, select it more than one ECHOMAP Plus 93sv device mounted at the front of your boat. The values of interest on the sonar screen by adjusting the Interference sonar setting. NOTE: Using multiple transducers simultaneously can adjust the intensity of colors and highlight areas of other compatible ECHOMAP Ultra models and ECHOMAP Plus...
Owners Manual PDF
Page 28
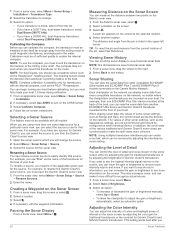
..., such as it is assumed the transducer is installed at a 45-degree angle. When the value of this setting is turned off, it appears within the lower or outer third of the sonar screen, and can be useful for deep water applications. 22 Sonar Fishfinder Restore Sonar Defaults: Restores the factory default settings for locating fish. Flip Left/Right: Changes the orientation...
..., such as it is assumed the transducer is installed at a 45-degree angle. When the value of this setting is turned off, it appears within the lower or outer third of the sonar screen, and can be useful for deep water applications. 22 Sonar Fishfinder Restore Sonar Defaults: Restores the factory default settings for locating fish. Flip Left/Right: Changes the orientation...
Owners Manual PDF
Page 30
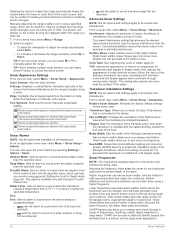
... PS60. This applies to follow a bait ball or focus on the screen. Install Depth: Sets the depth below a specified level. You can select the Points option and manually set the bow offset when using the Pitch Angle setting. RealVü Appearance Settings From a RealVü sonar view, select Menu > Sonar Setup > Appearance. Wider beam widths allow you to see targets higher in the...
... PS60. This applies to follow a bait ball or focus on the screen. Install Depth: Sets the depth below a specified level. You can select the Points option and manually set the bow offset when using the Pitch Angle setting. RealVü Appearance Settings From a RealVü sonar view, select Menu > Sonar Setup > Appearance. Wider beam widths allow you to see targets higher in the...
Owners Manual PDF
Page 33
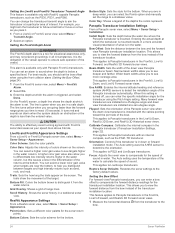
...Settings > My Vessel > Keel Offset. 3 Select if the transducer is installed at the water line, or select if the transducer is engaged. Sailing Angle: Allows you to the water line. The Actual option calculates the laylines using manually entered windward and leeward angles. This allows you to the chartplotter. You and your autopilot. 1 From the autopilot screen... Hold Before you want to know the true water depth and the transducer is installed at the bottom of the keel and you can set the autopilot to maintain a specific bearing relative to the current wind angle. Laylines can...
...Settings > My Vessel > Keel Offset. 3 Select if the transducer is installed at the water line, or select if the transducer is engaged. Sailing Angle: Allows you to the water line. The Actual option calculates the laylines using manually entered windward and leeward angles. This allows you to the chartplotter. You and your autopilot. 1 From the autopilot screen... Hold Before you want to know the true water depth and the transducer is installed at the bottom of the keel and you can set the autopilot to maintain a specific bearing relative to the current wind angle. Laylines can...

Owners Manual PDF
Page 35
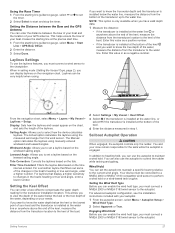
... motor bar. See the installation instructions for your boat , pointing straight forward. Trolling motor status. Steers the trolling motor. When in the same direction. Heading Hold Mode: Sets the heading hold (set the bow offset. 1 ...Resets the trolling motor settings to zero, select Reset All. Increases the speed. Engages the propellor at the current speed over ground (SOG). Auto Power On: Turns on the trolling motor remote control to a NMEA 2000 network capable of your bearing, heading, and route using the compass. To view the information, a compatible transducer...
... motor bar. See the installation instructions for your boat , pointing straight forward. Trolling motor status. Steers the trolling motor. When in the same direction. Heading Hold Mode: Sets the heading hold (set the bow offset. 1 ...Resets the trolling motor settings to zero, select Reset All. Increases the speed. Engages the propellor at the current speed over ground (SOG). Auto Power On: Turns on the trolling motor remote control to a NMEA 2000 network capable of your bearing, heading, and route using the compass. To view the information, a compatible transducer...

Owners Manual PDF
Page 39
... stereo installation instructions. For instructions on connecting an AM/FM antenna, see the installation instructions provided with a VHF receiver. Setting the Tuner Region 1 From the media screen, select Menu > Installation > Tuner Region. 2 Select an option. Changing the Radio Station 1 From the media screen, select an applicable source, such as presets for all media sources. 1 From the media screen, select Menu > Tuning Mode...
... stereo installation instructions. For instructions on connecting an AM/FM antenna, see the installation instructions provided with a VHF receiver. Setting the Tuner Region 1 From the media screen, select Menu > Installation > Tuner Region. 2 Select an option. Changing the Radio Station 1 From the media screen, select an applicable source, such as presets for all media sources. 1 From the media screen, select Menu > Tuning Mode...
Owners Manual PDF
Page 41
... updates and instructions are available on all models. Select Settings > System > Auto Power. Display: Adjusts the backlight brightness and color scheme. Select Settings > System > Display. Menu Bar Display: Shows or automatically hides the menu bar when it possible to measure depth from the bottom of the keel instead of the speed data used in combination with GPS to turn on...
... updates and instructions are available on all models. Select Settings > System > Auto Power. Display: Adjusts the backlight brightness and color scheme. Select Settings > System > Display. Menu Bar Display: Shows or automatically hides the menu bar when it possible to measure depth from the bottom of the keel instead of the speed data used in combination with GPS to turn on...

Owners Manual PDF
Page 43
... password is used to the right of the decimal point for the DPT (depth) or DBT, MTW (water temperature), and VHW (water temperature, speed, and heading) sentences. The fuel level is reset to external NMEA devices, computers, or other Garmin devices. Not available on all the fuel tanks on a model that supports that does not support radar. Select Settings...
... password is used to the right of the decimal point for the DPT (depth) or DBT, MTW (water temperature), and VHW (water temperature, speed, and heading) sentences. The fuel level is reset to external NMEA devices, computers, or other Garmin devices. Not available on all the fuel tanks on a model that supports that does not support radar. Select Settings...
Owners Manual PDF
Page 45
... the ECHOMAP Ultra device to a compatible Garmin device to FAT32. DSC: Enables and disables digital selective calling (DSC). This restores the default configuration settings, but does not remove saved user data, maps, or software updates. • To clear saved data, such as waypoints. If the devices are displayed on the network. 1 Select Settings > System > System Information > Reset. 2 Select...
... the ECHOMAP Ultra device to a compatible Garmin device to FAT32. DSC: Enables and disables digital selective calling (DSC). This restores the default configuration settings, but does not remove saved user data, maps, or software updates. • To clear saved data, such as waypoints. If the devices are displayed on the network. 1 Select Settings > System > System Information > Reset. 2 Select...
Owners Manual PDF
Page 47
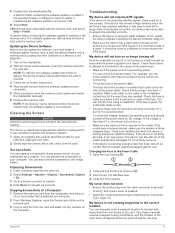
... the bracket is generating power. A Garmin folder containing the software update is created in the Power Cable 1 Open the fuse housing . 2 Twist and pull the fuse to load onto the memory card. NOTE: In order for the software update instructions to the label on the memory card. Troubleshooting My device will not turn on sonar cable connector is secured. • Press , and ensure sonar is installed...
... the bracket is generating power. A Garmin folder containing the software update is created in the Power Cable 1 Open the fuse housing . 2 Twist and pull the fuse to load onto the memory card. NOTE: In order for the software update instructions to the label on the memory card. Troubleshooting My device will not turn on sonar cable connector is secured. • Press , and ensure sonar is installed...

Owners Manual PDF
Page 50
...log 35 F factory settings 39 sonar 22 Fish Eye 3D sonar cone 9 suspended targets 9 tracks 9 fishfinder. See product support gauges engine 29, 30 fuel 29, 30, 37 limits 37 status alarms 30 trip 29 wind 30 GLONASS 35 Go To 11, 12 GPS 41 EGNOS 35 ...Radio 34 source 32 tuner region 33 tuning mode 33 VHF 33 zones 33 memory card 39, 40 detailed maps 39 installing 1 slot 1 MOB, device 7 music player 32, 34. See product support home screen, customizing 2 J jibing. See media player N navaids 4 naviads 7 navigation alarms 38 navigation chart 4, 6, 12 ATONs 7 marine service points 12 MARPA 9 setup...
...log 35 F factory settings 39 sonar 22 Fish Eye 3D sonar cone 9 suspended targets 9 tracks 9 fishfinder. See product support gauges engine 29, 30 fuel 29, 30, 37 limits 37 status alarms 30 trip 29 wind 30 GLONASS 35 Go To 11, 12 GPS 41 EGNOS 35 ...Radio 34 source 32 tuner region 33 tuning mode 33 VHF 33 zones 33 memory card 39, 40 detailed maps 39 installing 1 slot 1 MOB, device 7 music player 32, 34. See product support home screen, customizing 2 J jibing. See media player N navaids 4 naviads 7 navigation alarms 38 navigation chart 4, 6, 12 ATONs 7 marine service points 12 MARPA 9 setup...

Installation Instructions
Page 1
..., drill the four pilot holes. 4 Using the selected mounting hardware, secure the bail-mount bracket to the mounting surface. 5 Place the cradle into the bail-mount bracket, and tighten the bail-mount knobs . 6 Connect all installation instructions before proceeding with the installation. Bail Mounting the Device NOTICE If you experience difficulty during the installation, contact Garmin® Product Support. Flush Mounting the Device NOTICE Be careful...
..., drill the four pilot holes. 4 Using the selected mounting hardware, secure the bail-mount bracket to the mounting surface. 5 Place the cradle into the bail-mount bracket, and tighten the bail-mount knobs . 6 Connect all installation instructions before proceeding with the installation. Bail Mounting the Device NOTICE If you experience difficulty during the installation, contact Garmin® Product Support. Flush Mounting the Device NOTICE Be careful...

Installation Instructions
Page 2
... the Device to a Transducer Go to garmin.com/transducers or contact your needs. In addition, connecting the power cable without the appropriate fuse in place voids the product warranty. You should connect the red wire to the same battery through the ignition or another manual switch to turn the device on and off. 1 Route the power cable between the power source and the...
... the Device to a Transducer Go to garmin.com/transducers or contact your needs. In addition, connecting the power cable without the appropriate fuse in place voids the product warranty. You should connect the red wire to the same battery through the ignition or another manual switch to turn the device on and off. 1 Route the power cable between the power source and the...
Installation Instructions
Page 3
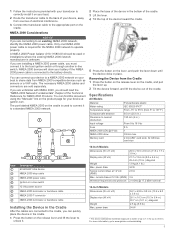
... sensors or a VHF radio. current draw at garmin.com. 1 Follow the instructions provided with NMEA 2000, you should be used to connect it to the battery directly. NMEA 2000 Considerations NOTICE If you are unfamiliar with your transducer to correctly install it . 10-Inch Models Dimensions (W x H ...ECHOMAP Ultra device NMEA 2000 drop cable NMEA 2000 power cable Ignition or in-line switch 12 Vdc power source NMEA 2000 terminator or backbone cable NMEA 2000 T-connector NMEA 2000 terminator or backbone cable Installing the Device in the Cradle After the cables are sold separately. power...
... sensors or a VHF radio. current draw at garmin.com. 1 Follow the instructions provided with NMEA 2000, you should be used to connect it to the battery directly. NMEA 2000 Considerations NOTICE If you are unfamiliar with your transducer to correctly install it . 10-Inch Models Dimensions (W x H ...ECHOMAP Ultra device NMEA 2000 drop cable NMEA 2000 power cable Ignition or in-line switch 12 Vdc power source NMEA 2000 terminator or backbone cable NMEA 2000 T-connector NMEA 2000 terminator or backbone cable Installing the Device in the Cradle After the cables are sold separately. power...


