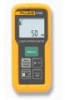
Fluke 414D, 419D, 424D Laser Distance - Manual
Page 2
... handling, including overvoltage failures caused by use and service. To obtain warranty service, contact your nearest Fluke authorized service center to obtain return authorization information, then send the product to that software will be error free or operate without interruption. Following warranty repair, the product will be billed for repair in material and workmanship under normal use outside the product's specified rating, or...
Fluke 414D, 419D, 424D Laser Distance - Manual
Page 3
Table of Contents Title Page Introduction ...1 How to Contact Fluke ...1 Safety Information ...2 Electromagnetic Compatibility (EMC 3 FCC Statement (U.S.A Only 3 Laser Classification 4 Integrated Distance Meter 4 Laser Class 2 Products 4 Features ...5 Before You Start...6 Batteries ...6 Multifunctional Endpiece 7 Keypad ...8 Display...9 Button Functions ...10 On/Off ...10 Basics ...10 Units of Measurement 11 Timer (419D/424D)...12 Beeper (419D/424D 12 i
Fluke 414D, 419D, 424D Laser Distance - Manual
Page 4
... Users Manual Backlight (419D/424D 12 Keypad Lock (419D/424D 12 Compass (424D)...13 Compass Calibration 13 Automatic Calibration 13 Manual Calibration 13 Magnetic Declination 14 Clear ...16 Measurements with a Tripod 16 Reference Point ...16 Measurements ...17 Single Distance Measurement 17 Minimum/Maximum Tracking 17 Addition/Subtraction 18 Area ...18 Volume...19 Tilt (424D only)...20 Smart Horizontal Mode...
Fluke 414D, 419D, 424D Laser Distance - Manual
Page 7
... view, print, or download the latest manual supplement, visit http://us.fluke.com/usen/support/manuals. 1 The Meter includes: • Most advanced technology for distance measurements • More accurate measurement • Longer measurement distance - model dependent This manual identifies when a feature is better than an ultrasonic device because it uses laser light waves and measures their reflection. Laser Distance Meter Introduction The Fluke 414D...
Fluke 414D, 419D, 424D Laser Distance - Manual
Page 8
.... 414D/419D/424D Users Manual Safety Information A Warning identifies hazardous conditions and procedures that can be compromised. • Replace the batteries when the low battery indicator shows to prevent incorrect measurements. • Do not use the Product around explosive gas. • Do not use the Product if it operates incorrectly. • Do not use the Product. • Carefully read all instructions. • Use...
Fluke 414D, 419D, 424D Laser Distance - Manual
Page 9
... receiver. • Connect the equipment into an outlet on a circuit different from that to which can radiate radio frequency energy and, if not installed and used in accordance with the limits for a Class B digital device, pursuant to part 15 of the relevant standards and regulations. W Warning Changes or modifications not expressly approved by turning the equipment off and on, the user...
Fluke 414D, 419D, 424D Laser Distance - Manual
Page 10
...414D/419D/424D Users Manual Laser Classification Integrated Distance Meter The Meter produces a visible laser beam from the front of the Meter. Looking directly into the laser beam may be hazardous. gwo20.gif 4 W Caution Looking into the beam with optical aids. Make sure the laser is a Class 2 laser product in accordance with fixed installations in machines and similar setups.... Eye protection is on the back of the Meter. Do not look directly into the laser beam. Figure 1 shows the warning that is normally afforded by aversion responses including the blink reflex...
Fluke 414D, 419D, 424D Laser Distance - Manual
Page 11
... Smart Horizontal Mode (Tilt) Stake Out[2] • • Height Tracking Multifunction Endpiece • • Room Corner Angle Beeper • • Handstrap [1] 419D and 424D store a maximum of features for the Meter by model. Laser Distance Meter Features 414D • 419D • 424D 5 Feature Table 2. Features Table 2 is a list of 20 complete display readouts. [2] 419D uses 1 value. 424D uses 2 values...
Fluke 414D, 419D, 424D Laser Distance - Manual
Page 12
414D/419D/424D Users Manual Before You Start 2 This section has basic information about the batteries and measurement reference point. Install two AAA (LR03) batteries with the correct polarity. Note Do not use zinc-carbon batteries. 4. Remove battery compartment lid. See Figure 2. 2. To install or replace the batteries: 1. W Caution To prevent corrosion, remove the batteries before a long period of nonuse. 6 gwo01.eps Attach the handstrap. 3. Batteries Replace the...
Fluke 414D, 419D, 424D Laser Distance - Manual
Page 14
414D/419D/424D Users Manual Keypad Figure 6 shows the location of each function button on the keypad. 6 414D 1 419D 1 424D 1 3 4 2 3 4 8 7 8 9 13 5 11 6 6 10 5 6 Measure/Power On Plus (+)/Minus (-) Plus (+)/Scroll Up Minus (-)/Scroll Down Clear/Off Reference/Change Units Area/Volume/Indirect Measurement (Pythagoras) Indirect Measurement (Pythagoras and Stake Out) 8 Area/Volume Memory Timer Tilt 9 12 11 14 10 5 Triangle Compass gwo05.eps
Fluke 414D, 419D, 424D Laser Distance - Manual
Page 16
... = Laser on the Meter and laser. Push for 2 seconds to use the buttons and identifies when a function is model-dependent. 414D/419D/424D Users Manual Button Functions This section is about how to turn on • 2x = Measure In Pythagoras calculation mode: • 2 seconds = Tracking (min/max measurement) Function Buttons Push : • 1x = Area • 2x = Volume • 3x = Pythagoras...
Fluke 414D, 419D, 424D Laser Distance - Manual
Page 18
.... 4. Beeper (419D/424D) Push at the same time for the most accurate measurements at the same time to turn on and turn on the 5-second timer. 414D/419D/424D Users Manual Timer (419D/424D) Fluke recommends that you push . This prevents Meter movement when you use a time-delay for 2 seconds to lock the keypad. Push to increase up to begin...
Fluke 414D, 419D, 424D Laser Distance - Manual
Page 19
... Manual Calibration for more information. W Caution To prevent incorrect direction readouts, do not use the compass feature, the Meter shows the calibration message. Manual Calibration When you use near magnets and magnetic devices. See Compass Calibration for more information. • Compass arrows blink on the compass, the Meter shows the calibration message: 1. The compass uses old data that the endpiece is also useful to know the view or direction as...
Fluke 414D, 419D, 424D Laser Distance - Manual
Page 20
... more plainly, declination. The display shows and the current setting. For other declination values, contact your location: 1. To set the Meter with the correct compensation for your local Geomagnetic Institute. Push to change the value. 3. Push at different locations on the earth. The default value is minimal. 414D/419D/424D Users Manual 8 Z 180° Y 180°...
Fluke 414D, 419D, 424D Laser Distance - Manual
Page 22
... default reference point is on, the Meter beeps as you change to change the reference point between the front and the end of the Meter. When set . 414D/419D/424D Users Manual Clear Push : • 1x = Clear last value • 2x = Clear all • 2 seconds = Turn off Meter Measurements with a Tripod Measurements with the 419D and 424D that use...
Fluke 414D, 419D, 424D Laser Distance - Manual
Page 23
... time increases when you point the laser at dark surfaces. Laser Distance Meter Measurements Max. See Figure 10. 10 Min. Move the laser side to confirm that the Meter is in tracking mode. 2. When not identified, all models include...turn on the display to side, up and down on the display. It also can occur if you point the laser at colorless liquids, glass, Styrofoam, semi-permeable surfaces, and high-gloss surfaces. This manual identifies when a feature is a problem. Note Measurement errors can find the distance between objects. A target plate is useful...
Fluke 414D, 419D, 424D Laser Distance - Manual
Page 26
... target. 3. To change the units, push and hold the Meter without a transverse tilt (±10 °). Push 2x = Height tracking. shows in the display. 2. To measure: 1. Push 1x = Smart Horizontal Mode. ` shows in the display. 2. 414D/419D/424D Users Manual Tilt (424D only) Note The inclinometer senses tilts at the same time for more information. Push . ...
Fluke 414D, 419D, 424D Laser Distance - Manual
Page 29
...display. 2. The arrows in the display indicate in which direction the Meter needs to be set in the Meter and used to the stake out point, the beep changes and the arrows do not show on the display. 5. Stake Out Measurement (419D/424D) A specific distance can be moved in order to accept the value. Note Hold the buttons... is in the construction of 0.1 m (4 in the summary line between the stake out point and the Meter (rear reference). 4. Push 4x. An example of this application is on, the Meter starts to use the end reference point for the values. 3. See Figure 14 for more...
Fluke 414D, 419D, 424D Laser Distance - Manual
Page 32
...Meter is helpful to the wall. 6. 414D/419D/424D Users Manual Indirect Measurement The Meter can find a vertical distance with Pythagoras' theorem. See page 17 for more information. 26 414D To find a distance with the endpiece fully open and the Meter on the display...61475; 3x. shows on a wall. • Make sure that uses two or three measurements. With this is very helpful for a height measurement that the first measurement and the measurement distance are at 90...8226; For the best results, turn the Meter about a set point. Point the laser at the first target (1).
Fluke 414D, 419D, 424D Laser Distance - Manual
Page 36
414D/419D/424D Users Manual Message codes Table 5 is a list of measurement range 260 Laser beam interrupted Correct the range. Message Codes Code Cause Remedy 156 Transverse tilt greater than 10 ° Hold the Meter without a transverse tilt. 162 Calibration mistake 204 Calculation error Make sure that show on the display, then your Meter is on and turn off the device 2 to 3 times. Do the calibration procedure again...