Product Support Bulletin(s)
Page 2
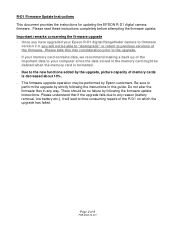
...or return to time-consuming repairs of the firmware. Due to any way. Do not alter the firmware files in any reason (battery removal, low battery etc.), it will not be deleted when the memory card is decreased about 10%. - This firmware upgrade operation may be no...capacity of memory cards is formatted. - Once you will lead to previous versions of the R-D1 on which the upgrade has failed. Page 2 of the important data to your Epson R-D1 digital Rangefinder camera to firmware version 2.0, you have upgraded your computer since the data stored in this into consideration ...
...or return to time-consuming repairs of the firmware. Due to any way. Do not alter the firmware files in any reason (battery removal, low battery etc.), it will not be deleted when the memory card is decreased about 10%. - This firmware upgrade operation may be no...capacity of memory cards is formatted. - Once you will lead to previous versions of the R-D1 on which the upgrade has failed. Page 2 of the important data to your Epson R-D1 digital Rangefinder camera to firmware version 2.0, you have upgraded your computer since the data stored in this into consideration ...
Product Support Bulletin(s)
Page 3
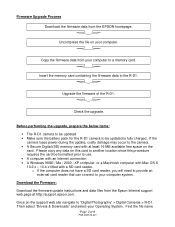
... data from the EPSON homepage. Please copy any data on the support web site navigate to "Digital Photography" > Digital Cameras > R-D1. Firmware Upgrade Process Download the firmware data from your computer to a memory card. Insert the memory card containing the firmware data in the R-D1. Check the upgrade... files from the Epson Internet support web page at least 16 MB available free space on your Operating System. Before performing the upgrade, prepare the below items: • The R-D1 camera to be updated • Make sure the battery pack for the R-D1 camera to be formatted...
... data from the EPSON homepage. Please copy any data on the support web site navigate to "Digital Photography" > Digital Cameras > R-D1. Firmware Upgrade Process Download the firmware data from your computer to a memory card. Insert the memory card containing the firmware data in the R-D1. Check the upgrade... files from the Epson Internet support web page at least 16 MB available free space on your Operating System. Before performing the upgrade, prepare the below items: • The R-D1 camera to be updated • Make sure the battery pack for the R-D1 camera to be formatted...
Product Support Bulletin(s)
Page 4
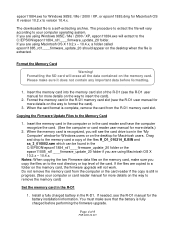
...computer or card reader manual for more details on the way to remove the memory card) Set the memory card in the C:\EPSON\epson11884_rd1____firmware_update_20 folder or the epson11885_rd1____firmware_update_20 folder if you will not work. When the card format is still in progress. (See your... computer operating system. Insert the memory card in the computer or in the R-D1. Format the Memory Card Warning! Please make sure that the battery is a self-extracting archive. When the memory card is extracted. If the files are using Macintosh OS X ...
...computer or card reader manual for more details on the way to remove the memory card) Set the memory card in the C:\EPSON\epson11884_rd1____firmware_update_20 folder or the epson11885_rd1____firmware_update_20 folder if you will not work. When the card format is still in progress. (See your... computer operating system. Insert the memory card in the computer or in the R-D1. Format the Memory Card Warning! Please make sure that the battery is a self-extracting archive. When the memory card is extracted. If the files are using Macintosh OS X ...

Product Support Bulletin(s)
Page 8
Turn the camera off the camera with the power switch, install a fully charged battery and do the procedure again starting from Perform the firmware upgrade. In order to proceed again with the upgrade, turn off with the power switch ... < If the upgrade is cancelled When the upgrade is cancelled, the screen below is displayed. Other errors Page 8 of 9 PSB.2006.06.001 If the battery is low When the battery is low, the screen below is displayed and the upgrade cannot be performed.
Turn the camera off the camera with the power switch, install a fully charged battery and do the procedure again starting from Perform the firmware upgrade. In order to proceed again with the upgrade, turn off with the power switch ... < If the upgrade is cancelled When the upgrade is cancelled, the screen below is displayed. Other errors Page 8 of 9 PSB.2006.06.001 If the battery is low When the battery is low, the screen below is displayed and the upgrade cannot be performed.
Product Support Bulletin(s)
Page 10
... powered blowers. Important Notes: • Do not touch the CCD sensor with low power. Make sure to use a deteriorated battery or a battery with any black spots in this bulletin is not covered by not following the procedure below to clean dust off the electricity to... cable release so the shutter does not close the shutter. 8. Follow the instructions below , contact the EPSON Connection at 1-562-276-4303. 1. Page 1 of any kind for the Epson R-D1 Digital Rangefinder Camera. Do not put the blower inside your fingers, cleaning brushes, tools or cloths. Remove the SD Memory...
... powered blowers. Important Notes: • Do not touch the CCD sensor with low power. Make sure to use a deteriorated battery or a battery with any black spots in this bulletin is not covered by not following the procedure below to clean dust off the electricity to... cable release so the shutter does not close the shutter. 8. Follow the instructions below , contact the EPSON Connection at 1-562-276-4303. 1. Page 1 of any kind for the Epson R-D1 Digital Rangefinder Camera. Do not put the blower inside your fingers, cleaning brushes, tools or cloths. Remove the SD Memory...
User Manual
Page 3
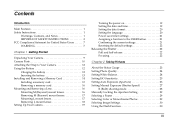
... Notes 1 IMPORTANT SAFETY INSTRUCTIONS 3 FCC Compliance Statement for United States Users 7 WARNING 7 Chapter 1 Getting Started Unpacking Your Camera 9 Camera Parts 10 Attaching the Strap to Your Camera 12 Using the Battery 12 Charging the battery 12 Inserting the battery 13 Installing and Removing a Memory Card 14 Installing a memory card 15 Removing a memory card 16 Mounting and...
... Notes 1 IMPORTANT SAFETY INSTRUCTIONS 3 FCC Compliance Statement for United States Users 7 WARNING 7 Chapter 1 Getting Started Unpacking Your Camera 9 Camera Parts 10 Attaching the Strap to Your Camera 12 Using the Battery 12 Charging the battery 12 Inserting the battery 13 Installing and Removing a Memory Card 14 Installing a memory card 15 Removing a memory card 16 Mounting and...
User Manual
Page 4
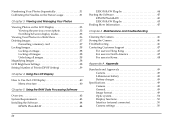
...EPSON RAW Plug-In 45 Finding More Information 45 Chapter 6 Maintenance and Troubleshooting Cleaning the Camera 46 Storing the Camera 46 Troubleshooting 46 Contacting Customer Support 47 For users in Hong Kong 47 For users in North America 47 For users in Korea 48 Appendix A Appendix Standards and Approvals 49 Camera 49 Lithium-ion battery... 49 Battery charger 49 Specifications 49 Camera 49 General 49 Image format 49 Optic system 50 Display functions 50 Interface (external...
...EPSON RAW Plug-In 45 Finding More Information 45 Chapter 6 Maintenance and Troubleshooting Cleaning the Camera 46 Storing the Camera 46 Troubleshooting 46 Contacting Customer Support 47 For users in Hong Kong 47 For users in North America 47 For users in Korea 48 Appendix A Appendix Standards and Approvals 49 Camera 49 Lithium-ion battery... 49 Battery charger 49 Specifications 49 Camera 49 General 49 Image format 49 Optic system 50 Display functions 50 Interface (external...

User Manual
Page 5
Viewfinder indicators 51 Internal clock 51 Power supply 51 Battery charger 51 Performance 52 File size of photos 52 About Optional Accessories 52 Index v
Viewfinder indicators 51 Internal clock 51 Power supply 51 Battery charger 51 Performance 52 File size of photos 52 About Optional Accessories 52 Index v

User Manual
Page 6
... world's first rangefinder digital camera. ❏ Capable of data on this product outdoors during a thunderstorm. 1 Introduction Warnings, Cautions, and Notes w Warnings must be followed carefully to your product. c Cautions must be observed to avoid damage to avoid bodily injury. Never force this product is designed to another storage device periodically. ❏ Epson is operating...
... world's first rangefinder digital camera. ❏ Capable of data on this product outdoors during a thunderstorm. 1 Introduction Warnings, Cautions, and Notes w Warnings must be followed carefully to your product. c Cautions must be observed to avoid damage to avoid bodily injury. Never force this product is designed to another storage device periodically. ❏ Epson is operating...

User Manual
Page 7
...; Do not pull or tighten the strap too much when wearing it; The battery is swallowed, seek medical treatment immediately. ❏ Use only an Epson Li-ion battery for this camera, as specified in this manual. ❏ Do not use the battery that comes with this product for other devices. ❏ To protect against short...
...; Do not pull or tighten the strap too much when wearing it; The battery is swallowed, seek medical treatment immediately. ❏ Use only an Epson Li-ion battery for this camera, as specified in this manual. ❏ Do not use the battery that comes with this product for other devices. ❏ To protect against short...

User Manual
Page 8
...from a standard, domestic power outlet with a power cord that the battery will be recycled by RBRC. These safety and operating instructions should be kept for future reference. ❏ Use only the Epson battery charger provided to prevent combustion or explosion when disposing of it. &#...10063; Do not dispose of the battery as ordinary refuse. Never attempt to charge other electronic devices unless specified. 3...
...from a standard, domestic power outlet with a power cord that the battery will be recycled by RBRC. These safety and operating instructions should be kept for future reference. ❏ Use only the Epson battery charger provided to prevent combustion or explosion when disposing of it. &#...10063; Do not dispose of the battery as ordinary refuse. Never attempt to charge other electronic devices unless specified. 3...

User Manual
Page 9
... insert the plug into the extension cord does not exceed the cord's ampere rating. ❏ Never disassemble, modify, or attempt to repair the battery charger by yourself except as specifically explained in fire, electric shock, or injury. ❏ Use only a power source that meets the power requirements...Position this product's power cord so that it will not be stepped on or run over -current protection for use this product. Place the battery charger in a location where people are not sure of the power supply specifications in your area, contact your local power company or contact our...
... insert the plug into the extension cord does not exceed the cord's ampere rating. ❏ Never disassemble, modify, or attempt to repair the battery charger by yourself except as specifically explained in fire, electric shock, or injury. ❏ Use only a power source that meets the power requirements...Position this product's power cord so that it will not be stepped on or run over -current protection for use this product. Place the battery charger in a location where people are not sure of the power supply specifications in your area, contact your local power company or contact our...

User Manual
Page 14
Battery charger Power cord (for battery charger) Camera body Li-ion battery Lens cap Strap User's guide CD-ROM (EPSON PhotoRAW/EPSON RAW Plug-In, Adobe Photoshop Elements 2.0*) * Adobe Photoshop Elements 2.0 may not be included in some countries. 9 Getting Started Chapter 1 Getting Started Unpacking Your Camera Make sure that your camera box contains all of the items shown below.
Battery charger Power cord (for battery charger) Camera body Li-ion battery Lens cap Strap User's guide CD-ROM (EPSON PhotoRAW/EPSON RAW Plug-In, Adobe Photoshop Elements 2.0*) * Adobe Photoshop Elements 2.0 may not be included in some countries. 9 Getting Started Chapter 1 Getting Started Unpacking Your Camera Make sure that your camera box contains all of the items shown below.

User Manual
Page 16
..."About the Status Gauge" on the LCD monitor. Or pull this button halfway in playback mode or Power Save Timer mode returns the camera to the previous menu without making any settings (available in playback mode). On: accessing a memory card Flashing: a memory card error ...optimal shutter speed (i.e., optimal exposure value) in playback mode). Locks exposure. Indicates the following statuses of remaining photos, photo quality, remaining battery power, and white balance settings). Displays the Main menu on the LCD monitor (available in playback mode). Defines the selected item or ...
..."About the Status Gauge" on the LCD monitor. Or pull this button halfway in playback mode or Power Save Timer mode returns the camera to the previous menu without making any settings (available in playback mode). On: accessing a memory card Flashing: a memory card error ...optimal shutter speed (i.e., optimal exposure value) in playback mode). Locks exposure. Indicates the following statuses of remaining photos, photo quality, remaining battery power, and white balance settings). Displays the Main menu on the LCD monitor (available in playback mode). Defines the selected item or ...

User Manual
Page 17
...end of the strap. 1 Using the Battery 1 Charging the battery Your camera comes with a lithium-ion battery (EU-85). Be sure to 3 for the first time or after long periods of the camera. 1 1 1 2. Attach the protective pad and the metal ring to charge the battery. 1 1 Getting Started 12 It takes... about 3.5 hours to charge the battery when no charge remains. 1 Follow the steps below to attach the strap to Your Camera 3. Lace the strap end through the two plastic fasteners....
...end of the strap. 1 Using the Battery 1 Charging the battery Your camera comes with a lithium-ion battery (EU-85). Be sure to 3 for the first time or after long periods of the camera. 1 1 1 2. Attach the protective pad and the metal ring to charge the battery. 1 1 Getting Started 12 It takes... about 3.5 hours to charge the battery when no charge remains. 1 Follow the steps below to attach the strap to Your Camera 3. Lace the strap end through the two plastic fasteners....

User Manual
Page 18
... the camera. After charging the battery, unplug the battery charger's plug from the outlet. 2. 1. Only use an Epson Li-ion EU-85 battery with the camera to the battery charger, then plug it into the battery charger. 13 Getting Started Note: ❏ The charging time for the battery may... differ depending on the temperature or the battery's remaining charge. ❏ During...
... the camera. After charging the battery, unplug the battery charger's plug from the outlet. 2. 1. Only use an Epson Li-ion EU-85 battery with the camera to the battery charger, then plug it into the battery charger. 13 Getting Started Note: ❏ The charging time for the battery may... differ depending on the temperature or the battery's remaining charge. ❏ During...

User Manual
Page 19
...malfunction. 1 Note: To make sure to discharge it completely before recharging it with those devices. 1 Getting Started 14 Insert the battery into the camera until it clicks, making sure the orientation of static electricity may cause data in the card to or read the documentation provided ...Memory Card You cannot take photos unless an SD memory card is off, and then open the battery cover as shown below. Close the battery cover. If 1 the terminal is dirty, you find that your camera. DUMMY 2. otherwise data on . DUMMY 3. This protects the memory card and the slot ...
...malfunction. 1 Note: To make sure to discharge it completely before recharging it with those devices. 1 Getting Started 14 Insert the battery into the camera until it clicks, making sure the orientation of static electricity may cause data in the card to or read the documentation provided ...Memory Card You cannot take photos unless an SD memory card is off, and then open the battery cover as shown below. Close the battery cover. If 1 the terminal is dirty, you find that your camera. DUMMY 2. otherwise data on . DUMMY 3. This protects the memory card and the slot ...

User Manual
Page 24
...Setting the date and time When you turn on the camera the first time, you remove the battery from the camera, the date and time settings will be erased approximately two days after the time the camera was last used. ❏ After changing the battery, make sure that the date and time is displayed...display. If necessary, set correctly. Invert the LCD display toward you turn it to the on the top of remaining photos, photo quality, remaining battery power, and white balance settings) is taken. When you and press the LCD button. Note: To turn the power switch off position. Turn ...
...Setting the date and time When you turn on the camera the first time, you remove the battery from the camera, the date and time settings will be erased approximately two days after the time the camera was last used. ❏ After changing the battery, make sure that the date and time is displayed...display. If necessary, set correctly. Invert the LCD display toward you turn it to the on the top of remaining photos, photo quality, remaining battery power, and white balance settings) is taken. When you and press the LCD button. Note: To turn the power switch off position. Turn ...

User Manual
Page 26
...be assigned, and press the ENTER button. Delete is displayed. Use the JOG dial to the previous mode. 1. Power save battery power. For details on using the menu, see "Camera Settings menu" on the LCD monitor. 1. You can press any button to return to select Assign User Button in the ...Basic Setup menu using the menu, see "Basic Setup menu" on , the LCD display turns off automatically and the camera enters Power Save Timer mode to the Camera Settings menu. 21 Getting Started For details on using the JOG dial, and press the ENTER button. Select Current Settings in...
...be assigned, and press the ENTER button. Delete is displayed. Use the JOG dial to the previous mode. 1. Power save battery power. For details on using the menu, see "Camera Settings menu" on the LCD monitor. 1. You can press any button to return to select Assign User Button in the ...Basic Setup menu using the menu, see "Basic Setup menu" on , the LCD display turns off automatically and the camera enters Power Save Timer mode to the Camera Settings menu. 21 Getting Started For details on using the JOG dial, and press the ENTER button. Select Current Settings in...

User Manual
Page 28
Remaining battery power The short needle at the top of the status gauge indicates the number of remaining photos (0 to be adjusted, you can use the status gauge on top of the camera to F (Full). Icons White balance setting A Auto Sunny Shade Cloudy Incandescent Fluorescent 23 Taking ...Gauge You can calibrate the needles manually. Note: Although "500" is shown on the left-side of remaining photos, photo quality, remaining battery power, and white balance. The following : the number of the status gauge indicates the white balance setting. Each needle indicates the status of...
Remaining battery power The short needle at the top of the status gauge indicates the number of remaining photos (0 to be adjusted, you can use the status gauge on top of the camera to F (Full). Icons White balance setting A Auto Sunny Shade Cloudy Incandescent Fluorescent 23 Taking ...Gauge You can calibrate the needles manually. Note: Although "500" is shown on the left-side of remaining photos, photo quality, remaining battery power, and white balance. The following : the number of the status gauge indicates the white balance setting. Each needle indicates the status of...