Product Support Bulletin(s)
Page 3
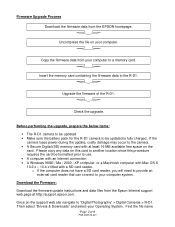
...sure the battery pack for the R-D1 camera to be formatted prior to use. • A computer with an internet connection • A Windows 98SE / Me / 2000 / XP computer, or a Macintosh computer with Mac OS X 10.2.x - 10.4.x fitted with at http://support.epson.com. Download the Firmware: Download ...this card to the camera. • A Secure Digital (SD) memory card with a SD card reader. o If the computer does not have a SD card reader, you will need to provide an external card reader that can connect to your computer to "Digital Photography" > Digital Cameras > R-D1. Find the file ...
...sure the battery pack for the R-D1 camera to be formatted prior to use. • A computer with an internet connection • A Windows 98SE / Me / 2000 / XP computer, or a Macintosh computer with Mac OS X 10.2.x - 10.4.x fitted with at http://support.epson.com. Download the Firmware: Download ...this card to the camera. • A Secure Digital (SD) memory card with a SD card reader. o If the computer does not have a SD card reader, you will need to provide an external card reader that can connect to your computer to "Digital Photography" > Digital Cameras > R-D1. Find the file ...
Product Support Bulletin(s)
Page 4
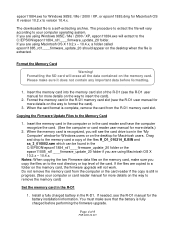
...Memory Card 1. Please make sure you are copied to a folder on the memory card, the firmware upgrade will extract to the C:\EPSON\epson11884_rd1____firmware_update_20 folder. Format the memory card in the card reader and have the computer recognize the card. (See the computer or card ... the memory card into the memory card slot of the files R_D1_010214_E.BIN and ss_3_010002.ram which can be found in the R-D1 1. If the files are using Macintosh OS X 10.2.x - 10.4.x, a folder called epson11885_rd1____firmware_update_20 should appear on the desktop when the file is fully charged before...
...Memory Card 1. Please make sure you are copied to a folder on the memory card, the firmware upgrade will extract to the C:\EPSON\epson11884_rd1____firmware_update_20 folder. Format the memory card in the card reader and have the computer recognize the card. (See the computer or card ... the memory card into the memory card slot of the files R_D1_010214_E.BIN and ss_3_010002.ram which can be found in the R-D1 1. If the files are using Macintosh OS X 10.2.x - 10.4.x, a folder called epson11885_rd1____firmware_update_20 should appear on the desktop when the file is fully charged before...

Product Support Bulletin(s)
Page 6
... upgraded Turn on the R-D1 with the power switch, turn the JOG Dial to select "LCD Brightness" and press the ENTER Page 6 of 9 PSB.2006.06.001 Confirm that the Version is "2.0", and then turn off the camera with the MENU Button Select "Settings" (you may need to use the JOG Dial if... you have images on the SD Card) and press the ENTER Button Use the JOG Dial to select "Basic Setup" and Press the ENTER Button...
... upgraded Turn on the R-D1 with the power switch, turn the JOG Dial to select "LCD Brightness" and press the ENTER Page 6 of 9 PSB.2006.06.001 Confirm that the Version is "2.0", and then turn off the camera with the MENU Button Select "Settings" (you may need to use the JOG Dial if... you have images on the SD Card) and press the ENTER Button Use the JOG Dial to select "Basic Setup" and Press the ENTER Button...
Product Support Bulletin(s)
Page 10
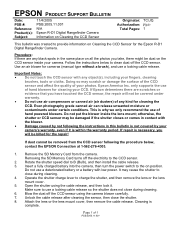
... Even photography grade canned air can release unwanted moisture or contaminants under warranty. • Do not use of hand blowers for cameras (manual type without a brush), and use a locking cable release so the shutter does not close during cleaning. 4. If repair is complete... for the Epson R-D1 Digital Rangefinder Camera. It may scratch or damage the surface of the CCD sensor and affect the quality of 1 PSB.2005.11.001 EPSON PRODUCT SUPPORT BULLETIN Date: PSB #: Reference: Product(s): Subject: 11/4/2005 PSB.2005.11.001 N/A Epson R-D1 Digital Rangefinder Camera Information on ...
... Even photography grade canned air can release unwanted moisture or contaminants under warranty. • Do not use of hand blowers for cameras (manual type without a brush), and use a locking cable release so the shutter does not close during cleaning. 4. If repair is complete... for the Epson R-D1 Digital Rangefinder Camera. It may scratch or damage the surface of the CCD sensor and affect the quality of 1 PSB.2005.11.001 EPSON PRODUCT SUPPORT BULLETIN Date: PSB #: Reference: Product(s): Subject: 11/4/2005 PSB.2005.11.001 N/A Epson R-D1 Digital Rangefinder Camera Information on ...

User Manual
Page 2
... be liable to other than those designated as Original Epson Products or Epson Approved Products by Seiko Epson Corporation, Nagano, Japan ii Epson is a trademark of this Epson product. EPSON is a registered trademark and EPSON Stylus is not responsible for any damages or problems arising from the use with Seiko Epson Corporation's operating and maintenance instructions. Apple and Macintosh...
... be liable to other than those designated as Original Epson Products or Epson Approved Products by Seiko Epson Corporation, Nagano, Japan ii Epson is a trademark of this Epson product. EPSON is a registered trademark and EPSON Stylus is not responsible for any damages or problems arising from the use with Seiko Epson Corporation's operating and maintenance instructions. Apple and Macintosh...
User Manual
Page 3
... IMPORTANT SAFETY INSTRUCTIONS 3 FCC Compliance Statement for United States Users 7 WARNING 7 Chapter 1 Getting Started Unpacking Your Camera 9 Camera Parts 10 Attaching the Strap to Your Camera 12 Using the Battery 12 Charging the battery 12 Inserting the battery 13 Installing and Removing a Memory Card 14 Installing a memory... mount lenses 16 Removing M (Bayonet) mount lenses 17 Mounting L mount lenses 17 Removing L mount lenses 18 Setting Up Your Camera 19 Turning the power on 19 Setting the date and time 19 Setting the date format 20 Setting the language 20 Power save ...
... IMPORTANT SAFETY INSTRUCTIONS 3 FCC Compliance Statement for United States Users 7 WARNING 7 Chapter 1 Getting Started Unpacking Your Camera 9 Camera Parts 10 Attaching the Strap to Your Camera 12 Using the Battery 12 Charging the battery 12 Inserting the battery 13 Installing and Removing a Memory Card 14 Installing a memory... mount lenses 16 Removing M (Bayonet) mount lenses 17 Mounting L mount lenses 17 Removing L mount lenses 18 Setting Up Your Camera 19 Turning the power on 19 Setting the date and time 19 Setting the date format 20 Setting the language 20 Power save ...
User Manual
Page 4
... structure 40 Chapter 5 Using the RAW Data Processing Software Overview 43 System Requirements 43 Installing the Software 44 EPSON PhotoRAW 44 EPSON RAW Plug-In 44 Starting the Software 45 EPSON PhotoRAW 45 EPSON RAW Plug-In 45 Finding More Information 45 Chapter 6 Maintenance and Troubleshooting Cleaning the Camera 46 Storing the Camera 46 Troubleshooting 46 Contacting...
... structure 40 Chapter 5 Using the RAW Data Processing Software Overview 43 System Requirements 43 Installing the Software 44 EPSON PhotoRAW 44 EPSON RAW Plug-In 44 Starting the Software 45 EPSON PhotoRAW 45 EPSON RAW Plug-In 45 Finding More Information 45 Chapter 6 Maintenance and Troubleshooting Cleaning the Camera 46 Storing the Camera 46 Troubleshooting 46 Contacting...

User Manual
Page 6
... rangefinder digital camera. ❏ Capable of these instructions before using this product, and keep this guide handy for any openings. ❏ Do not touch the components inside this product unless instructed to rain or moisture. ❏ To prevent fire or explosion, do so in ERF (EPSON ...loss or corruption of your equipment. Note: ❏ Do not expose the camera to use most standard lenses such as Leica M/L mount lenses. ❏ Provides accurate framing using the EPSON PhotoRAW or EPSON RAW Plug-In applications provided. Follow all of mounting existing lenses. Data can...
... rangefinder digital camera. ❏ Capable of these instructions before using this product, and keep this guide handy for any openings. ❏ Do not touch the components inside this product unless instructed to rain or moisture. ❏ To prevent fire or explosion, do so in ERF (EPSON ...loss or corruption of your equipment. Note: ❏ Do not expose the camera to use most standard lenses such as Leica M/L mount lenses. ❏ Provides accurate framing using the EPSON PhotoRAW or EPSON RAW Plug-In applications provided. Follow all of mounting existing lenses. Data can...

User Manual
Page 7
...The battery is swallowed, seek medical treatment immediately. ❏ Use only an Epson Li-ion battery for other devices. ❏ To protect ... open flame or in the wrong orientation may damage both devices connected by the cable. ❏ Do not use this product after the regular charging time, stop charging. ❏ Do not place the battery into a high...it . Each connector has only one provided with this camera, as cigarette lighters. ❏ Charge the battery before using the strap ❏ Do not swing the camera about. When using it ; Introduction 2 If it . If a battery...
...The battery is swallowed, seek medical treatment immediately. ❏ Use only an Epson Li-ion battery for other devices. ❏ To protect ... open flame or in the wrong orientation may damage both devices connected by the cable. ❏ Do not use this product after the regular charging time, stop charging. ❏ Do not place the battery into a high...it . Each connector has only one provided with this camera, as cigarette lighters. ❏ Charge the battery before using the strap ❏ Do not swing the camera about. When using it ; Introduction 2 If it . If a battery...

User Manual
Page 8
... niet weggooien maar inleveren als KCA. These safety and operating instructions should be kept for future reference. ❏ Use only the Epson battery charger provided to water or high humidity. ❏ Use only the type of power source indicated on the battery charger's label, and always supply power directly from a ...the relevant local safety standards. ❏ Place the battery charger near water. ❏ Do not expose the battery charger to charge the Epson Li-ion battery Model EU-85. For German users: Do not dispose of the battery with tape to completely cover both ends of the...
... niet weggooien maar inleveren als KCA. These safety and operating instructions should be kept for future reference. ❏ Use only the Epson battery charger provided to water or high humidity. ❏ Use only the type of power source indicated on the battery charger's label, and always supply power directly from a ...the relevant local safety standards. ❏ Place the battery charger near water. ❏ Do not expose the battery charger to charge the Epson Li-ion battery Model EU-85. For German users: Do not dispose of the battery with tape to completely cover both ends of the...

User Manual
Page 9
... product, make sure the total amperage of all devices plugged into the power outlet does not exceed the power outlet's ampere rating. ❏ If you use an extension cord with a 125 V 10 A plug and 125 V 7 A connector. ❏ The battery charger included is not pinched by wall switches... or automatic timers. ❏ Do not use power outlets controlled by items placed upon or against it enters the transformer. ❏ Do not let the power cord become damaged or frayed. Place...
... product, make sure the total amperage of all devices plugged into the power outlet does not exceed the power outlet's ampere rating. ❏ If you use an extension cord with a 125 V 10 A plug and 125 V 7 A connector. ❏ The battery charger included is not pinched by wall switches... or automatic timers. ❏ Do not use power outlets controlled by items placed upon or against it enters the transformer. ❏ Do not let the power cord become damaged or frayed. Place...

User Manual
Page 11
... wash them immediately with the letter N. If discomfort or vision problems remain after a thorough flushing, see a doctor immediately. ❏ Only use liquid or chemical cleaners. For United Kingdom, Hong Kong, and Singapore users Replace fuses only with the letter L. Neutral Brown - The brown...These are normal and do not mean that the appliance voltage corresponds to the supply voltage. When using memory cards vary according to card type. When storing, maintaining, or transporting the camera ❏ Do not store this product outdoors. ❏ Do not store this product near water...
... wash them immediately with the letter N. If discomfort or vision problems remain after a thorough flushing, see a doctor immediately. ❏ Only use liquid or chemical cleaners. For United Kingdom, Hong Kong, and Singapore users Replace fuses only with the letter L. Neutral Brown - The brown...These are normal and do not mean that the appliance voltage corresponds to the supply voltage. When using memory cards vary according to card type. When storing, maintaining, or transporting the camera ❏ Do not store this product outdoors. ❏ Do not store this product near water...

User Manual
Page 12
...and Power Supplies used in accordance with this device. MS 3-13 3840 Kilroy Airport Way Long Beach, CA 90806 Telephone: (562) 290-5254 7 Introduction For Canadian users This Class B digital apparatus complies with Class B Personal Computers: We: Located at: EPSON AMERICA, INC.... DECLARATION of CONFORMITY According to 47CFR, Part 2 and 15 for a Class B digital device, pursuant to radio and television reception, which exceed ...
...and Power Supplies used in accordance with this device. MS 3-13 3840 Kilroy Airport Way Long Beach, CA 90806 Telephone: (562) 290-5254 7 Introduction For Canadian users This Class B digital apparatus complies with Class B Personal Computers: We: Located at: EPSON AMERICA, INC.... DECLARATION of CONFORMITY According to 47CFR, Part 2 and 15 for a Class B digital device, pursuant to radio and television reception, which exceed ...

User Manual
Page 16
...-lock button Photo quality/WB lever SD card access LED LCD button MENU button ENTER button CANCEL button USER button LCD display Shutter button Used to mount optional equipment such as a flash or external viewfinder. Locks exposure. Displays the Main menu on page 40...settings (available in the viewfinder. For details, see "Menu structure" on the LCD monitor (available in playback mode or Power Save Timer mode returns the camera to take a photo. Navigates through the menus or photos displayed on /off. Or pull this button fully down to display the optimal shutter speed (i.e., ...
...-lock button Photo quality/WB lever SD card access LED LCD button MENU button ENTER button CANCEL button USER button LCD display Shutter button Used to mount optional equipment such as a flash or external viewfinder. Locks exposure. Displays the Main menu on page 40...settings (available in the viewfinder. For details, see "Menu structure" on the LCD monitor (available in playback mode or Power Save Timer mode returns the camera to take a photo. Navigates through the menus or photos displayed on /off. Or pull this button fully down to display the optimal shutter speed (i.e., ...

User Manual
Page 17
... charge remains. 1 Follow the steps below to attach the strap to 1 charge the battery before using the camera for the other end of the strap. 1 Using the Battery 1 Charging the battery Your camera comes with a lithium-ion battery (EU-85). Be sure to the camera. 1. Attach the protective pad and the metal ring to Your...
... charge remains. 1 Follow the steps below to attach the strap to 1 charge the battery before using the camera for the other end of the strap. 1 Using the Battery 1 Charging the battery Your camera comes with a lithium-ion battery (EU-85). Be sure to the camera. 1. Attach the protective pad and the metal ring to Your...

User Manual
Page 18
...the battery out when the charge lamp turns off. Inserting the battery Your camera uses the lithium-ion battery (EU-85) provided. Place the battery into a power outlet. 3. Only use an Epson Li-ion EU-85 battery with the camera to the battery charger, then plug it into the battery charger. 13 ... status: On: Indicates the battery is not fully seated in the battery charger. 1. Connect the power cord that came with the camera. Off: Indicates charging is complete or the battery is charging. After charging the battery, unplug the battery charger's plug from the outlet. 2.
...the battery out when the charge lamp turns off. Inserting the battery Your camera uses the lithium-ion battery (EU-85) provided. Place the battery into a power outlet. 3. Only use an Epson Li-ion EU-85 battery with the camera to the battery charger, then plug it into the battery charger. 13 ... status: On: Indicates the battery is not fully seated in the battery charger. 1. Connect the power cord that came with the camera. Off: Indicates charging is complete or the battery is charging. After charging the battery, unplug the battery charger's plug from the outlet. 2.

User Manual
Page 19
... you are extremely hot, humid, or dusty. ❏ Keep the memory card slot cover closed while the memory card is loaded. Make sure that your camera. Insert the battery into the camera until it a number 1 of times, make sure to malfunction. 1 Note: To make sure you find that the... soon after recharging it clicks, making sure the orientation of static electricity may cause data in the card to be lost or 1 damaged. ❏ Avoid using or storing the card in direct sunlight, or in places that case, replace it . Doing so may cause the memory card to discharge it completely...
... you are extremely hot, humid, or dusty. ❏ Keep the memory card slot cover closed while the memory card is loaded. Make sure that your camera. Insert the battery into the camera until it a number 1 of times, make sure to malfunction. 1 Note: To make sure you find that the... soon after recharging it clicks, making sure the orientation of static electricity may cause data in the card to be lost or 1 damaged. ❏ Avoid using or storing the card in direct sunlight, or in places that case, replace it . Doing so may cause the memory card to discharge it completely...

User Manual
Page 20
Using an SD memory card formatted by your camera. For details, see a message on the LCD display instructing you format...Close the memory card cover. Installing a memory card 1. The write protect tab The memory card is equipped with the camera's lock function. ❏ While formatting an SD memory card, do so. Write protect tab DUMMY 15 Getting Started ...Note: When inserting the memory card, make sure the orientation of the camera. When this tab is in the locked position, photos on the card is off, and then open the memory ...
Using an SD memory card formatted by your camera. For details, see a message on the LCD display instructing you format...Close the memory card cover. Installing a memory card 1. The write protect tab The memory card is equipped with the camera's lock function. ❏ While formatting an SD memory card, do so. Write protect tab DUMMY 15 Getting Started ...Note: When inserting the memory card, make sure the orientation of the camera. When this tab is in the locked position, photos on the card is off, and then open the memory ...

User Manual
Page 21
... not ejected, push the memory card down until you release your finger into the camera by attaching the optional M-Bayonet adapter ring. Lenses that cannot be used because of the structure of an image taken with this camera. HEKTOR 50 mm F2.5 1 - Push the memory card down again. 3. ... M (Bayonet) mount lenses 1. ELMAR 50 mm F3.5 ❏ Even with the same lens, the image quality using this camera may differ from that can be used include: - c Caution: Never remove a memory card while the access light is off, and then open the memory card cover. SUPER ANGULON 21 mm...
... not ejected, push the memory card down until you release your finger into the camera by attaching the optional M-Bayonet adapter ring. Lenses that cannot be used because of the structure of an image taken with this camera. HEKTOR 50 mm F2.5 1 - Push the memory card down again. 3. ... M (Bayonet) mount lenses 1. ELMAR 50 mm F3.5 ❏ Even with the same lens, the image quality using this camera may differ from that can be used include: - c Caution: Never remove a memory card while the access light is off, and then open the memory card cover. SUPER ANGULON 21 mm...

User Manual
Page 22
...: ❏ When you install an L mount lens, you hear a click. 2. Pull the lens straight out of them can be used. ❏ For more information on mounting an M-Bayonet adapter ring on the camera body, see the M-Bayonet adapter ring manual. 1. Removing M (Bayonet) mount lenses 1. Insert the lens and turn it will go...
...: ❏ When you install an L mount lens, you hear a click. 2. Pull the lens straight out of them can be used. ❏ For more information on mounting an M-Bayonet adapter ring on the camera body, see the M-Bayonet adapter ring manual. 1. Removing M (Bayonet) mount lenses 1. Insert the lens and turn it will go...
