
Network Guide
Page 2
... for damages, losses, costs, or expenses incurred by any consumable products other than those designated as Original Epson Products or Epson Approved Products by Seiko Epson Corporation. Copyright and Trademarks No part of this publication may be reproduced, stored in a retrieval system, or... from the use of any options or any means, mechanical, photocopying, recording, or otherwise, without the prior written permission of Seiko Epson Corporation. All rights reserved. Miller, Sergio Monesi, Keith Owens, George Petrov, Greg Roelofs, Kai Uwe Rommel, Steve Salisbury, Dave Smith...
... for damages, losses, costs, or expenses incurred by any consumable products other than those designated as Original Epson Products or Epson Approved Products by Seiko Epson Corporation. Copyright and Trademarks No part of this publication may be reproduced, stored in a retrieval system, or... from the use of any options or any means, mechanical, photocopying, recording, or otherwise, without the prior written permission of Seiko Epson Corporation. All rights reserved. Miller, Sergio Monesi, Keith Owens, George Petrov, Greg Roelofs, Kai Uwe Rommel, Steve Salisbury, Dave Smith...
Network Guide
Page 3
Trademarks Epson and Epson Stylus are for identification purposes only and may be trademarks of their respective owners. Epson disclaims any purpose, including commercial applications, and to alter it and redistribute it freely, subject to the above disclaimer and the ...as being Info-ZIP releases--including, but not limited to, different capitalizations), "Pocket UnZip," "WiZ" or "MacZip" without notice. © 2009 Epson America, Inc. 11/09 CPD-27725 Copyright and Trademarks 3 This information is subject to change without the explicit permission of Info-ZIP. Such altered...
Trademarks Epson and Epson Stylus are for identification purposes only and may be trademarks of their respective owners. Epson disclaims any purpose, including commercial applications, and to alter it and redistribute it freely, subject to the above disclaimer and the ...as being Info-ZIP releases--including, but not limited to, different capitalizations), "Pocket UnZip," "WiZ" or "MacZip" without notice. © 2009 Epson America, Inc. 11/09 CPD-27725 Copyright and Trademarks 3 This information is subject to change without the explicit permission of Info-ZIP. Such altered...

Network Guide
Page 4
Contents Chapter 1 Introduction About Your Printer 6 About This Guide 6 Warnings, Cautions, and Notes 7 Operating Environment 7 Features of the Network Interface 8 Network Interface Operation 9 Status lights 9 Network connector 9 About the Software 10 Terms and Concepts 10 Chapter 2 Setting Up Your System for Network Printing Overview 11 Installing Network Components on Your Computer 12 Windows 7 and Windows Vista 12 Windows XP 14 Mac OS X 15 Setting Up the Network Interface 16 Connecting the Network Interface to the Network 16 Configuring the Network Interface 17 Printing a ...
Contents Chapter 1 Introduction About Your Printer 6 About This Guide 6 Warnings, Cautions, and Notes 7 Operating Environment 7 Features of the Network Interface 8 Network Interface Operation 9 Status lights 9 Network connector 9 About the Software 10 Terms and Concepts 10 Chapter 2 Setting Up Your System for Network Printing Overview 11 Installing Network Components on Your Computer 12 Windows 7 and Windows Vista 12 Windows XP 14 Mac OS X 15 Setting Up the Network Interface 16 Connecting the Network Interface to the Network 16 Configuring the Network Interface 17 Printing a ...

Network Guide
Page 5
About EpsonNet Config 27 Accessing the EpsonNet Config User's Guide 27 EpsonNet Config with Web Browser 27 About EpsonNet Config 27 Configuring the Network Interface Using EpsonNet Config With a Web Browser . 29 Opening Screen 32 Chapter 4 Troubleshooting General Problems 34 Chapter 5 Uninstalling Software Windows 7 and Windows Vista 36 Windows XP 36 Mac OS X 36 Index 5
About EpsonNet Config 27 Accessing the EpsonNet Config User's Guide 27 EpsonNet Config with Web Browser 27 About EpsonNet Config 27 Configuring the Network Interface Using EpsonNet Config With a Web Browser . 29 Opening Screen 32 Chapter 4 Troubleshooting General Problems 34 Chapter 5 Uninstalling Software Windows 7 and Windows Vista 36 Windows XP 36 Mac OS X 36 Index 5

Network Guide
Page 6
If you want to configure the network interface to quickly and easily configure the network interface. The configuration utility is provided with protocols that you to use TCP/IP and SNMP network protocols, use EpsonNet Config. The protocols that the network interface can use all of the above-mentioned protocols on your network. The built-in Ethernet interface and can connect anywhere on your network using the network interface on a network. You can print from Microsoft® Windows® and Mac OS® X applications. It includes how to the network. About This Guide This ...
If you want to configure the network interface to quickly and easily configure the network interface. The configuration utility is provided with protocols that you to use TCP/IP and SNMP network protocols, use EpsonNet Config. The protocols that the network interface can use all of the above-mentioned protocols on your network. The built-in Ethernet interface and can connect anywhere on your network using the network interface on a network. You can print from Microsoft® Windows® and Mac OS® X applications. It includes how to the network. About This Guide This ...
Network Guide
Page 7
"Administrator" is written for network administrators, and many of the steps included in this guide require detailed network knowledge and administrator rights. ❏ The term "network administrator" in this guide refers to the person responsible for maintaining the network. Notes contain important information and useful tips on the operation of your equipment. c Cautions must be observed to avoid damage to avoid bodily injury. This does not alter the instructions. Warnings, Cautions, and Notes w Warnings must be followed carefully to your printer. OS Windows 7 ...
"Administrator" is written for network administrators, and many of the steps included in this guide require detailed network knowledge and administrator rights. ❏ The term "network administrator" in this guide refers to the person responsible for maintaining the network. Notes contain important information and useful tips on the operation of your equipment. c Cautions must be observed to avoid damage to avoid bodily injury. This does not alter the instructions. Warnings, Cautions, and Notes w Warnings must be followed carefully to your printer. OS Windows 7 ...
Network Guide
Page 8
Features of the Network Interface ❏ Connects your Epson printer using a built-in Ethernet interface, which is called the network interface in this manual, to the network. ❏ Supports multiple protocols, such as TCP/...
Features of the Network Interface ❏ Connects your Epson printer using a built-in Ethernet interface, which is called the network interface in this manual, to the network. ❏ Supports multiple protocols, such as TCP/...

Network Guide
Page 9
IndicateInsdcicoantnees cctoionnnetcytpioen type RJR-4J-545ccoonnnneecctotorr Flashes when data is Fitsrlaraesnhcseemsivweithdteedn odratraeceived The light on the left is solid green and the light on the right flashes when data is not connected to the network. c Caution: You must use an Ethernet cable for both 10Base-T and 100Base-TX. Network connector The RJ-45 connector is connected to a 10Base-T (green) or 100Base-TX (orange) network. Introduction 9 The light on the right is off, the printer is being transmitted or received. You can use a Category-5 or higher shielded...
IndicateInsdcicoantnees cctoionnnetcytpioen type RJR-4J-545ccoonnnneecctotorr Flashes when data is Fitsrlaraesnhcseemsivweithdteedn odratraeceived The light on the left is solid green and the light on the right flashes when data is not connected to the network. c Caution: You must use an Ethernet cable for both 10Base-T and 100Base-TX. Network connector The RJ-45 connector is connected to a 10Base-T (green) or 100Base-TX (orange) network. Introduction 9 The light on the right is off, the printer is being transmitted or received. You can use a Category-5 or higher shielded...

Network Guide
Page 10
About the Software The software CD provided with your printer includes the following network software. ❏ EpsonNet Config for Windows is a Windows-based configuration utility that controls how data or information is exchanged through a network. a dynamic host configuration protocol. a rule that allows you to configure the network interface. Terms and Concepts Configuration -- Configuring the network interface is a protocol that allows you to devices on a network. 10 Introduction It is to prepare it to configure the network interface. Protocol -- a prepared set of ...
About the Software The software CD provided with your printer includes the following network software. ❏ EpsonNet Config for Windows is a Windows-based configuration utility that controls how data or information is exchanged through a network. a dynamic host configuration protocol. a rule that allows you to configure the network interface. Terms and Concepts Configuration -- Configuring the network interface is a protocol that allows you to devices on a network. 10 Introduction It is to prepare it to configure the network interface. Protocol -- a prepared set of ...

Network Guide
Page 11
See "Configuring the Network Interface" on page 17 for details. 2. For Macintosh users, see "About EpsonNet Config" on page 26. Install the necessary network components on your computers, and network settings (such as the status lights. If necessary, configure the network settings of the network interface, such as the IP address, subnet mask, etc.) are installed on your computers. Configure the network interface using EpsonNet Config. See "Network Interface Operation" on page 9 for details. 5. Connect the network interface to the network. Connect the network ...
See "Configuring the Network Interface" on page 17 for details. 2. For Macintosh users, see "About EpsonNet Config" on page 26. Install the necessary network components on your computers, and network settings (such as the status lights. If necessary, configure the network settings of the network interface, such as the IP address, subnet mask, etc.) are installed on your computers. Configure the network interface using EpsonNet Config. See "Network Interface Operation" on page 9 for details. 5. Connect the network interface to the network. Connect the network ...

Network Guide
Page 12
Note: If you see the User Account Control screen, click Yes or Continue. 12 Setting Up Your System for your computer, depending on Your Computer Before configuring the network interface and printing from the computer, you need to set the IP address, the subnet mask, and the default gateway of the computer. 1. See the section in this chapter appropriate for Network Printing Click , click Control Panel, and then click View network status and tasks or double-click Network and Sharing Center. 2. Click Local Area Connection (Windows 7) or View Status (Windows Vista), and then click the ...
Note: If you see the User Account Control screen, click Yes or Continue. 12 Setting Up Your System for your computer, depending on Your Computer Before configuring the network interface and printing from the computer, you need to set the IP address, the subnet mask, and the default gateway of the computer. 1. See the section in this chapter appropriate for Network Printing Click , click Control Panel, and then click View network status and tasks or double-click Network and Sharing Center. 2. Click Local Area Connection (Windows 7) or View Status (Windows Vista), and then click the ...

Network Guide
Page 13
The following table lists the network components required for Network Printing 13 Setting Up Your System for configuring the network interface with EpsonNet Config. Printing method LPR printing Necessary components Internet Protocol (TCP/IP) 4. Set the IP address, the subnet mask, etc. Double-click Internet Protocol Version 4 (TCP/IPv4) on the Local Area Connection Properties dialog box to the Network" on page 16. Restart the computer. Check if the following table lists the network components required for network printing. and then click OK. 6. If the necessary ...
The following table lists the network components required for Network Printing 13 Setting Up Your System for configuring the network interface with EpsonNet Config. Printing method LPR printing Necessary components Internet Protocol (TCP/IP) 4. Set the IP address, the subnet mask, etc. Double-click Internet Protocol Version 4 (TCP/IPv4) on the Local Area Connection Properties dialog box to the Network" on page 16. Restart the computer. Check if the following table lists the network components required for network printing. and then click OK. 6. If the necessary ...

Network Guide
Page 14
Note: The Windows XP CD may be required during the installation. 1. Check if the following procedure to install the necessary components. Windows XP For Windows XP, use the following network components are in the list. Click Start, select Control Panel, and then select Network Connections. 2. EpsonNet Config's setting screens TCP/IP, SNMP (IP trap) Necessary components Internet Protocol (TCP/IP) 14 Setting Up Your System for configuring the network interface with EpsonNet Config. Under LAN or High-Speed Internet, right-click the Local Area Connection icon and choose ...
Note: The Windows XP CD may be required during the installation. 1. Check if the following procedure to install the necessary components. Windows XP For Windows XP, use the following network components are in the list. Click Start, select Control Panel, and then select Network Connections. 2. EpsonNet Config's setting screens TCP/IP, SNMP (IP trap) Necessary components Internet Protocol (TCP/IP) 14 Setting Up Your System for configuring the network interface with EpsonNet Config. Under LAN or High-Speed Internet, right-click the Local Area Connection icon and choose ...

Network Guide
Page 15
Printing method LPR printing Necessary components Internet Protocol (TCP/IP) 4. Click the TCP/IP tab. Click the Apply Now button to open the Internet Protocols (TCP/IP) Properties dialog box. Assign an IP address and other settings if necessary. 5. For LPR printing: Double-click Internet Protocol (TCP/IP) on page 16. and then click OK. 6. The necessary components are not in Ethernet from the Configure menu, and then assign the IP address. 3. Mac OS X To assign an IP address, subnet mask, etc. From the Apple menu, select System Preferences. 2. to the Network" on...
Printing method LPR printing Necessary components Internet Protocol (TCP/IP) 4. Click the TCP/IP tab. Click the Apply Now button to open the Internet Protocols (TCP/IP) Properties dialog box. Assign an IP address and other settings if necessary. 5. For LPR printing: Double-click Internet Protocol (TCP/IP) on page 16. and then click OK. 6. The necessary components are not in Ethernet from the Configure menu, and then assign the IP address. 3. Mac OS X To assign an IP address, subnet mask, etc. From the Apple menu, select System Preferences. 2. to the Network" on...

Network Guide
Page 16
Make sure that your printer is on a network just by default, you can use both 10Base-T and 100Base-TX. When you print a lot of the network cable to the network. See "Configuring the Network Interface" on . Turn on the network interface, and the other end to the network. Now you can use a Category 5 or higher shielded twisted-pair cable to connect the network interface to use the printer's control panel. Note: You can configure the network interface to prevent malfunction. ❏ Do not connect or disconnect the network cable when the printer is on page 17 for your ...
Make sure that your printer is on a network just by default, you can use both 10Base-T and 100Base-TX. When you print a lot of the network cable to the network. See "Configuring the Network Interface" on . Turn on the network interface, and the other end to the network. Now you can use a Category 5 or higher shielded twisted-pair cable to connect the network interface to use the printer's control panel. Note: You can configure the network interface to prevent malfunction. ❏ Do not connect or disconnect the network cable when the printer is on page 17 for your ...

Network Guide
Page 17
A checkmark (✓) appears next to ENABLE to show that the printer is turned on the printer's control panel (available only when NETWORK SETUP is set to ENABLE): Item NETWORK SETUP IP ADDRESS SETTING IP,SM,DG SETTING APPLE TALK MS NETWORK BONJOUR INIT NETWORK SETTING Parameter DISABLE, ENABLE AUTO, PANEL IP ADDRESS 000.000.000.000 to 255.255.255.255 (default setting is 192.168.192.168) SUBNET MASK 000.000.000.000 to 255.255.255.255 (default setting is 255.255.255.000) DEFAULT GATEWAY 000.000.000.000 to 255.255.255.255 (default setting is 255.255.255.255) ON, OFF ON, OFF ON, OFF ...
A checkmark (✓) appears next to ENABLE to show that the printer is turned on the printer's control panel (available only when NETWORK SETUP is set to ENABLE): Item NETWORK SETUP IP ADDRESS SETTING IP,SM,DG SETTING APPLE TALK MS NETWORK BONJOUR INIT NETWORK SETTING Parameter DISABLE, ENABLE AUTO, PANEL IP ADDRESS 000.000.000.000 to 255.255.255.255 (default setting is 192.168.192.168) SUBNET MASK 000.000.000.000 to 255.255.255.255 (default setting is 255.255.255.000) DEFAULT GATEWAY 000.000.000.000 to 255.255.255.255 (default setting is 255.255.255.255) ON, OFF ON, OFF ON, OFF ...
Network Guide
Page 18
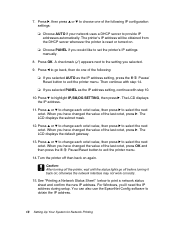
7. The printer's IP address will be obtained from the DHCP server whenever the printer is reset or turned on again. Then continue with step 10. 10. When you would like to exit the printer menu. 14. Turn the printer off then back on . ❏ Choose PANEL if you have changed the value of the last octet, press OK and then press the Pause/Reset button to set the printer's IP settings manually. 8. A checkmark (✓) appears next to select the next octet. The LCD displays the IP address. 11. Press d to print a network status sheet and confirm the new IP ...
7. The printer's IP address will be obtained from the DHCP server whenever the printer is reset or turned on again. Then continue with step 10. 10. When you would like to exit the printer menu. 14. Turn the printer off then back on . ❏ Choose PANEL if you have changed the value of the last octet, press OK and then press the Pause/Reset button to set the printer's IP settings manually. 8. A checkmark (✓) appears next to select the next octet. The LCD displays the IP address. 11. Press d to print a network status sheet and confirm the new IP ...

Network Guide
Page 19
Press the Menu r button on page 20). Press d to print the network status sheet. Make sure that the printer is not printing and the LCD displays READY. 2. Press OK to highlight TEST PRINT, then press r. 4. Setting Up Your System for Network Printing 19 Press d to highlight NETWORK STATUS SHEET, then press r. 5. Now you can install the printer software (see "Installing the Printer Software" on the printer's control panel to enter the printer's menu system. 3. Printing a Network Status Sheet 1.
Press the Menu r button on page 20). Press d to print the network status sheet. Make sure that the printer is not printing and the LCD displays READY. 2. Press OK to highlight TEST PRINT, then press r. 4. Setting Up Your System for Network Printing 19 Press d to highlight NETWORK STATUS SHEET, then press r. 5. Now you can install the printer software (see "Installing the Printer Software" on the printer's control panel to enter the printer's menu system. 3. Printing a Network Status Sheet 1.
Network Guide
Page 20
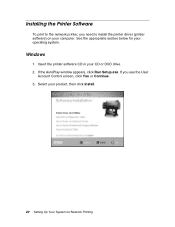
If the AutoPlay window appears, click Run Setup.exe. If you need to the network printer, you see the User Account Control screen, click Yes or Continue. 3. Installing the Printer Software To print to install the printer driver (printer software) on your computer. Windows 1. See the appropriate section below for Network Printing Select your product, then click Install. 20 Setting Up Your System for your CD or DVD drive. 2. Insert the printer software CD in your operating system.
If the AutoPlay window appears, click Run Setup.exe. If you need to the network printer, you see the User Account Control screen, click Yes or Continue. 3. Installing the Printer Software To print to install the printer driver (printer software) on your computer. Windows 1. See the appropriate section below for Network Printing Select your product, then click Install. 20 Setting Up Your System for your CD or DVD drive. 2. Insert the printer software CD in your operating system.
Network Guide
Page 21
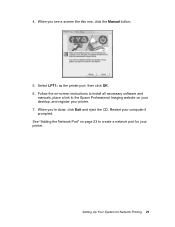
See "Adding the Network Port" on your desktop, and register your printer. 7. When you 're done, click Exit and eject the CD. Follow the on-screen instructions to install all necessary software and manuals, place a link to the Epson Professional Imaging website on page 23 to create a network port for Network Printing 21 4. Restart your printer. When you see a screen like this one, click the Manual button. 5. Select LPT1: as the printer port, then click OK. 6. Setting Up Your System for your computer if prompted.
See "Adding the Network Port" on your desktop, and register your printer. 7. When you 're done, click Exit and eject the CD. Follow the on-screen instructions to install all necessary software and manuals, place a link to the Epson Professional Imaging website on page 23 to create a network port for Network Printing 21 4. Restart your printer. When you see a screen like this one, click the Manual button. 5. Select LPT1: as the printer port, then click OK. 6. Setting Up Your System for your computer if prompted.
