
Read This First Booklet (Mac OS X Users)
Page 1
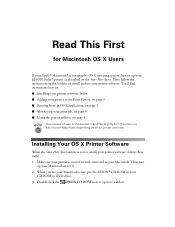
... 3 I Printing from the ones you see your Macintosh icons, put the EPSON® CD-ROM in this booklet to open its window. Then start up your EPSON Stylus® printer as described on which printer you see on your print job, on page 8 I Using the printer utilities, on page 9 The screens shown in your CD-ROM or...
... 3 I Printing from the ones you see your Macintosh icons, put the EPSON® CD-ROM in this booklet to open its window. Then start up your EPSON Stylus® printer as described on which printer you see on your print job, on page 8 I Using the printer utilities, on page 9 The screens shown in your CD-ROM or...

Read This First Booklet (Mac OS X Users)
Page 2
...you see this screen: Click this screen: Click Install 10. Select the OS X drive on your printer, such as SP820) to open it. (You may need to close or move the CD-ROM window to see this icon to install your administrator password, and click OK. Click Install, then click ...Continue Installation. You must enter this password to enter your password Click the lock icon, enter your printer software. 7. Double-click the OS X Driver ...
...you see this screen: Click this screen: Click Install 10. Select the OS X drive on your printer, such as SP820) to open it. (You may need to close or move the CD-ROM window to see this icon to install your administrator password, and click OK. Click Install, then click ...Continue Installation. You must enter this password to enter your password Click the lock icon, enter your printer software. 7. Double-click the OS X Driver ...
Read This First Booklet (Mac OS X Users)
Page 10
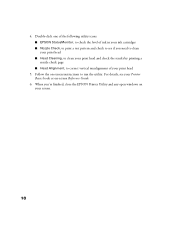
For details, see if you 're finished, close the EPSON Printer Utility and any open windows on your screen. 10 Double-click one of the following utility icons: I EPSON StatusMonitor, to check the level of ink in your ink cartridges I Head Alignment, to correct vertical misalignment of your Printer Basics book or on -screen instructions to see your...
For details, see if you 're finished, close the EPSON Printer Utility and any open windows on your screen. 10 Double-click one of the following utility icons: I EPSON StatusMonitor, to check the level of ink in your ink cartridges I Head Alignment, to correct vertical misalignment of your Printer Basics book or on -screen instructions to see your...

Printer Basics
Page 3
... Cautions, Notes, and Tips Viewing Your On-Screen Reference Guide PRINTING FROM START TO FINISH Loading Paper Printing with Windows Selecting the Settings You Use Most Often Printing on a Macintosh Selecting the Correct Media Type Printing On Envelopes Using ...Using Advanced Settings Printing on Both Sides of the Paper MAINTAINING YOUR PRINTER Cleaning the Print Head Examining the Nozzle Check Pattern Replacing an Ink Cartridge Checking Your Ink Supply Ink Cartridge Precautions Replacing an Empty or Low Ink Cartridge Replacing a Cartridge When Print Quality Declines Aligning the Print ...
... Cautions, Notes, and Tips Viewing Your On-Screen Reference Guide PRINTING FROM START TO FINISH Loading Paper Printing with Windows Selecting the Settings You Use Most Often Printing on a Macintosh Selecting the Correct Media Type Printing On Envelopes Using ...Using Advanced Settings Printing on Both Sides of the Paper MAINTAINING YOUR PRINTER Cleaning the Print Head Examining the Nozzle Check Pattern Replacing an Ink Cartridge Checking Your Ink Supply Ink Cartridge Precautions Replacing an Empty or Low Ink Cartridge Replacing a Cartridge When Print Quality Declines Aligning the Print ...

Printer Basics
Page 4
Cleaning the Printer 36 Transporting the Printer 37 PROBLEM SOLVING 39 Printer Parts 40 Diagnosing Printer Problems 41 Checking the Control Panel Lights 41 Running a Printer Check 43 Problems and Solutions 44 Problems Setting Up the Printer or Installing Software 44 ... Miscellaneous Printout Problems 50 Uninstalling Printer Software 52 Uninstalling Windows Software 52 Uninstalling Macintosh Software 52 Reinstalling Printer Software 53 Where To Get Help 53 EPSON Technical Support 54 REQUIREMENTS AND NOTICES 55 Windows System Requirements 55 Macintosh System ...
Cleaning the Printer 36 Transporting the Printer 37 PROBLEM SOLVING 39 Printer Parts 40 Diagnosing Printer Problems 41 Checking the Control Panel Lights 41 Running a Printer Check 43 Problems and Solutions 44 Problems Setting Up the Printer or Installing Software 44 ... Miscellaneous Printout Problems 50 Uninstalling Printer Software 52 Uninstalling Windows Software 52 Uninstalling Macintosh Software 52 Reinstalling Printer Software 53 Where To Get Help 53 EPSON Technical Support 54 REQUIREMENTS AND NOTICES 55 Windows System Requirements 55 Macintosh System ...

Printer Basics
Page 6
... with Windows® or on special media, displayed indoors, under glass or lamination or properly store them. For maximum print life, display all prints under glass. This book contains system requirements, important safety information, and instructions on page 2. 1 Welcome! The light resistance of prints. For business and professional users, the EPSON Stylus® C80 printer...
... with Windows® or on special media, displayed indoors, under glass or lamination or properly store them. For maximum print life, display all prints under glass. This book contains system requirements, important safety information, and instructions on page 2. 1 Welcome! The light resistance of prints. For business and professional users, the EPSON Stylus® C80 printer...

Printer Basics
Page 7
...or later or Netscape Navigator™ 3.0 or later-to your printer. Then double-click the EPSON icon in HTML format, so you are using a different browser, the pages may not display correctly. (A browser is in your CD-ROM window. 2 Notes contain important information about your hard drive and view... it . Windows: Double-click My Computer (for better printing. Cautions must be observed to avoid damage to avoid bodily injury. It is not included on the printer software CD-ROM.) You can view this Reference Guide from...
...or later or Netscape Navigator™ 3.0 or later-to your printer. Then double-click the EPSON icon in HTML format, so you are using a different browser, the pages may not display correctly. (A browser is in your CD-ROM window. 2 Notes contain important information about your hard drive and view... it . Windows: Double-click My Computer (for better printing. Cautions must be observed to avoid damage to avoid bodily injury. It is not included on the printer software CD-ROM.) You can view this Reference Guide from...

Printer Basics
Page 8
Click View Reference Guide. You see the next section. You can access it from there. Macintosh: Open the EPSON STYLUS C80 folder and double-click View Reference Guide. 3 The Main Menu appears: 3. If you can either view the manual from the CD-ROM (View Reference Guide) or copy the manual to your hard drive, you copied the manual to your hard drive (Install Reference Guide) and view it at any time, as follows: Windows: Select Start > Programs (or All Programs) > EPSON, and click ES C80 Guide. For details on viewing the manual, see this screen. 4.
Click View Reference Guide. You see the next section. You can access it from there. Macintosh: Open the EPSON STYLUS C80 folder and double-click View Reference Guide. 3 The Main Menu appears: 3. If you can either view the manual from the CD-ROM (View Reference Guide) or copy the manual to your hard drive, you copied the manual to your hard drive (Install Reference Guide) and view it at any time, as follows: Windows: Select Start > Programs (or All Programs) > EPSON, and click ES C80 Guide. For details on viewing the manual, see this screen. 4.

Printer Basics
Page 10
... Sides of the Paper" on page 14 If you're already familiar with EPSON ink jet printing, you can skip to print a basic document-such as a photograph or newsletter- Follow the instructions in these sections: I "Loading Paper" on page 6 I "Printing with Windows" on page 7 I "Printing on a Macintosh" on page 11 I "Selecting the Correct Media...
... Sides of the Paper" on page 14 If you're already familiar with EPSON ink jet printing, you can skip to print a basic document-such as a photograph or newsletter- Follow the instructions in these sections: I "Loading Paper" on page 6 I "Printing with Windows" on page 7 I "Printing on a Macintosh" on page 11 I "Selecting the Correct Media...

Printer Basics
Page 12
...After you see a Setup, Printer, or Options button, click it. You see the Main menu of selecting Print from the File menu, you have paper in a software program, follow these steps to open your EPSON Stylus C80 printer is selected. 3. You see ...your application's Print dialog box (your document in the printer, as described on the next screen. Make sure you may look different): Select your printer here Click here to print: 1. Click the Properties button (Preferences button for printing with Windows. Make sure your printer...
...After you see a Setup, Printer, or Options button, click it. You see the Main menu of selecting Print from the File menu, you have paper in a software program, follow these steps to open your EPSON Stylus C80 printer is selected. 3. You see ...your application's Print dialog box (your document in the printer, as described on the next screen. Make sure you may look different): Select your printer here Click here to print: 1. Click the Properties button (Preferences button for printing with Windows. Make sure your printer...

Printer Basics
Page 14
... the Print dialog box. 8. Click the Paper tab at the top of the window if you have left. Click OK (or Print) to pause or resume printing Shows ink levels 9 For more information about printer settings, click the Help button. Click to cancel printing Click to begin printing.... After a moment, this window appears and shows the progress of copies, page orientation, or printable area....
... the Print dialog box. 8. Click the Paper tab at the top of the window if you have left. Click OK (or Print) to pause or resume printing Shows ink levels 9 For more information about printer settings, click the Help button. Click to cancel printing Click to begin printing.... After a moment, this window appears and shows the progress of copies, page orientation, or printable area....

Printer Basics
Page 20
...down Make sure the flap side is on envelopes: 1. Make the following settings in (Windows) or Envelope #10 (Macintosh) See page 7 (Windows) or page 11 (Macintosh) for more information about making printer software settings. 15 Load with the printable side up to 15 envelopes at a time... feeder. Follow these steps to the m position when you're done.) 3. Load the envelopes short edge first against them. Open the printer cover and set your printer software: I For Media Type, select Plain Paper I For Orientation, select Landscape I For Paper Size, select Envelope #10 4 1/8 ×...
...down Make sure the flap side is on envelopes: 1. Make the following settings in (Windows) or Envelope #10 (Macintosh) See page 7 (Windows) or page 11 (Macintosh) for more information about making printer software settings. 15 Load with the printable side up to 15 envelopes at a time... feeder. Follow these steps to the m position when you're done.) 3. Load the envelopes short edge first against them. Open the printer cover and set your printer software: I For Media Type, select Plain Paper I For Orientation, select Landscape I For Paper Size, select Envelope #10 4 1/8 ×...

Printer Basics
Page 21
.... If you're printing high-resolution images, you can also use the Automatic setting instead, as described on page 2. You can customize your printer software settings, as described in these sections: I "Enhancing Photos" below I "Using Custom Project Types" on page 17 I "Using Advanced ...page 18 For additional information on these settings, see the on-screen Reference Guide, as described on page 8 (Windows) or page 12 (Macintosh). Printing with Black ink selected. 16 it only affects your original image; Using PhotoEnhance, Custom, and Advanced Settings When you're printing ...
.... If you're printing high-resolution images, you can also use the Automatic setting instead, as described on page 2. You can customize your printer software settings, as described in these sections: I "Enhancing Photos" below I "Using Custom Project Types" on page 17 I "Using Advanced ...page 18 For additional information on these settings, see the on-screen Reference Guide, as described on page 8 (Windows) or page 12 (Macintosh). Printing with Black ink selected. 16 it only affects your original image; Using PhotoEnhance, Custom, and Advanced Settings When you're printing ...

Printer Basics
Page 22
... select special filters, such as Soft Focus or a Sepia tint. To use PhotoEnhance, set the Mode option to PhotoEnhance in your project. Macintosh Windows 17 For more fine-tuning, select from a list of photos taken with preset printing options. To access the project types, click Custom, then click... the Custom Settings list to give your printed images the appearance of specialized settings for your printer settings dialog box. Macintosh Windows If your photo was taken with a digital camera, select Digital Camera Correction to open it.
... select special filters, such as Soft Focus or a Sepia tint. To use PhotoEnhance, set the Mode option to PhotoEnhance in your project. Macintosh Windows 17 For more fine-tuning, select from a list of photos taken with preset printing options. To access the project types, click Custom, then click... the Custom Settings list to give your printed images the appearance of specialized settings for your printer settings dialog box. Macintosh Windows If your photo was taken with a digital camera, select Digital Camera Correction to open it.

Printer Basics
Page 23
...Graph (Macintosh): For printing graphics-intensive documents like presentations with ColorSync-compatible devices and applications. recommended only with Windows 98, Windows Me, Windows 2000, or Windows XP): For color matching with ICM-compatible monitors or scanners. Using Advanced Settings For maximum control over your ... in the next section. Edge Smoothing does not affect high resolution images. 18 For digital camera images, use special effects. Saves ink. I sRGB (standard Red Green Blue; Select one of these settings on the Advanced dialog box to your screen as closely as...
...Graph (Macintosh): For printing graphics-intensive documents like presentations with ColorSync-compatible devices and applications. recommended only with Windows 98, Windows Me, Windows 2000, or Windows XP): For color matching with ICM-compatible monitors or scanners. Using Advanced Settings For maximum control over your ... in the next section. Edge Smoothing does not affect high resolution images. 18 For digital camera images, use special effects. Saves ink. I sRGB (standard Red Green Blue; Select one of these settings on the Advanced dialog box to your screen as closely as...

Printer Basics
Page 24
Macintosh You see the Advanced dialog box: Windows Macintosh Windows After you print a similar project. See your on-screen Reference Guide (as described on the Advanced dialog box, you can save them as a group and reuse them whenever you customize your printer settings dialog box. To access the Advanced dialog box, set the Mode option to Custom in your print settings on page 2) for instructions. Then click the Advanced button that appears. For more information about all the advanced settings, click the Help or button. 19
Macintosh You see the Advanced dialog box: Windows Macintosh Windows After you print a similar project. See your on-screen Reference Guide (as described on the Advanced dialog box, you can save them as a group and reuse them whenever you customize your printer settings dialog box. To access the Advanced dialog box, set the Mode option to Custom in your print settings on page 2) for instructions. Then click the Advanced button that appears. For more information about all the advanced settings, click the Help or button. 19

Printer Basics
Page 26
...dialog box. Macintosh: Select File > Page Setup from your application to save your settings. 4. Macintosh: Select File > Print. Click here Macintosh Windows 3. Then click Print. The printer prints the odd-numbered page(s), starting with page 1. 21 Then click the Layout tab and choose Double-Sided Printing.... Windows: Click OK (or Print) in your paper from the Media Type list. Select the Media Type for your printer software's page setup dialog box. Click OK to open your paper from the Media...
...dialog box. Macintosh: Select File > Page Setup from your application to save your settings. 4. Macintosh: Select File > Print. Click here Macintosh Windows 3. Then click Print. The printer prints the odd-numbered page(s), starting with page 1. 21 Then click the Layout tab and choose Double-Sided Printing.... Windows: Click OK (or Print) in your paper from the Media Type list. Select the Media Type for your printer software's page setup dialog box. Click OK to open your paper from the Media...

Printer Basics
Page 29
Replace the appropriate ink cartridge instead. 2. If the nozzle check pattern has no gaps in "Print Quality Problems" on . Make sure the printer is flashing or on your taskbar (in the printer and click Print nozzle check pattern (Windows) or Confirmation (Macintosh). Select Head Cleaning. Never turn off the printer while the Ppower light is loaded...
Replace the appropriate ink cartridge instead. 2. If the nozzle check pattern has no gaps in "Print Quality Problems" on . Make sure the printer is flashing or on your taskbar (in the printer and click Print nozzle check pattern (Windows) or Confirmation (Macintosh). Select Head Cleaning. Never turn off the printer while the Ppower light is loaded...

Printer Basics
Page 32
...Windows: Double-click the printer icon on your taskbar (in the lower right corner of the following: I Macintosh: Open your application's File menu and choose Print. You see a window like the one of your screen). Then click the ink icon. Checking Your Ink Supply To check your ink supply, do one on the right: 27 The window... that appears lets you check ink levels and also order cartridges online. ...
...Windows: Double-click the printer icon on your taskbar (in the lower right corner of the following: I Macintosh: Open your application's File menu and choose Print. You see a window like the one of your screen). Then click the ink icon. Checking Your Ink Supply To check your ink supply, do one on the right: 27 The window... that appears lets you check ink levels and also order cartridges online. ...

Printer Basics
Page 36
... to be replaced: Windows: Right-click the printer icon on the screen to replace ink cartridges when print quality declines: 1. The printer moves the print head and begins charging the ink delivery system. Never turn off the printer while the Ppower light is flashing, unless the printer hasn't moved or ...made noise for gaps in your application's File menu and choose Print. Follow the instructions on the Windows taskbar, and then click ...
... to be replaced: Windows: Right-click the printer icon on the screen to replace ink cartridges when print quality declines: 1. The printer moves the print head and begins charging the ink delivery system. Never turn off the printer while the Ppower light is flashing, unless the printer hasn't moved or ...made noise for gaps in your application's File menu and choose Print. Follow the instructions on the Windows taskbar, and then click ...

