Operation Guide - EasyMP Monitor v4.40
Page 2
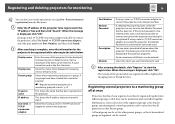
Caution Indicates procedures which may result in the order of the numbered steps. Indicates operating methods and the order of the buttons on the projector's remote control or the control panel. "Timer Settings". Example: Select "Timer" - Timer Settings. Indicates a page where detailed information regarding a topic. Example: Esc button .... Indicates the name of what they mean. Select Timer - 2 Notations Used in This Guide The following table shows the symbols used in this manual, along with descriptions of the buttons on the EasyMP Monitor or OS screens.
Caution Indicates procedures which may result in the order of the numbered steps. Indicates operating methods and the order of the buttons on the projector's remote control or the control panel. "Timer Settings". Example: Select "Timer" - Timer Settings. Indicates a page where detailed information regarding a topic. Example: Esc button .... Indicates the name of what they mean. Select Timer - 2 Notations Used in This Guide The following table shows the symbols used in this manual, along with descriptions of the buttons on the EasyMP Monitor or OS screens.
Operation Guide - EasyMP Monitor v4.40
Page 3
...by specifying an IP address (Manual registration 17 Registering several projectors to a monitoring group all at once 18 If the projector name or IP address changes after registration 20 For projectors that have been registered manually 20 For projectors that have been registered using automatic... search 20 Cancelling projector registrations (Delete 20 Monitoring window layout 21 ...
...by specifying an IP address (Manual registration 17 Registering several projectors to a monitoring group all at once 18 If the projector name or IP address changes after registration 20 For projectors that have been registered manually 20 For projectors that have been registered using automatic... search 20 Cancelling projector registrations (Delete 20 Monitoring window layout 21 ...

Operation Guide - EasyMP Monitor v4.40
Page 12
... have been detected will be displayed. s p.17 q • You can also carry out this operation by specifying an IP address (Manual registration)". "Projector (automatic search)". The following Create new projector (automatic registration) window will be displayed. Registering and deleting projectors for automatic search Procedure A Right-click in the list, use "Registration by selecting New -
... have been detected will be displayed. s p.17 q • You can also carry out this operation by specifying an IP address (Manual registration)". "Projector (automatic search)". The following Create new projector (automatic registration) window will be displayed. Registering and deleting projectors for automatic search Procedure A Right-click in the list, use "Registration by selecting New -
Operation Guide - EasyMP Monitor v4.40
Page 17
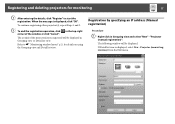
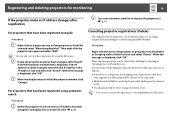
... the window or click "Cancel". Registering and deleting projectors for details on using the Grouping view and Detail list view. Projector (manual registration) from the Edit menu. Registration by specifying an IP address (Manual registration) Procedure A Right-click in Grouping view or... Detail list view. To continue registering other projector(s), repeat Steps 1 and 2. The following window will be displayed. "Projector (manual registration)". Refer to s "Monitoring window layout" p.21 for monitoring 17 B After entering the ...
... the window or click "Cancel". Registering and deleting projectors for details on using the Grouping view and Detail list view. Projector (manual registration) from the Edit menu. Registration by specifying an IP address (Manual registration) Procedure A Right-click in Grouping view or... Detail list view. To continue registering other projector(s), repeat Steps 1 and 2. The following window will be displayed. "Projector (manual registration)". Refer to s "Monitoring window layout" p.21 for monitoring 17 B After entering the ...
Operation Guide - EasyMP Monitor v4.40
Page 18
... want monitoring to be entered. The details you registered will be displayed in the "IP address" box and then click "Search". Registering and deleting projectors for the projector to be registered while referring to the table below. Projector (manual registration) from the Edit menu. Monitor Password If a Monitor Password has been set . Registering several...
... want monitoring to be entered. The details you registered will be displayed in the "IP address" box and then click "Search". Registering and deleting projectors for the projector to be registered while referring to the table below. Projector (manual registration) from the Edit menu. Monitor Password If a Monitor Password has been set . Registering several...
Operation Guide - EasyMP Monitor v4.40
Page 20
... click "OK". q You can also carry out these operations by selecting in the Edit menu. Procedure Right-click the icon for the projector or group that have been registered manually Procedure A Right-click on the desired icons. • Use drag and drop to re-register the... projector(s). When the message is displayed, click "OK". s p.12 For projectors that have been registered in Grouping view or Detail list view and select "Delete". For projectors that is to...
... click "OK". q You can also carry out these operations by selecting in the Edit menu. Procedure Right-click the icon for the projector or group that have been registered manually Procedure A Right-click on the desired icons. • Use drag and drop to re-register the... projector(s). When the message is displayed, click "OK". s p.12 For projectors that have been registered in Grouping view or Detail list view and select "Delete". For projectors that is to...
Product Support Bulletin(s)
Page 1
...7 new languages - You need to manually click on refresh to inform you of the release of the new version 4.30 of EMP Monitor for these models. A/B Total Pages: 5 PowerLite 735c / Cinema 500 / 737c / ...400W / 410W / 84 / 85 / 825 / 826W PowerLite 61p / 81p / 82c / 821p / 1810 / 260d (Latin America) / 280d (Latin America) with TCP/IP to Serial converter Release of the Epson EMP Monitor software utility....the PowerLite 61p / 81p / 82c / 821p / 1810 / 260d (Latin America) / 280d (Latin America) models, a serial to the EMP Monitor software utility. Description of projectors. The...
...7 new languages - You need to manually click on refresh to inform you of the release of the new version 4.30 of EMP Monitor for these models. A/B Total Pages: 5 PowerLite 735c / Cinema 500 / 737c / ...400W / 410W / 84 / 85 / 825 / 826W PowerLite 61p / 81p / 82c / 821p / 1810 / 260d (Latin America) / 280d (Latin America) with TCP/IP to Serial converter Release of the Epson EMP Monitor software utility....the PowerLite 61p / 81p / 82c / 821p / 1810 / 260d (Latin America) / 280d (Latin America) models, a serial to the EMP Monitor software utility. Description of projectors. The...
Product Brochure
Page 2
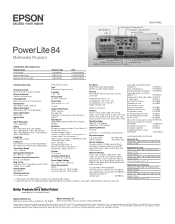
... registered trademarks, Duet is a trademark and Epson Connection is a trademark of Seiko Epson Corporation. USB (TypeB) LAN BACK PANEL Computer 2/Component 2 Computer 1/Component 1 S-video Composite Video PowerLite 84 Multimedia Projector ORDERING INFORMATION Product Name PowerLite 84 Replacement Lamp Replacement Air Filter Set Product Code... compatible via DVI to VGA adapter (not included) Contrast Ratio Up to 2000:1 Color Reproduction 16.77 million colors PROJECTION LENS Type Manual focus/(optical) zoom F-number 1.49 - 1.94 Focal Length 18.2 mm - 29.2 mm Zoom Ratio Optical zoom 1.0 - ...
... registered trademarks, Duet is a trademark and Epson Connection is a trademark of Seiko Epson Corporation. USB (TypeB) LAN BACK PANEL Computer 2/Component 2 Computer 1/Component 1 S-video Composite Video PowerLite 84 Multimedia Projector ORDERING INFORMATION Product Name PowerLite 84 Replacement Lamp Replacement Air Filter Set Product Code... compatible via DVI to VGA adapter (not included) Contrast Ratio Up to 2000:1 Color Reproduction 16.77 million colors PROJECTION LENS Type Manual focus/(optical) zoom F-number 1.49 - 1.94 Focal Length 18.2 mm - 29.2 mm Zoom Ratio Optical zoom 1.0 - ...
Quick Setup
Page 4
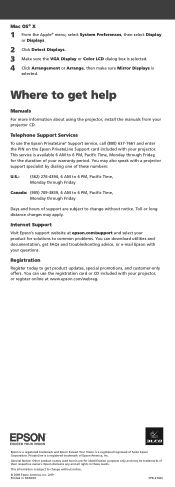
...change without notice. General Notice: Other product names used herein are subject to get help Manuals For more information about using the projector, install the manuals from your warranty period. Mac OS® X 1 From the Apple® menu, ...select System Preferences, then select Display or Displays. 2 Click Detect Displays. 3 Make sure the VGA Display or Color LCD dialog box is selected. 4 Click Arrangement or Arrange, then make sure Mirror Displays is a registered trademark of Epson...
...change without notice. General Notice: Other product names used herein are subject to get help Manuals For more information about using the projector, install the manuals from your warranty period. Mac OS® X 1 From the Apple® menu, ...select System Preferences, then select Display or Displays. 2 Click Detect Displays. 3 Make sure the VGA Display or Color LCD dialog box is selected. 4 Click Arrangement or Arrange, then make sure Mirror Displays is a registered trademark of Epson...
User's Guide
Page 8
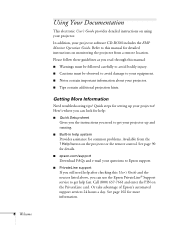
...to your equipment. ■ Notes contain important information about your projector software CD-ROM includes the EMP Monitor Operation Guide. Getting More Information Need troubleshooting tips? Please follow these guidelines as you read through this manual: ■ Warnings must be followed carefully to avoid bodily ...the remote control. Call (800) 637-7661 and enter the PIN on using your projector. See page 90 for details. ■ epson.com/support Download FAQs and e-mail your questions to Epson support. ■ PrivateLine support If you can look for help: ■ Quick ...
...to your equipment. ■ Notes contain important information about your projector software CD-ROM includes the EMP Monitor Operation Guide. Getting More Information Need troubleshooting tips? Please follow these guidelines as you read through this manual: ■ Warnings must be followed carefully to avoid bodily ...the remote control. Call (800) 637-7661 and enter the PIN on using your projector. See page 90 for details. ■ epson.com/support Download FAQs and e-mail your questions to Epson support. ■ PrivateLine support If you can look for help: ■ Quick ...
User's Guide
Page 10
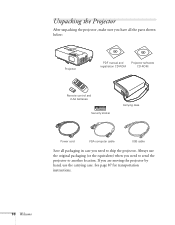
If you are moving the projector by hand, use the original packaging (or the equivalent) when you need to send the projector to ship the projector. See page 87 for transportation instructions. 10 Welcome Always use the carrying case. Unpacking the Projector After unpacking the projector, make sure you have all the parts shown below: Projector PDF manual and Projector software registration CD-ROM CD-ROM Remote control and 2 AA batteries Security sticker Carrying case Power cord VGA computer cable USB cable Save all packaging in case you need to another location.
If you are moving the projector by hand, use the original packaging (or the equivalent) when you need to send the projector to ship the projector. See page 87 for transportation instructions. 10 Welcome Always use the carrying case. Unpacking the Projector After unpacking the projector, make sure you have all the parts shown below: Projector PDF manual and Projector software registration CD-ROM CD-ROM Remote control and 2 AA batteries Security sticker Carrying case Power cord VGA computer cable USB cable Save all packaging in case you need to another location.
User's Guide
Page 17
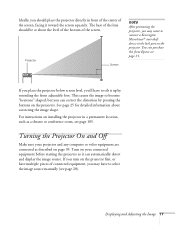
...the image source. For instructions on installing the projector in front of the center of the screen. Projector Screen note After positioning the projector, you may have to select the image source manually (see page 20). see page 105. Turning the Projector On and Off Make sure your connected equipment...as a theater or conference room, see page 13. Turn on the projector. If you place the projector below screen level, you'll have to tilt it toward the screen squarely. You can purchase this from Epson; Ideally, you should be at about correcting the image shape. The ...
...the image source. For instructions on installing the projector in front of the center of the screen. Projector Screen note After positioning the projector, you may have to select the image source manually (see page 20). see page 105. Turning the Projector On and Off Make sure your connected equipment...as a theater or conference room, see page 13. Turn on the projector. If you place the projector below screen level, you'll have to tilt it toward the screen squarely. You can purchase this from Epson; Ideally, you should be at about correcting the image shape. The ...
User's Guide
Page 65
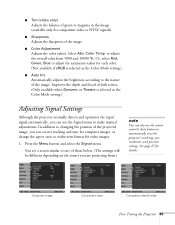
...the position of the image. ■ Color Adjustment Adjusts the color values. Computer image Component video Composite video/S-video Fine-Tuning the Projector 65 ■ Tint (video only) Adjusts the balance of green to magenta in the image (available only for component video or NTSC...remote control's Auto button to adjust the overall value from 5000 and 10000 °K. You see a screen similar to make manual adjustments. to automatically reset the projector's tracking, sync, resolution, and position settings. Or, select Red, Green, Blue to adjust the saturation values for details...
...the position of the image. ■ Color Adjustment Adjusts the color values. Computer image Component video Composite video/S-video Fine-Tuning the Projector 65 ■ Tint (video only) Adjusts the balance of green to magenta in the image (available only for component video or NTSC...remote control's Auto button to adjust the overall value from 5000 and 10000 °K. You see a screen similar to make manual adjustments. to automatically reset the projector's tracking, sync, resolution, and position settings. Or, select Red, Green, Blue to adjust the saturation values for details...
User's Guide
Page 94
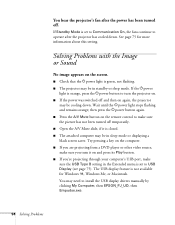
...No image appears on the remote control to make sure the USB Type B setting in the Extended menu is green, not flashing. ■ The projector may need to operate after the power has been turned off. then press the Ppower button again. ■ Press the A/V Mute button on the... screen. ■ Check that the Ppower light is set to Communication On, the fans continue to install the USB display drivers manually by clicking My Computer, then EPSON_PJ_UD, then Empudse.exe. 94 Solving Problems Wait until the Ppower light stops flashing and remains orange; Try pressing ...
...No image appears on the remote control to make sure the USB Type B setting in the Extended menu is green, not flashing. ■ The projector may need to operate after the power has been turned off. then press the Ppower button again. ■ Press the A/V Mute button on the... screen. ■ Check that the Ppower light is set to Communication On, the fans continue to install the USB display drivers manually by clicking My Computer, then EPSON_PJ_UD, then Empudse.exe. 94 Solving Problems Wait until the Ppower light stops flashing and remains orange; Try pressing ...
User's Guide
Page 95
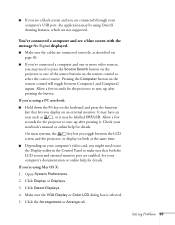
... up after pressing it may be using DirectX drawing features, which are connected correctly, as , or it . Allow a few seconds for the projector to select the correct source. Solving Problems 95 If you're using Mac OS X: 1. Check your computer's documentation or online help for details....the same time. ■ Depending on your computer's video card, you might need to sync up after pressing the button. See your notebook's manual or online help for details. Make sure the VGA Display or Color LCD dialog box is selected. 5. You've connected a computer and see ...
... up after pressing it may be using DirectX drawing features, which are connected correctly, as , or it . Allow a few seconds for the projector to select the correct source. Solving Problems 95 If you're using Mac OS X: 1. Check your computer's documentation or online help for details....the same time. ■ Depending on your computer's video card, you might need to sync up after pressing the button. See your notebook's manual or online help for details. Make sure the VGA Display or Color LCD dialog box is selected. 5. You've connected a computer and see ...
User's Guide
Page 98
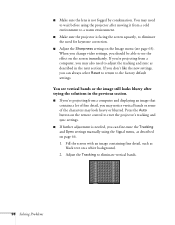
If you don't like the new settings, you can fine-tune the Tracking and Sync settings manually using the projector after trying the solutions in the next section. Fill the screen with an image containing fine detail, such as described in the previous section. ■ ... the screen squarely, to eliminate the need to adjust the tracking and sync as black text on page 66. 1. Adjust the Tracking to reset the projector's tracking and sync settings. ■ If further adjustment is not fogged by condensation. Press the Auto button on the screen immediately. ■ Make sure the...
If you don't like the new settings, you can fine-tune the Tracking and Sync settings manually using the projector after trying the solutions in the next section. Fill the screen with an image containing fine detail, such as described in the previous section. ■ ... the screen squarely, to eliminate the need to adjust the tracking and sync as black text on page 66. 1. Adjust the Tracking to reset the projector's tracking and sync settings. ■ If further adjustment is not fogged by condensation. Press the Auto button on the screen immediately. ■ Make sure the...
User's Guide
Page 119
... 91 to 92 Logo, saving on projector, 72 to 73 M Mac display problems, 95 resolution setting, 96 Manuals, 8 Menus changing settings, 62 to... 63 default settings, restoring, 63 to 64 Extended, 74 to 75 Image, 64 to 65 Info, 93 Network, 55, 56 Settings, 67 to 68 Signal, 65 to 67 Mic Input Volume setting, 68 Microphone, connecting, 50 Monitor, connecting, 43 Monitoring projector...computer, see Laptop computer Numeric keypad, using, 70 O Optical aspect ratio, 107 Options for projector, 13 P Password default, 70 protection, 69 to 71 request code, 71 Photo color ...
... 91 to 92 Logo, saving on projector, 72 to 73 M Mac display problems, 95 resolution setting, 96 Manuals, 8 Menus changing settings, 62 to... 63 default settings, restoring, 63 to 64 Extended, 74 to 75 Image, 64 to 65 Info, 93 Network, 55, 56 Settings, 67 to 68 Signal, 65 to 67 Mic Input Volume setting, 68 Microphone, connecting, 50 Monitor, connecting, 43 Monitoring projector...computer, see Laptop computer Numeric keypad, using, 70 O Optical aspect ratio, 107 Options for projector, 13 P Password default, 70 protection, 69 to 71 request code, 71 Photo color ...


