
Basics
Page 21
... Card menu doesn't open automatically, use the 4-way ring or jog dial to a folder that is automatically created in the Backup Files folder on the viewer. 21 You see this menu: 2 Select CF Memory Card Backup or SD Memory Card Backup, then press OK. The files are copied to highlight Memory Card on the... viewer. Copying Files from a Memory Card After you insert a memory card (as described on page 18 or 20), you can copy all of the files on the card to Backup Files or copy selected files to the My Photos or My Videos folder on the Home...
... Card menu doesn't open automatically, use the 4-way ring or jog dial to a folder that is automatically created in the Backup Files folder on the viewer. 21 You see this menu: 2 Select CF Memory Card Backup or SD Memory Card Backup, then press OK. The files are copied to highlight Memory Card on the... viewer. Copying Files from a Memory Card After you insert a memory card (as described on page 18 or 20), you can copy all of the files on the card to Backup Files or copy selected files to the My Photos or My Videos folder on the Home...

Basics
Page 25
... delete the files from the memory card after you copy them to the viewer. 1 On the Home screen, use the 4-way ring or jog dial to select Settings and press OK. 2 Select Backup Settings and press OK. 3 Select Process After Backup and press OK. 4 Choose one of the following settings: ◗ ...Verify backed up data if you want the viewer to verify that the files were copied successfully. ◗ Verify & del. ...
... delete the files from the memory card after you copy them to the viewer. 1 On the Home screen, use the 4-way ring or jog dial to select Settings and press OK. 2 Select Backup Settings and press OK. 3 Select Process After Backup and press OK. 4 Choose one of the following settings: ◗ ...Verify backed up data if you want the viewer to verify that the files were copied successfully. ◗ Verify & del. ...

Basics
Page 27
...the viewer to a TV or projector (see page 30). 1 Use the 4-way ring or jog dial to select the folder containing your P-6000/ P-7000. Viewing Photos You can also rate photos and display them according to their rating (see page 34). You can display images at full-screen, zoom in Backup Files.... 27 Viewing Photos and Videos Follow the instructions in this section to view photos, create slide shows, and play videos on your photos, then press OK. To share your images, slide shows, and videos with a ...
...the viewer to a TV or projector (see page 30). 1 Use the 4-way ring or jog dial to select the folder containing your P-6000/ P-7000. Viewing Photos You can also rate photos and display them according to their rating (see page 34). You can display images at full-screen, zoom in Backup Files.... 27 Viewing Photos and Videos Follow the instructions in this section to view photos, create slide shows, and play videos on your photos, then press OK. To share your images, slide shows, and videos with a ...

Basics
Page 38
... the following: ◗ If you connected a device that is automatically created in the Backup Files folder on the device to the viewer. Copying Files to the Viewer After you connect a USB device, you can copy all the files to the viewer, or select individual files to copy. 1 On the Home screen, use the 4-way... ring or jog dial to highlight USB Device, then press OK. 2 Select Connect to USB Device, then press OK. Select Backup USB device to Viewer, then press OK. You see the USB Device menu: 3 Do one of the files on the...
... the following: ◗ If you connected a device that is automatically created in the Backup Files folder on the device to the viewer. Copying Files to the Viewer After you connect a USB device, you can copy all the files to the viewer, or select individual files to copy. 1 On the Home screen, use the 4-way... ring or jog dial to highlight USB Device, then press OK. 2 Select Connect to USB Device, then press OK. Select Backup USB device to Viewer, then press OK. You see the USB Device menu: 3 Do one of the files on the...

Basics
Page 40
Backing Up All Files to a USB Device This process may take some time, depending on the volume of data in the viewer. 1 Follow the instructions on page 37 to connect the USB device. 2 On the Home screen, use the 4-way ring or jog dial to highlight USB Device, then press OK. 3 In the USB Device menu, select Connect to USB Device, then press OK. 4 Select Copy all Backup Files, then press OK. 5 Wait until all the files are copied, then disconnect the USB device. 40
Backing Up All Files to a USB Device This process may take some time, depending on the volume of data in the viewer. 1 Follow the instructions on page 37 to connect the USB device. 2 On the Home screen, use the 4-way ring or jog dial to highlight USB Device, then press OK. 3 In the USB Device menu, select Connect to USB Device, then press OK. 4 Select Copy all Backup Files, then press OK. 5 Wait until all the files are copied, then disconnect the USB device. 40

Basics
Page 44
... audio files to make them playable. The LCD screen turns off. 5 Double-click the Epson Link2 icon on the Home screen, then press the button to connect to your computer. Larger end Smaller end 4 Make sure the viewer is on your desktop to open the program. 6 Click My Music, then locate the... audio files you want to copy from your computer. Always keep backup copies of your songs, and never transfer your only copies to the viewer. 7 Click the down arrow in the center of the screen to transfer the files to your computer. 3 Use the...
... audio files to make them playable. The LCD screen turns off. 5 Double-click the Epson Link2 icon on the Home screen, then press the button to connect to your computer. Larger end Smaller end 4 Make sure the viewer is on your desktop to open the program. 6 Click My Music, then locate the... audio files you want to copy from your computer. Always keep backup copies of your songs, and never transfer your only copies to the viewer. 7 Click the down arrow in the center of the screen to transfer the files to your computer. 3 Use the...

Basics
Page 45
... want to play it. Playing Audio Files You can be displayed in My Music. Then remove the USB cable. ◗ Macintosh: Drag and drop the viewer icon to the trash, then remove the USB cable. 9 If you see a message on top of your screen and select Safely Remove Hardware or Unplug... or Eject Hardware. If you to update the music list, click OK. 8 When the transfer is complete, disconnect the viewer from a memory card, select it in Backup Files, then press OK to play a music file copied from your computer: ◗ Windows: Right-click the or icon in the lower...
... want to play it. Playing Audio Files You can be displayed in My Music. Then remove the USB cable. ◗ Macintosh: Drag and drop the viewer icon to the trash, then remove the USB cable. 9 If you see a message on top of your screen and select Safely Remove Hardware or Unplug... or Eject Hardware. If you to update the music list, click OK. 8 When the transfer is complete, disconnect the viewer from a memory card, select it in Backup Files, then press OK to play a music file copied from your computer: ◗ Windows: Right-click the or icon in the lower...

Basics
Page 54
The viewer LCD screen turns off. 54 Larger end Smaller end 4 Make sure the viewer is on the viewer and your computer. 3 Use the included USB cable to connect the viewer to your computer. Backing Up Files to Your Computer You can automatically copy all the files from the viewer's Backup Files folder to your computer. 1 Connect the AC adapter to your viewer (see page 9). 2 Turn on the Home screen, then press the button to connect to your computer.
The viewer LCD screen turns off. 54 Larger end Smaller end 4 Make sure the viewer is on the viewer and your computer. 3 Use the included USB cable to connect the viewer to your computer. Backing Up Files to Your Computer You can automatically copy all the files from the viewer's Backup Files folder to your computer. 1 Connect the AC adapter to your viewer (see page 9). 2 Turn on the Home screen, then press the button to connect to your computer.
Basics
Page 55
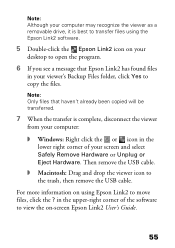
...USB cable. ◗ Macintosh: Drag and drop the viewer icon to copy the files. For more information on -screen Epson Link2 User's Guide. 55 Note: Although your computer may recognize the viewer as a removable drive, it is complete, disconnect the viewer from your computer: ◗ Windows: Right click ... transfer is best to transfer files using the Epson Link2 software. 5 Double-click the Epson Link2 icon on your desktop to open the program. 6 If you see a message that Epson Link2 has found files in the upper-right corner of your viewer's Backup Files folder, click Yes to the trash, ...
...USB cable. ◗ Macintosh: Drag and drop the viewer icon to copy the files. For more information on -screen Epson Link2 User's Guide. 55 Note: Although your computer may recognize the viewer as a removable drive, it is complete, disconnect the viewer from your computer: ◗ Windows: Right click ... transfer is best to transfer files using the Epson Link2 software. 5 Double-click the Epson Link2 icon on your desktop to open the program. 6 If you see a message that Epson Link2 has found files in the upper-right corner of your viewer's Backup Files folder, click Yes to the trash, ...

Basics
Page 69
... to 45 file formats, 43 playing, 45 to 48 problems, 57 B Backing up memory card, 21 to 24 USB device, 38 viewer, 40, 54 to 55 Backup Files folder copying files from, 49 to 53 copying files to, 21, 38 Battery charging, 9 installing, 8 recycling, 62 replacing, 58 safety, 60 to 62 storing... of Conformity, 64 Deleting files, 25, 53 Details view, 29 Disk space, 56 Display button, 29 to 30 Displaying folder views, 29 image information, 30 E Epson contacting, 58 to 59 Link2 software, 6 Store, 58 warranty, 65 to 67 69
... to 45 file formats, 43 playing, 45 to 48 problems, 57 B Backing up memory card, 21 to 24 USB device, 38 viewer, 40, 54 to 55 Backup Files folder copying files from, 49 to 53 copying files to, 21, 38 Battery charging, 9 installing, 8 recycling, 62 replacing, 58 safety, 60 to 62 storing... of Conformity, 64 Deleting files, 25, 53 Details view, 29 Disk space, 56 Display button, 29 to 30 Displaying folder views, 29 image information, 30 E Epson contacting, 58 to 59 Link2 software, 6 Store, 58 warranty, 65 to 67 69

Manual - Tethering
Page 1
..., but they are shot, streamlining the process of DSLRs which have HDD free space larger than 512 MB. Mass Storage is a list of creating backup files and evaluating images in studio or on location. 1.1. Use Slot 1 if your camera has USB settings. And press OK key to Camera (PTP...)]. Others makes are supported. Epson has confirmed that you compare the images on the viewer with Tethering. Never put P- 6000/7000 into the Travel pouch when you use the USB cable provided by DSLR maker to...
..., but they are shot, streamlining the process of DSLRs which have HDD free space larger than 512 MB. Mass Storage is a list of creating backup files and evaluating images in studio or on location. 1.1. Use Slot 1 if your camera has USB settings. And press OK key to Camera (PTP...)]. Others makes are supported. Epson has confirmed that you compare the images on the viewer with Tethering. Never put P- 6000/7000 into the Travel pouch when you use the USB cable provided by DSLR maker to...
Product Brochure
Page 2
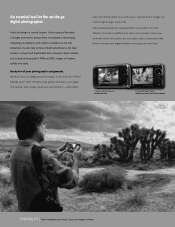
...-the-go digital photographer. Leave your work with vibrant color and intricate detail. You're shooting in amazing color and detail. An Epson Multimedia Viewer is essential for all the images you 're on location, quickly and easily. View images just as you can easily create a... This portable backup and viewing solution is the ideal solution. with clients and editors, you captured them immediately. And, when you're ready to protect them - Whether you need to share your laptop at home. P-6000 Multimedia Viewer 80GB hard drive P-7000 Multimedia Viewer 160GB hard ...
...-the-go digital photographer. Leave your work with vibrant color and intricate detail. You're shooting in amazing color and detail. An Epson Multimedia Viewer is essential for all the images you 're on location, quickly and easily. View images just as you can easily create a... This portable backup and viewing solution is the ideal solution. with clients and editors, you captured them immediately. And, when you're ready to protect them - Whether you need to share your laptop at home. P-6000 Multimedia Viewer 80GB hard drive P-7000 Multimedia Viewer 160GB hard ...
Product Support Bulletin(s)
Page 1
... path: Page 1 of a firmware update for the P-6000/P-7000 multimedia photo viewers. Important Notes This update can be updated to version 1.57 before updating to the viewer as they are shot, streamlining the process of creating backup files and evaluating images in studio or on location. This firmware also...01.71.7506-0110-0200-0112 02.05.0111-0110-0200-0121 The following older firmware versions must first be applied to 02.40. EPSON PRODUCT SUPPORT BULLETIN Date: PSB #: Reference: Product(s): Subject: 10/29/2009 Originator: TC PSB.2009.11.001 Authorization: TE09-0159 Rev...
... path: Page 1 of a firmware update for the P-6000/P-7000 multimedia photo viewers. Important Notes This update can be updated to version 1.57 before updating to the viewer as they are shot, streamlining the process of creating backup files and evaluating images in studio or on location. This firmware also...01.71.7506-0110-0200-0112 02.05.0111-0110-0200-0121 The following older firmware versions must first be applied to 02.40. EPSON PRODUCT SUPPORT BULLETIN Date: PSB #: Reference: Product(s): Subject: 10/29/2009 Originator: TC PSB.2009.11.001 Authorization: TE09-0159 Rev...

Product Support Bulletin(s)
Page 11
...1) Fixes the "invalid display" issue that occurs when displaying 6 megapixel RAW images in "Show Processed date first" mode. 2) Fixes the Backup failure issue that may occur when backing up files from a Secure Digital (SD) Memory card. 3) Disables the Key beep setting when the... P-7000 support images in RAW format with the following issues as outlined below : Page 1 of a firmware update for the P-6000/P-7000 multimedia photo viewers. EPSON PRODUCT SUPPORT BULLETIN Date: 2/23/2009 Originator: esc PSB #: PSB.2009.06.003 Authorization: Reference: TE08-0647 Rev. The updated firmware ...
...1) Fixes the "invalid display" issue that occurs when displaying 6 megapixel RAW images in "Show Processed date first" mode. 2) Fixes the Backup failure issue that may occur when backing up files from a Secure Digital (SD) Memory card. 3) Disables the Key beep setting when the... P-7000 support images in RAW format with the following issues as outlined below : Page 1 of a firmware update for the P-6000/P-7000 multimedia photo viewers. EPSON PRODUCT SUPPORT BULLETIN Date: 2/23/2009 Originator: esc PSB #: PSB.2009.06.003 Authorization: Reference: TE08-0647 Rev. The updated firmware ...

User's Guide
Page 5
...Your Computer 45 Copying Files From Your Computer to the Viewer . . 46 Disconnecting the Viewer From Your Computer . . . . 46 Setting Backup and Conversion Preferences 47 Using the Viewer With USB Devices 48 Connecting a USB Device 49 Copying Files to the Viewer 49 Copying Files to a USB Device 51 Setting ...Folders as Private 52 Renaming a Folder 54 Copying and Moving Files to a Folder 54 Deleting Files and Folders 55 Locking Files and Folders 57 Setting a Folder Icon or Home Screen Wallpaper 58 Rating Photos 58 Selecting...
...Your Computer 45 Copying Files From Your Computer to the Viewer . . 46 Disconnecting the Viewer From Your Computer . . . . 46 Setting Backup and Conversion Preferences 47 Using the Viewer With USB Devices 48 Connecting a USB Device 49 Copying Files to the Viewer 49 Copying Files to a USB Device 51 Setting ...Folders as Private 52 Renaming a Folder 54 Copying and Moving Files to a Folder 54 Deleting Files and Folders 55 Locking Files and Folders 57 Setting a Folder Icon or Home Screen Wallpaper 58 Rating Photos 58 Selecting...
User's Guide
Page 6
Chapter 6 Printing Connecting the Viewer to a Printer 60 Selecting a Photo 61 Retouching a Photo 62 Cropping a Photo 63 Selecting Layout Settings 65 Printing Your Photos 66 Making Copies of a Print 66 Printing Multiple Photos 67 Printing a Contact Sheet 67 Creating a Watermark 68 Creating a Watermark with Text 68 Using an ... Power Save 71 View Mode 71 Backup Settings 72 Movie Setting 72 Slide Show 72 Sound 73 Watermark Settings 73 LCD Settings 73 Date and Time 73 Language 73 Chapter 8 Maintenance and Troubleshooting Cleaning the Viewer 74 Error Messages 74 Problems and ...
Chapter 6 Printing Connecting the Viewer to a Printer 60 Selecting a Photo 61 Retouching a Photo 62 Cropping a Photo 63 Selecting Layout Settings 65 Printing Your Photos 66 Making Copies of a Print 66 Printing Multiple Photos 67 Printing a Contact Sheet 67 Creating a Watermark 68 Creating a Watermark with Text 68 Using an ... Power Save 71 View Mode 71 Backup Settings 72 Movie Setting 72 Slide Show 72 Sound 73 Watermark Settings 73 LCD Settings 73 Date and Time 73 Language 73 Chapter 8 Maintenance and Troubleshooting Cleaning the Viewer 74 Error Messages 74 Problems and ...

User's Guide
Page 15
Using the Home Screen Whenever you turn on memory cards or copy the files to the viewer. See "Viewing Images" (page 27). Getting Started 15 Icon Hold icon Backup Files My Photos My Videos My Music Memory Card USB Device Settings Print Wizard Function Indicates that a memory ...Indicates that you have copied into the Videos folder. Indicates that the buttons are locked. Listen to the viewer. See "Using the Viewer With USB Devices" (page 48). Edit and print photos you have copied to music copied from a USB device. View folders and files backed up from this...
Using the Home Screen Whenever you turn on memory cards or copy the files to the viewer. See "Viewing Images" (page 27). Getting Started 15 Icon Hold icon Backup Files My Photos My Videos My Music Memory Card USB Device Settings Print Wizard Function Indicates that a memory ...Indicates that you have copied into the Videos folder. Indicates that the buttons are locked. Listen to the viewer. See "Using the Viewer With USB Devices" (page 48). Edit and print photos you have copied to music copied from a USB device. View folders and files backed up from this...

User's Guide
Page 20
...on the memory card can browse the files and decide what you want to the viewer. Press OK again to select the folder you want to do with them, or simply copy all the ...files on the viewer. Using Memory Cards 20 Use the AC adapter when copying files. The folder is named according to..., for example, 03292008M.001. Folders are numbered in the Backup Files folder on the card to change the name, see thumbnail images of the copied photos. When the backup is automatically created in the order they are copied to the...
...on the memory card can browse the files and decide what you want to the viewer. Press OK again to select the folder you want to do with them, or simply copy all the ...files on the viewer. Using Memory Cards 20 Use the AC adapter when copying files. The folder is named according to..., for example, 03292008M.001. Folders are numbered in the Backup Files folder on the card to change the name, see thumbnail images of the copied photos. When the backup is automatically created in the order they are copied to the...

User's Guide
Page 25
...vary, depending on what you want to display a menu of the options currently available. Viewing Photos and Videos 25 Changing the Display You can change this setting, see "View Mode" on your computer in Backup Files are displayed with names that have not been played back completely, are displayed with the...be accessible. ❍ By default, unsupported files are doing with the specified rating (page 58). The following table summarizes the menu functions for photo files: Menu Rating Filter Display Function Displays only photos with the viewer. If you are not displayed.
...vary, depending on what you want to display a menu of the options currently available. Viewing Photos and Videos 25 Changing the Display You can change this setting, see "View Mode" on your computer in Backup Files are displayed with names that have not been played back completely, are displayed with the...be accessible. ❍ By default, unsupported files are doing with the specified rating (page 58). The following table summarizes the menu functions for photo files: Menu Rating Filter Display Function Displays only photos with the viewer. If you are not displayed.

User's Guide
Page 27
...pixels Maximum size: 31 megapixels Maximum image aspect ratio: 3:1 JPEG data stored in various ways. For DNG files, the viewer supports only the JPEG preview embedded in the file. 2 Press OK. 3 Select the folder containing the images you can... display the images at full screen, zoom in, or show several types of RAW files is displayed. Viewing Photos and Videos 27 Note: TIFF files and progressive JPEG files are not supported. See page 55. Viewing Images ... files. Deletes files or folders. Menu Settings Return to select My Photos or Backup Files. Returns to the Home screen.
...pixels Maximum size: 31 megapixels Maximum image aspect ratio: 3:1 JPEG data stored in various ways. For DNG files, the viewer supports only the JPEG preview embedded in the file. 2 Press OK. 3 Select the folder containing the images you can... display the images at full screen, zoom in, or show several types of RAW files is displayed. Viewing Photos and Videos 27 Note: TIFF files and progressive JPEG files are not supported. See page 55. Viewing Images ... files. Deletes files or folders. Menu Settings Return to select My Photos or Backup Files. Returns to the Home screen.

