
Basics
Page 2
... any options or any form or by the purchaser or third parties as Original Epson Products or Epson Approved Products by Seiko Epson Corporation. General notice: Other product names used herein are service marks of Seiko Epson Corporation. No part of this publication may be reproduced, stored in a retrieval system, or transmitted, in those designated...
... any options or any form or by the purchaser or third parties as Original Epson Products or Epson Approved Products by Seiko Epson Corporation. General notice: Other product names used herein are service marks of Seiko Epson Corporation. No part of this publication may be reproduced, stored in a retrieval system, or transmitted, in those designated...

Basics
Page 3
Contents Introduction 5 About the Software 6 Replacement Battery 6 Getting Started 7 Unpacking Your P-4000 7 P-4000 Lights and Buttons 8 Installing the Battery 9 Charging the Battery 10 Turning Your P-4000 On and Off 12 Setting the Language, Date, and Time 12 Conserving Battery Power 14 Using the Home Screen 15 Installing the Software 16 Viewing and Playing Photos, Video, and Music 17 Inserting and Removing Memory Cards 17 Copying Files from a Memory Card 21 Supported File Formats 24 Browsing Files on a Memory Card 26 Using the P-4000 Screen 28 3
Contents Introduction 5 About the Software 6 Replacement Battery 6 Getting Started 7 Unpacking Your P-4000 7 P-4000 Lights and Buttons 8 Installing the Battery 9 Charging the Battery 10 Turning Your P-4000 On and Off 12 Setting the Language, Date, and Time 12 Conserving Battery Power 14 Using the Home Screen 15 Installing the Software 16 Viewing and Playing Photos, Video, and Music 17 Inserting and Removing Memory Cards 17 Copying Files from a Memory Card 21 Supported File Formats 24 Browsing Files on a Memory Card 26 Using the P-4000 Screen 28 3

Basics
Page 7
Unpacking Your P-4000 Epson P-4000 Viewing stand Software CD-ROM Carrying case Lithium-ion battery USB cable Strap AC adapter and power cord 7 Getting Started Follow the instructions in this section to install the batteries and software and get ready to use your P-4000.
Unpacking Your P-4000 Epson P-4000 Viewing stand Software CD-ROM Carrying case Lithium-ion battery USB cable Strap AC adapter and power cord 7 Getting Started Follow the instructions in this section to install the batteries and software and get ready to use your P-4000.

Basics
Page 10
Charging the Battery After installing the battery, you need to charge it clicks. When the battery is being charged. The Charge light is green while the battery is fully charged, the light turns off , it takes longer. BATT. 4 Close the battery cover and slide it to the right until it using the AC adapter. With the power on, it takes about 3 hours to fully charge the battery. When the power is off . 10
Charging the Battery After installing the battery, you need to charge it clicks. When the battery is being charged. The Charge light is green while the battery is fully charged, the light turns off , it takes longer. BATT. 4 Close the battery cover and slide it to the right until it using the AC adapter. With the power on, it takes about 3 hours to fully charge the battery. When the power is off . 10

Basics
Page 11
... an electrical outlet. Battery is fully charged. : Battery power is about half full. : Battery power is low. : Battery power is not installed; Charge the battery using the P-4000. Caution: Do not connect the AC adapter when the battery is running out. The battery status is charging. : 11 Do not remove the... AC adapter while you are using the : AC adapter. this can damage the P-4000. Battery is displayed in to the power cord, and plug it in the top right corner of...
... an electrical outlet. Battery is fully charged. : Battery power is about half full. : Battery power is low. : Battery power is not installed; Charge the battery using the P-4000. Caution: Do not connect the AC adapter when the battery is running out. The battery status is charging. : 11 Do not remove the... AC adapter while you are using the : AC adapter. this can damage the P-4000. Battery is displayed in to the power cord, and plug it in the top right corner of...

Basics
Page 15
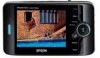
You can return to create album shortcuts here Latest Data Settings View most recently saved files Customize your albums Battery status Saved Data Albums Memory Card See page 43 to the Home screen at any time by pressing the Home button. View folders for all your saved files View or copy files from a memory card Home View your P-4000 and check storage space 15 Use the 4-way ring to highlight one of the icons, then press the OK button to select it. Using the Home Screen Whenever you turn on the P-4000, the Home screen appears.
You can return to create album shortcuts here Latest Data Settings View most recently saved files Customize your albums Battery status Saved Data Albums Memory Card See page 43 to the Home screen at any time by pressing the Home button. View folders for all your saved files View or copy files from a memory card Home View your P-4000 and check storage space 15 Use the 4-way ring to highlight one of the icons, then press the OK button to select it. Using the Home Screen Whenever you turn on the P-4000, the Home screen appears.

Basics
Page 17
...™ (3.3V only) The SD Card slot supports the following cards: ◗ SD card (Secure Digital) up to 512MB ◗ MultiMedia card (MMC V 2.1 or later) up to 512MB You can also use the following types of memory cards with a CompactFlash adapter in this section to insert a memory card, copy files, and view...
...™ (3.3V only) The SD Card slot supports the following cards: ◗ SD card (Secure Digital) up to 512MB ◗ MultiMedia card (MMC V 2.1 or later) up to 512MB You can also use the following types of memory cards with a CompactFlash adapter in this section to insert a memory card, copy files, and view...

Basics
Page 18
Caution: Never remove a memory card, or shake or drop the P-4000 while the Access light is flashing. Do not put labels or stickers on memory cards. The sticker may cause files to be lost or damaged. Doing so may peel off, preventing the card from being ejected and damaging the P-4000. Using the CompactFlash Card Slot Insert the memory card into the slot. Then push the memory card all the way into the slot with the back of card 18 Back of the card facing the screen.
Caution: Never remove a memory card, or shake or drop the P-4000 while the Access light is flashing. Do not put labels or stickers on memory cards. The sticker may cause files to be lost or damaged. Doing so may peel off, preventing the card from being ejected and damaging the P-4000. Using the CompactFlash Card Slot Insert the memory card into the slot. Then push the memory card all the way into the slot with the back of card 18 Back of the card facing the screen.

Basics
Page 19
To remove a card from the P-4000; If the button is off. Otherwise, the card and P-4000 may be damaged. If you are using a CompactFlash adapter, put the card into the adapter and insert the adapter into the slot. do not remove only the memory card. 19 Note: If ...you insert memory cards in the correct orientation. Then press the eject button and pull out the card. Caution: Make sure you are using a CompactFlash adapter, remove the adapter from the C/F Card slot, first make sure the Access light is not sticking out, press it once to pop it...
To remove a card from the P-4000; If the button is off. Otherwise, the card and P-4000 may be damaged. If you are using a CompactFlash adapter, put the card into the adapter and insert the adapter into the slot. do not remove only the memory card. 19 Note: If ...you insert memory cards in the correct orientation. Then press the eject button and pull out the card. Caution: Make sure you are using a CompactFlash adapter, remove the adapter from the C/F Card slot, first make sure the Access light is not sticking out, press it once to pop it...

Basics
Page 20
Back of the slot. 20 Then push the memory card all the way into the slot with the back of the card. Then press in the correct orientation. Caution: Make sure you insert memory cards in on the top of the card facing the LCD. When the card pops out, pull it out of card To remove a card from the SD Card slot, first make sure the Access light is off. Otherwise, the card and P-4000 may be damaged. Using the Secure Digital Card Slot Insert the memory card into the slot.
Back of the slot. 20 Then push the memory card all the way into the slot with the back of the card. Then press in the correct orientation. Caution: Make sure you insert memory cards in on the top of the card facing the LCD. When the card pops out, pull it out of card To remove a card from the SD Card slot, first make sure the Access light is off. Otherwise, the card and P-4000 may be damaged. Using the Secure Digital Card Slot Insert the memory card into the slot.

Basics
Page 21
Copying Files from a Memory Card After you insert a memory card, you can browse the files and decide what you want to do with them, or simply copy all the files on the card to the P-4000. 1 Insert the memory card as described on page 18 or 20. 2 Use the 4-way ring to highlight Memory Card on the Home screen and press the OK button. You see the following menu: Home Saved DataCopy Data fArolbmumMsemory CardMemory Card Create Album After Copying Data Browse the Memory Card Latest Data Settings 21
Copying Files from a Memory Card After you insert a memory card, you can browse the files and decide what you want to do with them, or simply copy all the files on the card to the P-4000. 1 Insert the memory card as described on page 18 or 20. 2 Use the 4-way ring to highlight Memory Card on the Home screen and press the OK button. You see the following menu: Home Saved DataCopy Data fArolbmumMsemory CardMemory Card Create Album After Copying Data Browse the Memory Card Latest Data Settings 21

Basics
Page 23
... files stored on the P-4000 to delete the files from the memory card after you copy them to the P-4000. 1 On the Home screen, use the 4-way ring to select Settings and press the OK button. 2 Select Copy Mode and press the OK button. 3 Press left or right on... memory cards to be automatically deleted, without a warning message, after copying. 4 When you want the P-4000 to ask before copying whether to another storage device periodically. Deleting Files After Copying You can have files automatically deleted after you copy them . ◗ Select Confirm before deleting if you want files...
... files stored on the P-4000 to delete the files from the memory card after you copy them to the P-4000. 1 On the Home screen, use the 4-way ring to select Settings and press the OK button. 2 Select Copy Mode and press the OK button. 3 Press left or right on... memory cards to be automatically deleted, without a warning message, after copying. 4 When you want the P-4000 to ask before copying whether to another storage device periodically. Deleting Files After Copying You can have files automatically deleted after you copy them . ◗ Select Confirm before deleting if you want files...

Basics
Page 24
The pixel size depends on the capability and settings of the camera used to capture the image, and whether you have resized the image in the header of .nef RAW files is displayed. .pef * Pixels refer to image ...resolution, not file size (bytes). Supported File Formats The P-4000 supports non-progressive JPEG files, and RAW files from the following digital SLR cameras: ◗ Epson R-D1 ◗ Canon® EOS-D30, EOS-D60, EOS-10D, EOS-20D, Digital Rebel, Digital Rebel XT, Kiss Digital, Kiss Digital N, EOS-1D Mark II...
The pixel size depends on the capability and settings of the camera used to capture the image, and whether you have resized the image in the header of .nef RAW files is displayed. .pef * Pixels refer to image ...resolution, not file size (bytes). Supported File Formats The P-4000 supports non-progressive JPEG files, and RAW files from the following digital SLR cameras: ◗ Epson R-D1 ◗ Canon® EOS-D30, EOS-D60, EOS-10D, EOS-20D, Digital Rebel, Digital Rebel XT, Kiss Digital, Kiss Digital N, EOS-1D Mark II...

Basics
Page 25
.... The P-4000 supports video files in resolutions ranging from 160 × 112 pixels to 640 × 480 pixels, with file sizes up to supported formats using programs such as QuickTime® Pro. Video file Video codec extensions Audio codec Max bit rate .avi .mov .mp4 .asf MPEG-4 (Simple Profile) AAC, MP3...
.... The P-4000 supports video files in resolutions ranging from 160 × 112 pixels to 640 × 480 pixels, with file sizes up to supported formats using programs such as QuickTime® Pro. Video file Video codec extensions Audio codec Max bit rate .avi .mov .mp4 .asf MPEG-4 (Simple Profile) AAC, MP3...

Basics
Page 27
... OK button. You can zoom in, view information about the image, or see a histogram, as described on page 32. To view an image full screen, use the 4-way ring to select the image you can also press the Menu button and do the following when viewing images on a memory card: ◗...
... OK button. You can zoom in, view information about the image, or see a histogram, as described on page 32. To view an image full screen, use the 4-way ring to select the image you can also press the Menu button and do the following when viewing images on a memory card: ◗...

Basics
Page 28
..., which you can view or play them in various ways. Only folders that appear on creating album shortcuts. 28 Using the P-4000 Screen After you have copied files from a memory card, you use for copying files from your computer. See page 11 for information about battery status. The following illustrations and tables...
..., which you can view or play them in various ways. Only folders that appear on creating album shortcuts. 28 Using the P-4000 Screen After you have copied files from a memory card, you use for copying files from your computer. See page 11 for information about battery status. The following illustrations and tables...

Basics
Page 30
Viewing Images You can view images in the Home screen, then press the OK button. Home Saved Data Albums Memory Card Latest Data Settings 1 Use the 4-way ring to select Saved Data or Albums in Saved Data or Albums as thumbnails or full-screen images. To display information or instructions, press the Display button. You see folders or albums: Saved Data 30 20040829\002 20040827\001 20040820\001 20040818\003 20040815\001 20040813\001 20040810\002 20040805\001 20040801\005 20040720\002 20040715\003 20040630\001 Information and instructions vary depending on the screen.
Viewing Images You can view images in the Home screen, then press the OK button. Home Saved Data Albums Memory Card Latest Data Settings 1 Use the 4-way ring to select Saved Data or Albums in Saved Data or Albums as thumbnails or full-screen images. To display information or instructions, press the Display button. You see folders or albums: Saved Data 30 20040829\002 20040827\001 20040820\001 20040818\003 20040815\001 20040813\001 20040810\002 20040805\001 20040801\005 20040720\002 20040715\003 20040630\001 Information and instructions vary depending on the screen.

Basics
Page 31
Thumbnails of the images and other files are displayed for every memory card. You can change the setting to view, then press the OK button. Note: On the Saved Data screen, folders are displayed: To move to the next screen, press down on the Home screen, then select View Mode. 2 Use the 4-way ring to select the folder or album containing the images you want to display folders by date. Select Settings on the 4-way ring and hold. 31
Thumbnails of the images and other files are displayed for every memory card. You can change the setting to view, then press the OK button. Note: On the Saved Data screen, folders are displayed: To move to the next screen, press down on the Home screen, then select View Mode. 2 Use the 4-way ring to select the folder or album containing the images you want to display folders by date. Select Settings on the 4-way ring and hold. 31

Basics
Page 32
3 Use the 4-way ring to select the image you want to zoom in on an image shown full screen, press the OK button. Keep pressing it to fill the screen. Continue pressing it to view, then press the OK button. The selected image is enlarged to zoom all the way out. ◗ To move around a zoomed image, use the 4-way ring. 32 Zooming an Image ◗ To zoom in even further. ◗ To zoom out, press the Cancel button.
3 Use the 4-way ring to select the image you want to zoom in on an image shown full screen, press the OK button. Keep pressing it to fill the screen. Continue pressing it to view, then press the OK button. The selected image is enlarged to zoom all the way out. ◗ To move around a zoomed image, use the 4-way ring. 32 Zooming an Image ◗ To zoom in even further. ◗ To zoom out, press the Cancel button.

Basics
Page 36
Note: Make sure the P-4000 is at the Home screen. 36 You should use the AC adapter when you connect the P-4000. Connecting the P-4000 to Your Computer 1 Connect the AC adapter to the P-4000 and plug it in the box, and easily copy files back and forth. Then turn on the P-4000 and your computer. See page 16 for instructions. Note: If your computer using the USB cable that came in . Copying Files to and From Your Computer You can connect the P-4000 to your computer uses Windows 98SE, you need to install driver software before you connect the P-4000 to your computer.
Note: Make sure the P-4000 is at the Home screen. 36 You should use the AC adapter when you connect the P-4000. Connecting the P-4000 to Your Computer 1 Connect the AC adapter to the P-4000 and plug it in the box, and easily copy files back and forth. Then turn on the P-4000 and your computer. See page 16 for instructions. Note: If your computer using the USB cable that came in . Copying Files to and From Your Computer You can connect the P-4000 to your computer uses Windows 98SE, you need to install driver software before you connect the P-4000 to your computer.