Users Guide
Page 3
...Tab 44 Additional Scanning Settings - Contents DS-1630 User's Guide ...7 Scanner Basics...8 Scanner Parts Locations ...8 Scanner Parts...8 Scanner Buttons and Lights...10 Epson Scanner Accessories...11 Changing the Power Off and Sleep Timer Settings 11 Placing Originals on the Scanner ...13 Placing Originals in the Automatic...Settings - Windows 29 Scanning ...30 Starting a Scan...30 Starting a Scan from a Scanner Button 30 Assigning Start Button Settings or Scan Jobs 31 Starting a Scan Using the Epson Scan 2 Icon 33 Starting a Scan from a Scanning Program 35 Scanning with Document ...
...Tab 44 Additional Scanning Settings - Contents DS-1630 User's Guide ...7 Scanner Basics...8 Scanner Parts Locations ...8 Scanner Parts...8 Scanner Buttons and Lights...10 Epson Scanner Accessories...11 Changing the Power Off and Sleep Timer Settings 11 Placing Originals on the Scanner ...13 Placing Originals in the Automatic...Settings - Windows 29 Scanning ...30 Starting a Scan...30 Starting a Scan from a Scanner Button 30 Assigning Start Button Settings or Scan Jobs 31 Starting a Scan Using the Epson Scan 2 Icon 33 Starting a Scan from a Scanning Program 35 Scanning with Document ...

Users Guide
Page 4
... File - Scanning Special Projects...47 Scanning Multi-Page Originals as Expected 67 Scanning Software Does Not Operate Correctly 68 Cannot Start Epson Scan 2 ...68 Scanning is Slow ...69 Solving Original Document Feeding Problems 69 Originals Do Not Feed From the Automatic Document... are Blurry 77 4 Windows 56 Cleaning and Transporting Your Scanner 59 Cleaning Your Scanner ...59 Cleaning the ADF ...59 Transporting Your Scanner ...65 Solving Problems ...66 Scanner Light Status ...66 Solving Scanning Problems ...67 Scanner Does Not Turn On or Turns Off Unexpectedly 67 Start ...
... File - Scanning Special Projects...47 Scanning Multi-Page Originals as Expected 67 Scanning Software Does Not Operate Correctly 68 Cannot Start Epson Scan 2 ...68 Scanning is Slow ...69 Solving Original Document Feeding Problems 69 Originals Do Not Feed From the Automatic Document... are Blurry 77 4 Windows 56 Cleaning and Transporting Your Scanner 59 Cleaning Your Scanner ...59 Cleaning the ADF ...59 Transporting Your Scanner ...65 Solving Problems ...66 Scanner Light Status ...66 Solving Scanning Problems ...67 Scanner Does Not Turn On or Turns Off Unexpectedly 67 Start ...

Users Guide
Page 5
......86 Safety and Approvals Specifications 86 Notices ...88 Important Safety Instructions...88 Restrictions on Copying ...89 Default Delay Times for Power Management for Epson Products 90 Binding Arbitration and Class Waiver 90 Trademarks ...93 Copyright Notice...94 Open Source Software License ...94 libTIFF Software Acknowledgment 96 A Note... Appear in an Image 78 Scanned Image Colors Do Not Match Original Colors 78 Scanned Image Edges are Cropped 79 Resetting the Epson Scan 2 Settings 79 Uninstall Your Scanner Software...79 Uninstalling Scanner Software - Windows 80 Uninstalling...
......86 Safety and Approvals Specifications 86 Notices ...88 Important Safety Instructions...88 Restrictions on Copying ...89 Default Delay Times for Power Management for Epson Products 90 Binding Arbitration and Class Waiver 90 Trademarks ...93 Copyright Notice...94 Open Source Software License ...94 libTIFF Software Acknowledgment 96 A Note... Appear in an Image 78 Scanned Image Colors Do Not Match Original Colors 78 Scanned Image Edges are Cropped 79 Resetting the Epson Scan 2 Settings 79 Uninstall Your Scanner Software...79 Uninstalling Scanner Software - Windows 80 Uninstalling...

Users Guide
Page 8
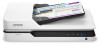
Scanner Parts Locations Changing the Power Off and Sleep Timer Settings Scanner Parts Locations See these sections to identify the parts on your scanner. Scanner Parts Scanner Buttons and Lights Epson Scanner Accessories Parent topic: Scanner Basics Scanner Parts 1 ADF (Automatic Document Feeder) 8 Scanner Basics See these sections to learn about the basic features of your scanner.
Scanner Parts Locations Changing the Power Off and Sleep Timer Settings Scanner Parts Locations See these sections to identify the parts on your scanner. Scanner Parts Scanner Buttons and Lights Epson Scanner Accessories Parent topic: Scanner Basics Scanner Parts 1 ADF (Automatic Document Feeder) 8 Scanner Basics See these sections to learn about the basic features of your scanner.

Users Guide
Page 9
2 ADF cover 3 Input tray 4 Edge guides 5 Stopper 6 Output tray 7 Control panel 1 Document mat 2 Scanner glass 9
2 ADF cover 3 Input tray 4 Edge guides 5 Stopper 6 Output tray 7 Control panel 1 Document mat 2 Scanner glass 9

Users Guide
Page 10
error light 3 stop button 4 ready light 5 start button Parent topic: Scanner Parts Locations 10 1 AC inlet 2 USB port Parent topic: Scanner Parts Locations Scanner Buttons and Lights 1 power button 2 !
error light 3 stop button 4 ready light 5 start button Parent topic: Scanner Parts Locations 10 1 AC inlet 2 USB port Parent topic: Scanner Parts Locations Scanner Buttons and Lights 1 power button 2 !

Users Guide
Page 11
... 2 Utility. • Windows 8.x: Navigate to change the time period before the scanner enters sleep mode and turns off automatically. 1. Epson Scanner Accessories You can also purchase accessories from an Epson authorized reseller. Part Network interface unit Part number B12B808441 Parent topic: Scanner Parts Locations Changing the Power Off and Sleep Timer Settings You can use...
... 2 Utility. • Windows 8.x: Navigate to change the time period before the scanner enters sleep mode and turns off automatically. 1. Epson Scanner Accessories You can also purchase accessories from an Epson authorized reseller. Part Network interface unit Part number B12B808441 Parent topic: Scanner Parts Locations Changing the Power Off and Sleep Timer Settings You can use...

Users Guide
Page 12
Close the Epson Scan 2 Utility. Select the length of time after which you want the scanner to go to automatically turn off when not in use as the Sleep Timer setting. 4. 2. Click the Power Save tab. 3. Select the length of time after which you want the scanner to sleep as the Power Off Timer setting. 5. Parent topic: Scanner Basics 12
Close the Epson Scan 2 Utility. Select the length of time after which you want the scanner to go to automatically turn off when not in use as the Sleep Timer setting. 4. 2. Click the Power Save tab. 3. Select the length of time after which you want the scanner to sleep as the Power Off Timer setting. 5. Parent topic: Scanner Basics 12

Users Guide
Page 13
... or longer, see the link at the end of a 2-sided document. Placing Originals in the Automatic Document Feeder Placing Originals on the Scanner Glass Placing Originals in the Automatic Document Feeder Follow the instructions here to avoid damaging it. Placing Standard-Size Originals in the ADF Placing ...Long Originals in the ADF Original Document Specifications for the ADF Parent topic: Placing Originals on the Scanner Related references Original Document Specifications for the ADF Placing Standard-Size Originals in the ADF You can also use its cover as a ...
... or longer, see the link at the end of a 2-sided document. Placing Originals in the Automatic Document Feeder Placing Originals on the Scanner Glass Placing Originals in the Automatic Document Feeder Follow the instructions here to avoid damaging it. Placing Standard-Size Originals in the ADF Placing ...Long Originals in the ADF Original Document Specifications for the ADF Parent topic: Placing Originals on the Scanner Related references Original Document Specifications for the ADF Placing Standard-Size Originals in the ADF You can also use its cover as a ...

Users Guide
Page 14
Remove any dust or stains from the scanner glass. Note: Also wipe off any documents from the areas shown here with a soft, dry cloth. 14 1.
Remove any dust or stains from the scanner glass. Note: Also wipe off any documents from the areas shown here with a soft, dry cloth. 14 1.

Users Guide
Page 17
Note: Also wipe off any documents from the areas shown here with a soft, dry cloth. 2. 1. Slide the edge guides outward. 17 Remove any dust or stains from the scanner glass.
Note: Also wipe off any documents from the areas shown here with a soft, dry cloth. 2. 1. Slide the edge guides outward. 17 Remove any dust or stains from the scanner glass.

Users Guide
Page 19
...; 6.7 inches (89 × 170 mm) for double-sided scanning Caution: Load the following types of originals on the scanner glass instead of the ADF, or they may be damaged or may damage the scanner: • Photos 19 loading capacity varies depending on the edge guide or 50 Yes sheets (21 lb [80...
...; 6.7 inches (89 × 170 mm) for double-sided scanning Caution: Load the following types of originals on the scanner glass instead of the ADF, or they may be damaged or may damage the scanner: • Photos 19 loading capacity varies depending on the edge guide or 50 Yes sheets (21 lb [80...

Users Guide
Page 20
... for an extended period, or they may damage the scanner. • Originals with holes, other than standard hole-punched originals • Booklets • Non-paper originals, such as fabric or metal foil • Originals containing ... cards • Plastic cards Parent topic: Placing Originals in the Automatic Document Feeder Placing Originals on the Scanner Glass You can place originals directly on the scanner glass. Caution: Do not place heavy objects on the scanner glass and do not press on the glass with too much force, or it • Ripped...
... for an extended period, or they may damage the scanner. • Originals with holes, other than standard hole-punched originals • Booklets • Non-paper originals, such as fabric or metal foil • Originals containing ... cards • Plastic cards Parent topic: Placing Originals in the Automatic Document Feeder Placing Originals on the Scanner Glass You can place originals directly on the scanner glass. Caution: Do not place heavy objects on the scanner glass and do not press on the glass with too much force, or it • Ripped...

Users Guide
Page 21
Caution: Be careful not to open the scanner cover more than 70° or you may damage it. 21 1. Open the scanner cover.
Caution: Be careful not to open the scanner cover more than 70° or you may damage it. 21 1. Open the scanner cover.

Users Guide
Page 22
2. Place your original facedown on the scanner glass with the top edge facing as shown. Slide the original to the edges of the indicated corner. 22
2. Place your original facedown on the scanner glass with the top edge facing as shown. Slide the original to the edges of the indicated corner. 22

Users Guide
Page 24
Note: If your original is over 0.4 inch (10 mm) thick, leave the scanner cover open and gently press down on the Scanner 24 Close the scanner cover gently to keep your original instead as you scan. 3. Parent topic: Placing Originals on your original in place.
Note: If your original is over 0.4 inch (10 mm) thick, leave the scanner cover open and gently press down on the Scanner 24 Close the scanner cover gently to keep your original instead as you scan. 3. Parent topic: Placing Originals on your original in place.

Users Guide
Page 26
... versions): Click or Start, and select All Programs or Programs. Select EPSON > Epson Scan 2 > Epson Scan 2 Utility. • OS X: Open the Applications folder, open the Epson Software folder, and select Epson Scan 2 Utility. 2. Then follow the instructions here to your scanner and verify that came with the optional Epson Network Interface Unit for network scanning using the...
... versions): Click or Start, and select All Programs or Programs. Select EPSON > Epson Scan 2 > Epson Scan 2 Utility. • OS X: Open the Applications folder, open the Epson Software folder, and select Epson Scan 2 Utility. 2. Then follow the instructions here to your scanner and verify that came with the optional Epson Network Interface Unit for network scanning using the...

Users Guide
Page 27
Select your scanner and click Add. 27 You see a screen like this: Note: If you see an Enable Editing button, click it so that you can modify the scanner settings. 3.
Select your scanner and click Add. 27 You see a screen like this: Note: If you see an Enable Editing button, click it so that you can modify the scanner settings. 3.

Users Guide
Page 29
... 29 Windows You can scan to the computer you want to send the scanned file to and press the OK button. Note: Make sure your scanner is sent to a network computer directly from the Network Interface Unit - Select a scan job and press the OK button on the LCD screen. 3. Scanning to... the same network group or it will not appear on the Network Interface Unit. 5. Press the OK button on the scanner or Network Interface Unit. Press the start button on the Network Interface Unit. 2. You first set up a password in Document Capture Pro and then select...
... 29 Windows You can scan to the computer you want to send the scanned file to and press the OK button. Note: Make sure your scanner is sent to a network computer directly from the Network Interface Unit - Select a scan job and press the OK button on the LCD screen. 3. Scanning to... the same network group or it will not appear on the Network Interface Unit. 5. Press the OK button on the scanner or Network Interface Unit. Press the start button on the Network Interface Unit. 2. You first set up a password in Document Capture Pro and then select...

Users Guide
Page 30
... your product for scanning, start button in Document Capture Pro (Windows) or Document Capture (OS X). Load an original in Epson Scan 2 Scan Resolution Guidelines Scanning Special Projects Starting a Scan After placing your scanner. Note: You can scan original documents or photos and save them as digital files. This automatically starts Document Capture...
... your product for scanning, start button in Document Capture Pro (Windows) or Document Capture (OS X). Load an original in Epson Scan 2 Scan Resolution Guidelines Scanning Special Projects Starting a Scan After placing your scanner. Note: You can scan original documents or photos and save them as digital files. This automatically starts Document Capture...

