User Manual
Page 6
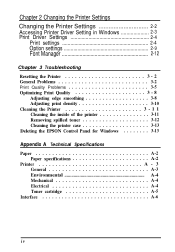
... 2-2 Accessing Printer Driver Setting in Windows 2-3 Print Driver Settings 2-4 Print settings 2-4 Option settings 2-9 Font Manager 2-12 Chapter 3 Troubleshooting Resetting the Printer 3 - 2 General Problems 3-2 Print Quality Problems 3-5 Optimizing Print Quality 3 - 8 Adjusting edge smoothing 3-8 Adjusting ... of the printer 3-11 Removing spilled toner 3-12 Cleaning the printer case 3-13 Deleting the EPSON Control Panel for Windows 3-13 Appendix A Technical Specifications Paper A-2 Paper specifications A-2 Printer A - 3 General A-3 Environmental A-4 Mechanical A-4 ...
... 2-2 Accessing Printer Driver Setting in Windows 2-3 Print Driver Settings 2-4 Print settings 2-4 Option settings 2-9 Font Manager 2-12 Chapter 3 Troubleshooting Resetting the Printer 3 - 2 General Problems 3-2 Print Quality Problems 3-5 Optimizing Print Quality 3 - 8 Adjusting edge smoothing 3-8 Adjusting ... of the printer 3-11 Removing spilled toner 3-12 Cleaning the printer case 3-13 Deleting the EPSON Control Panel for Windows 3-13 Appendix A Technical Specifications Paper A-2 Paper specifications A-2 Printer A - 3 General A-3 Environmental A-4 Mechanical A-4 ...
User Manual
Page 15
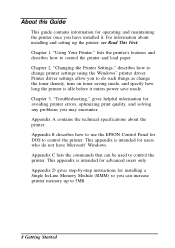
... step-by-step instructions for installing a Single In-Line Memory Module (SIMM) so you may encounter. Appendix B describes how to use the EPSON Control Panel for DOS to control the printer and load paper. This appendix is idle before it . Chapter 1, "Using Your Printer," lists... the printer's features and describes how to control the printer. Chapter 3, "Troubleshooting," gives helpful information for avoiding printer errors, optimizing print quality, and solving any problems you can be used to control the printer. Appendix ...
... step-by-step instructions for installing a Single In-Line Memory Module (SIMM) so you may encounter. Appendix B describes how to use the EPSON Control Panel for DOS to control the printer and load paper. This appendix is idle before it . Chapter 1, "Using Your Printer," lists... the printer's features and describes how to control the printer. Chapter 3, "Troubleshooting," gives helpful information for avoiding printer errors, optimizing print quality, and solving any problems you can be used to control the printer. Appendix ...
User Manual
Page 40
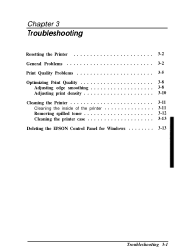
Chapter 3 Troubleshooting Resetting the Printer 3-2 General Problems 3-2 Print Quality Problems 3-5 Optimizing Print Quality 3-8 Adjusting edge smoothing 3-8 Adjusting print density 3-10 Cleaning the Printer 3-11 Cleaning the inside of the printer 3-11 Removing spilled toner 3-12 Cleaning the printer case 3-13 Deleting the EPSON Control Panel for Windows 3-13 Troubleshooting 3-1
Chapter 3 Troubleshooting Resetting the Printer 3-2 General Problems 3-2 Print Quality Problems 3-5 Optimizing Print Quality 3-8 Adjusting edge smoothing 3-8 Adjusting print density 3-10 Cleaning the Printer 3-11 Cleaning the inside of the printer 3-11 Removing spilled toner 3-12 Cleaning the printer case 3-13 Deleting the EPSON Control Panel for Windows 3-13 Troubleshooting 3-1

User Manual
Page 41
... "Paper Handling" in the paper tray before installing paper. Fan the stack of paper and then tap it on how to align it before loading. 3-2 Troubleshooting To reset the printer, hold down the reset button at the rear of the printer. Some types of paper require single-sheet feeding. Be sure...
... "Paper Handling" in the paper tray before installing paper. Fan the stack of paper and then tap it on how to align it before loading. 3-2 Troubleshooting To reset the printer, hold down the reset button at the rear of the printer. Some types of paper require single-sheet feeding. Be sure...
User Manual
Page 42
... source such as a wall switch, make sure the switch is turned on Open the printer's front cover and make sure the outlet is operating properly. Troubleshooting 3-3 Never let more than 50 sheets accumulate in the tray. Try turning over the stack of paper in the Read This First guide. Perform the...
... source such as a wall switch, make sure the switch is turned on Open the printer's front cover and make sure the outlet is operating properly. Troubleshooting 3-3 Never let more than 50 sheets accumulate in the tray. Try turning over the stack of paper in the Read This First guide. Perform the...

User Manual
Page 43
... is garbled or printed as described in the Read This First guide. if you are using the correct page length and margin settings in Appendix D. 3-4 Troubleshooting A single sheet or the last sheet doesn't print The file you may be empty. If the printer still does not print correctly, call your interface...
... is garbled or printed as described in the Read This First guide. if you are using the correct page length and margin settings in Appendix D. 3-4 Troubleshooting A single sheet or the last sheet doesn't print The file you may be empty. If the printer still does not print correctly, call your interface...

User Manual
Page 44
... not solve the problem, replace the toner cartridge as described in the Read This First guide and print several pages to check the print quality. Troubleshooting 3-5 The font you selected in your software program doesn't print The font you need to obtain the font screen software appropriate for the type of...
... not solve the problem, replace the toner cartridge as described in the Read This First guide and print several pages to check the print quality. Troubleshooting 3-5 The font you selected in your software program doesn't print The font you need to obtain the font screen software appropriate for the type of...
User Manual
Page 45
... bottom of the printer interior. Horizontal black or white bands or black page Install a new toner cartridge as described in the Read This First guide. 3-6 Troubleshooting With the toner cartridge removed, clean the paper path inside the printer using a clean, soft, dry cloth. If this does not solve the problem, install...
... bottom of the printer interior. Horizontal black or white bands or black page Install a new toner cartridge as described in the Read This First guide. 3-6 Troubleshooting With the toner cartridge removed, clean the paper path inside the printer using a clean, soft, dry cloth. If this does not solve the problem, install...

User Manual
Page 46
... cartridge is with your dealer or a qualified service person. See Chapter 1 for best results. If the test page is blank, the problem is probably empty. Troubleshooting 3-7 The higher the moisture content in the Read This First guide.
... cartridge is with your dealer or a qualified service person. See Chapter 1 for best results. If the test page is blank, the problem is probably empty. Troubleshooting 3-7 The higher the moisture content in the Read This First guide.

User Manual
Page 48
...setting. See the next section, "Adjusting print density." Note: Edge smoothing may not improve graphics that include gray shading or a screen pattern. Troubleshooting 3-9 To change the Edge Smoothing setting to the area inside the edges. For a darker edge smoothing setting, make the print density lighter ...program, you might want to select the printer.) 4. Normally you should not have to select Options or Printer.) 3. If necessary, select the ActionLaser 1100 in the File menu. 2. In the Setup dialog box for this, use the Light setting if the edges appear dark, and use the ...
...setting. See the next section, "Adjusting print density." Note: Edge smoothing may not improve graphics that include gray shading or a screen pattern. Troubleshooting 3-9 To change the Edge Smoothing setting to the area inside the edges. For a darker edge smoothing setting, make the print density lighter ...program, you might want to select the printer.) 4. Normally you should not have to select Options or Printer.) 3. If necessary, select the ActionLaser 1100 in the File menu. 2. In the Setup dialog box for this, use the Light setting if the edges appear dark, and use the ...

User Manual
Page 49
... in the list of text and graphics. If necessary, select the ActionLaser 1100 in the File menu. 2. Change the Toner Density setting as appropriate. If you select darker print, you may need to replace the toner cartridge more often. 3-10 Troubleshooting From your printed pages are too light or too dark, adjust the...
... in the list of text and graphics. If necessary, select the ActionLaser 1100 in the File menu. 2. Change the Toner Density setting as appropriate. If you select darker print, you may need to replace the toner cartridge more often. 3-10 Troubleshooting From your printed pages are too light or too dark, adjust the...

User Manual
Page 50
... of the printer Fine particles of paper dust and ordinary dust can collect inside the printer with a soft, clean cloth. Open the printer's front cover. 3. Troubleshooting 3-11 Remove the toner cartridge. 4. Make sure the printer is turned off. 2. Remove any dirt inside the printer. Do not use compressed air. Whenever you...
... of the printer Fine particles of paper dust and ordinary dust can collect inside the printer with a soft, clean cloth. Open the printer's front cover. 3. Troubleshooting 3-11 Remove the toner cartridge. 4. Make sure the printer is turned off. 2. Remove any dirt inside the printer. Do not use compressed air. Whenever you...

User Manual
Page 51
... bottom of the printer interior. 5. Be sure to read the instructions for your clothing, rinse it may cause the toner to leave a permanent stain. 3-12 Troubleshooting it off with cold water. Follow these steps: 1. Note: If you remove all the spilled toner. Be sure to clean the laser scanner window at...
... bottom of the printer interior. 5. Be sure to read the instructions for your clothing, rinse it may cause the toner to leave a permanent stain. 3-12 Troubleshooting it off with cold water. Follow these steps: 1. Note: If you remove all the spilled toner. Be sure to clean the laser scanner window at...

User Manual
Page 52
...box, type C:\EPPRT\EPDELETE. Use the File Manager to delete the EPSON Control Panel, choose OK. 5. these chemicals can damage the components and case. Note: If the EPSON Control Panel is in the File menu. Once the EPSON Control Panel is dirty or dusty, turn off the printer and ... OK. 6. Caution: Never use alcohol or thinner to specify the correct pathname. 4. Troubleshooting 3-13 Cleaning the printer case If the printer's outer case is deleted, a message appears telling you need to delete the EPSON Control Panel for Windows If you to get water on the computer and start Windows...
...box, type C:\EPPRT\EPDELETE. Use the File Manager to delete the EPSON Control Panel, choose OK. 5. these chemicals can damage the components and case. Note: If the EPSON Control Panel is in the File menu. Once the EPSON Control Panel is dirty or dusty, turn off the printer and ... OK. 6. Caution: Never use alcohol or thinner to specify the correct pathname. 4. Troubleshooting 3-13 Cleaning the printer case If the printer's outer case is deleted, a message appears telling you need to delete the EPSON Control Panel for Windows If you to get water on the computer and start Windows...