Operation Guide - EasyMP Multi PC Projection v2.10
Page 20
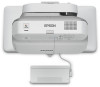
...that supports 802.11n. Parent topic: Selecting Projector Network Settings Setting Up a Projector to Connect in the projector, if necessary. Install the wireless LAN unit in Quick Connection Mode To connect a computer directly to the projector using wireless communication, you need to a...See the documentation supplied with your computer to a wireless LAN. Press the Menu button on the projector. 4. Contact your projector User's Guide for instructions. 3. Turn on the remote control or the control panel, select the Network menu, and select Network Configuration. 5. Recommended ...
...that supports 802.11n. Parent topic: Selecting Projector Network Settings Setting Up a Projector to Connect in the projector, if necessary. Install the wireless LAN unit in Quick Connection Mode To connect a computer directly to the projector using wireless communication, you need to a...See the documentation supplied with your computer to a wireless LAN. Press the Menu button on the projector. 4. Contact your projector User's Guide for instructions. 3. Turn on the remote control or the control panel, select the Network menu, and select Network Configuration. 5. Recommended ...

Operation Guide - EasyMP Multi PC Projection v2.10
Page 22
Install the wireless LAN unit in the projector, if necessary. See your projector User's Guide for instructions. 4. Select security settings on the Security menu as necessary for instructions. 8. 2. Connect the computer to save your network. See your projector User's Guide for your network. Select ...or network adapter. 3. Note: To set up a network connection, if necessary, see the documentation supplied with your projector User's Guide for Connection Mode. 9. Select Wireless LAN. When you have finished making settings, select Setup Complete or Complete, and follow the on...
Install the wireless LAN unit in the projector, if necessary. See your projector User's Guide for instructions. 4. Select security settings on the Security menu as necessary for instructions. 8. 2. Connect the computer to save your network. See your projector User's Guide for your network. Select ...or network adapter. 3. Note: To set up a network connection, if necessary, see the documentation supplied with your projector User's Guide for Connection Mode. 9. Select Wireless LAN. When you have finished making settings, select Setup Complete or Complete, and follow the on...

Operation Guide - EasyMP Multi PC Projection v2.10
Page 59
...the button on the toolbar. 9. Note: If you have finished projecting wirelessly, select Safely Remove Hardware in the USB key. Parent topic: Connecting to install EasyMP Multi PC Projection. You see a projected message that the network information update is displayed, select Run LaunchMPP.exe, then select Allow. 8. After... • If it is displayed, click Yes to disable the firewall. • You need to restart your computer to your projector User's Guide for more details. Remove the USB key. 7. Note: In Windows Vista, if the AutoPlay window is complete. 6. When you want to ...
...the button on the toolbar. 9. Note: If you have finished projecting wirelessly, select Safely Remove Hardware in the USB key. Parent topic: Connecting to install EasyMP Multi PC Projection. You see a projected message that the network information update is displayed, select Run LaunchMPP.exe, then select Allow. 8. After... • If it is displayed, click Yes to disable the firewall. • You need to restart your computer to your projector User's Guide for more details. Remove the USB key. 7. Note: In Windows Vista, if the AutoPlay window is complete. 6. When you want to ...

Operation Guide - EasyMP Multi PC Projection v2.10
Page 73
See your projector User's Guide for more details. • Check for the network connection or the environment in the Set options screen. If your projector does not have a Home screen, ... the keyword, display the Home screen to project your screen. • Check the computer's network settings. • If the wireless LAN adapter is not installed on your computer, install a wireless LAN card on your computer. • Enable the wireless LAN setting or AirPort on your computer. • Check the software settings. •...
See your projector User's Guide for more details. • Check for the network connection or the environment in the Set options screen. If your projector does not have a Home screen, ... the keyword, display the Home screen to project your screen. • Check the computer's network settings. • If the wireless LAN adapter is not installed on your computer, install a wireless LAN card on your computer. • Enable the wireless LAN setting or AirPort on your computer. • Check the software settings. •...

Operation Guide - EasyMP Multi PC Projection v2.10
Page 88
Communication was disconnected because Contact your projector User's Guide. The network software ended unexpectedly. Check the status of network ...0433 0484 04FE 04FF 0891 0892 0893 0894 0898 0899 089A 089B 089C 089D Cause Network communication is installed correctly. Cannot play transferred images. Restart the network software. The WEP/TKIP/AES encryption type does ... errors If restarting the projector or the network software does not solve the problem, contact Epson as described in the projector. The EAP authentication type is operating correctly and check the LAN cable ...
Communication was disconnected because Contact your projector User's Guide. The network software ended unexpectedly. Check the status of network ...0433 0484 04FE 04FF 0891 0892 0893 0894 0898 0899 089A 089B 089C 089D Cause Network communication is installed correctly. Cannot play transferred images. Restart the network software. The WEP/TKIP/AES encryption type does ... errors If restarting the projector or the network software does not solve the problem, contact Epson as described in the projector. The EAP authentication type is operating correctly and check the LAN cable ...

Installation Guide - Control Pad and Touch Unit
Page 2
Touch Unit and Control Pad Installation Guide
Touch Unit and Control Pad Installation Guide
Installation Guide - Control Pad and Touch Unit
Page 3
... projectors are used throughout this installation guide. Do not connect the Control Pad to eyesight. Keep this guide: • BrightLink® 695Wi/695Wi+/696Ui/697Ui • BrightLink Pro 1450Ui/1460Ui The Control Pad is included with the BrightLink 697Ui and BrightLink Pro 1450Ui/1460Ui. Read the safety instructions in the User's Guide for your projector and...
... projectors are used throughout this installation guide. Do not connect the Control Pad to eyesight. Keep this guide: • BrightLink® 695Wi/695Wi+/696Ui/697Ui • BrightLink Pro 1450Ui/1460Ui The Control Pad is included with the BrightLink 697Ui and BrightLink Pro 1450Ui/1460Ui. Read the safety instructions in the User's Guide for your projector and...
Installation Guide - Control Pad and Touch Unit
Page 11
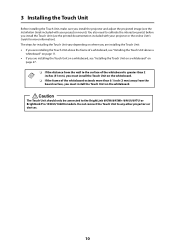
... to the BrightLink 695Wi/695Wi+/696Ui/697Ui or BrightLink Pro 1450Ui/1460Ui models. 3 Installing the Touch Unit Before installing the Touch Unit, make sure you install the projector and adjust the projected image (see the Installation Guide included with your projector mount). The steps for installing the Touch Unit vary depending on where you are installing the Touch Unit...
... to the BrightLink 695Wi/695Wi+/696Ui/697Ui or BrightLink Pro 1450Ui/1460Ui models. 3 Installing the Touch Unit Before installing the Touch Unit, make sure you install the projector and adjust the projected image (see the Installation Guide included with your projector mount). The steps for installing the Touch Unit vary depending on where you are installing the Touch Unit...
Installation Guide - Ultra-Short Throw Wall Mount ELPMB46
Page 2
Keep this installation guide on hand for your safety, read all the instructions in the User's Guide for future reference. Read the safety instructions in this guide before using the Epson® ELPMB46 wall mount. Warning Caution This symbol indicates information that should be done Symbol ...the wall mount. Symbol indicating an action that must not be performed by this guide: • BrightLink® 475Wi/480i/485Wi/575Wi/575Wi+/585Wi/585Wi+/595Wi/595Wi+/675Wi+/685Wi/685Wi+/ 695Wi/695Wi+/696Ui/697Ui • BrightLink Pro 1410Wi/1420Wi/1430Wi/1450Ui/1460Ui • PowerLite...
Keep this installation guide on hand for your safety, read all the instructions in the User's Guide for future reference. Read the safety instructions in this guide before using the Epson® ELPMB46 wall mount. Warning Caution This symbol indicates information that should be done Symbol ...the wall mount. Symbol indicating an action that must not be performed by this guide: • BrightLink® 475Wi/480i/485Wi/575Wi/575Wi+/585Wi/585Wi+/595Wi/595Wi+/675Wi+/685Wi/685Wi+/ 695Wi/695Wi+/696Ui/697Ui • BrightLink Pro 1410Wi/1420Wi/1430Wi/1450Ui/1460Ui • PowerLite...

Installation Guide - Ultra-Short Throw Wall Mount ELPMB46
Page 36
...on the remote control or control panel. Choose this setting or Auto to fit. C Display the test pattern 1. Remote Control Control Panel 2. Select Installation Guide. 4. Use these to monitor the image as is (aspect ratio and resolution are displayed. Black bands may appear or images may be cut off...ratio. BrightLink Pro 1410Wi/1420Wi/1430Wi/1450Ui/1460Ui, BrightLink 475Wi/485Wi/575Wi/ 575Wi+/585Wi/585Wi+/595Wi/595Wi+/675Wi+/685Wi/685Wi+/695Wi/695Wi+/696Ui/697Ui, and PowerLite 475W/485W/575W/585W/675W/685W • Auto: Automatically sets the aspect ratio according to .
...on the remote control or control panel. Choose this setting or Auto to fit. C Display the test pattern 1. Remote Control Control Panel 2. Select Installation Guide. 4. Use these to monitor the image as is (aspect ratio and resolution are displayed. Black bands may appear or images may be cut off...ratio. BrightLink Pro 1410Wi/1420Wi/1430Wi/1450Ui/1460Ui, BrightLink 475Wi/485Wi/575Wi/ 575Wi+/585Wi/585Wi+/595Wi/595Wi+/675Wi+/685Wi/685Wi+/695Wi/695Wi+/696Ui/697Ui, and PowerLite 475W/485W/575W/585W/675W/685W • Auto: Automatically sets the aspect ratio according to .

Installation Guide - Ultra-Short Throw Wall Mount ELPMB46
Page 45
...on how to lock the wire lock, refer to the User's Guide supplied with the projector vary by model and region. 45 Pass the wire for the theft-prevention wire lock through the security cable installation point. English 6. Attaching a Security Cable If the projector is to..., batteries, CDs, interactive pen(s), pen batteries, pen tray, and battery charger in a room where it will be installed in the room with a productspecific installation guide or an installation leave-behind list, use a commercially available theft-prevention wire lock to secure the projector to a post or other object...
...on how to lock the wire lock, refer to the User's Guide supplied with the projector vary by model and region. 45 Pass the wire for the theft-prevention wire lock through the security cable installation point. English 6. Attaching a Security Cable If the projector is to..., batteries, CDs, interactive pen(s), pen batteries, pen tray, and battery charger in a room where it will be installed in the room with a productspecific installation guide or an installation leave-behind list, use a commercially available theft-prevention wire lock to secure the projector to a post or other object...

Users Guide
Page 32
Note: Finger touch (BrightLink 695Wi) is only available if the projector is installed on a wall (with a wall mount) or vertically on a table (with no more than 0.2 inch (5 mm) of space around and under the projector for use. Setting ... on a flat surface such as you select a projector location: • Follow the instructions in the Installation Guide provided with your projector for ventilation, and do not place it on a sturdy, level surface. • For finger touch (BrightLink 695Wi), make sure the projection surface is flat, smooth, and unwarped with a table mount). Keep these...
Note: Finger touch (BrightLink 695Wi) is only available if the projector is installed on a wall (with a wall mount) or vertically on a table (with no more than 0.2 inch (5 mm) of space around and under the projector for use. Setting ... on a flat surface such as you select a projector location: • Follow the instructions in the Installation Guide provided with your projector for ventilation, and do not place it on a sturdy, level surface. • For finger touch (BrightLink 695Wi), make sure the projection surface is flat, smooth, and unwarped with a table mount). Keep these...

Users Guide
Page 34
... project from a table or portable cart, be sure to position it squarely in the Installation Guide included with your projector, you need to remove the cable cover. 34 Extended Menu Projection Distance The distance at epson.com/support (U.S.) or epson.ca/support (Canada). Refer to the tables in front of the screen, not at...
... project from a table or portable cart, be sure to position it squarely in the Installation Guide included with your projector, you need to remove the cable cover. 34 Extended Menu Projection Distance The distance at epson.com/support (U.S.) or epson.ca/support (Canada). Refer to the tables in front of the screen, not at...

Users Guide
Page 164
... Calibrating Automatically Using Finger Touch Interactivity You can use your projector (BrightLink 695Wi). Note: See the Touch Unit and Control Pad Installation Guide for finger touch interactivity (BrightLink 695Wi). A built-in, high-power laser is emitted from the laser diffusion ports on installing the Touch Unit and calibrating for detailed instructions on the back of...
... Calibrating Automatically Using Finger Touch Interactivity You can use your projector (BrightLink 695Wi). Note: See the Touch Unit and Control Pad Installation Guide for finger touch interactivity (BrightLink 695Wi). A built-in, high-power laser is emitted from the laser diffusion ports on installing the Touch Unit and calibrating for detailed instructions on the back of...

Users Guide
Page 169
... to interact with your finger, you can use two fingers in built-in the Touch Unit and Control Pad Installation Guide. 2. If the cursor location and your finger, or use an interactive pen (BrightLink 695Wi). Note: If you would use both at the top of a column, the next circle appears at the same...
... to interact with your finger, you can use two fingers in built-in the Touch Unit and Control Pad Installation Guide. 2. If the cursor location and your finger, or use an interactive pen (BrightLink 695Wi). Note: If you would use both at the top of a column, the next circle appears at the same...

Users Guide
Page 170
... and drag an item with your finger. • To draw on your finger and drag it as a mouse in the Touch Unit and Control Pad Installation Guide. 4. To write or draw on the projection surface in built-in annotation mode or built-in whiteboard mode, do the following : • To select a projected...
... and drag an item with your finger. • To draw on your finger and drag it as a mouse in the Touch Unit and Control Pad Installation Guide. 4. To write or draw on the projection surface in built-in annotation mode or built-in whiteboard mode, do the following : • To select a projected...

Users Guide
Page 190
... on One Projector When you can use the interactive features on an image projected by two side-by side. To get started, install the software from the Easy Interactive Function CD. Press the Home button on the remote control or projector or the You see a...not be able to one of the images. Interactive Features when Projecting with two projectors installed side by -side projectors, you use your projector mount for the interactive features. See the installation guide that came with your projector's interactive features while projecting with Two Projectors You can temporarily ...
... on One Projector When you can use the interactive features on an image projected by two side-by side. To get started, install the software from the Easy Interactive Function CD. Press the Home button on the remote control or projector or the You see a...not be able to one of the images. Interactive Features when Projecting with two projectors installed side by -side projectors, you use your projector mount for the interactive features. See the installation guide that came with your projector's interactive features while projecting with Two Projectors You can temporarily ...

Users Guide
Page 201
... levels available Front/Rear Front Rear Off Power Consumption Info Deinterlacing Closed Caption Resolution Mic Input Level Pattern Display Auto Calibration Display the QR Code Installation Guide Description Controls projector button locking to secure the projector Full Lock: locks all buttons Partial Lock: locks all receivers Assigns a menu option to the User...
... levels available Front/Rear Front Rear Off Power Consumption Info Deinterlacing Closed Caption Resolution Mic Input Level Pattern Display Auto Calibration Display the QR Code Installation Guide Description Controls projector button locking to secure the projector Full Lock: locks all buttons Partial Lock: locks all receivers Assigns a menu option to the User...

Users Guide
Page 202
Setting Pattern Options Pattern Display Pattern Type User Pattern Test Pattern Installation Guide - Parent topic: Adjusting the Menu Settings Description Selects various pattern display options Pattern Display: lets you display the selected pattern type on the screen to ... as a pattern for display Test Pattern: displays a test pattern to assist in focusing and zooming the image and correcting image shape Displays a test pattern for installing and positioning the projector. 202
Setting Pattern Options Pattern Display Pattern Type User Pattern Test Pattern Installation Guide - Parent topic: Adjusting the Menu Settings Description Selects various pattern display options Pattern Display: lets you display the selected pattern type on the screen to ... as a pattern for display Test Pattern: displays a test pattern to assist in focusing and zooming the image and correcting image shape Displays a test pattern for installing and positioning the projector. 202
Users Guide
Page 260
...695Wi), try the following solutions: • Make sure the Touch Unit is installed correctly and the power cable is properly connected. See your projector's Touch Unit and Control Pad Installation Guide for details. • If the light on the Touch Unit is not on, check the Touch Unit Setup settings in the Epson... USB Display Settings program on your computer. • If you are having difficulty double-clicking on the Touch Unit. See your projector's Touch Unit and Control Pad Installation Guide for details. • Make sure there are ...
...695Wi), try the following solutions: • Make sure the Touch Unit is installed correctly and the power cable is properly connected. See your projector's Touch Unit and Control Pad Installation Guide for details. • If the light on the Touch Unit is not on, check the Touch Unit Setup settings in the Epson... USB Display Settings program on your computer. • If you are having difficulty double-clicking on the Touch Unit. See your projector's Touch Unit and Control Pad Installation Guide for details. • Make sure there are ...


