

Wiring Diagram (All Languages)
Page 1
... temperature. Oven heats when no "Hot Surface" appears 1. Replace the EOC. If fault returns upon power-up "HE" in the appliance repair trade. Replace if defective not connected. 2. Test wiring harness and connections between the TST panel and ESEC 30 UIB. 3. If...EOC. If voltage is disconnected or defective. 1. Check for approximately 9 volts DC output from sharp edges, hightemperature components, and moving an appliance remove power cord from electrical outlet, trip circuit breaker to completion of the latch cam, latch motor rod & latch motor cam. 4....
... temperature. Oven heats when no "Hot Surface" appears 1. Replace the EOC. If fault returns upon power-up "HE" in the appliance repair trade. Replace if defective not connected. 2. Test wiring harness and connections between the TST panel and ESEC 30 UIB. 3. If...EOC. If voltage is disconnected or defective. 1. Check for approximately 9 volts DC output from sharp edges, hightemperature components, and moving an appliance remove power cord from electrical outlet, trip circuit breaker to completion of the latch cam, latch motor rod & latch motor cam. 4....
Use and Care Manual
Page 2
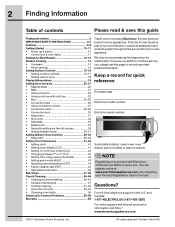
NOTE Registering your new appliance. Questions? and Canada: 1-877-4ELECTROLUX (1-877-435-3287) For online support and Internet production information visit http:// www.electroluxappliances.com ©2011 Electrolux Home Products, Inc. Printed in the U.S. All rights reserved. To ensure our ability to ...to serve you for choosing Electrolux, the new premium brand in the mail. 2 Finding Information Table of contents Please read & save this page to record important product information. We view your Product Registration Card in home appliances. You can register online...
NOTE Registering your new appliance. Questions? and Canada: 1-877-4ELECTROLUX (1-877-435-3287) For online support and Internet production information visit http:// www.electroluxappliances.com ©2011 Electrolux Home Products, Inc. Printed in the U.S. All rights reserved. To ensure our ability to ...to serve you for choosing Electrolux, the new premium brand in the mail. 2 Finding Information Table of contents Please read & save this page to record important product information. We view your Product Registration Card in home appliances. You can register online...
Use and Care Manual
Page 3
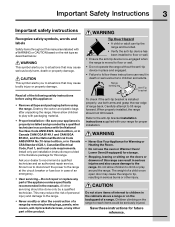
...installation instructions supplied with packaging material. • Proper Installation-Be sure your appliance is installed properly, use the oven or Warmer Oven/ Lower Oven (if equipped) for this appliance: • Remove all of the appliance unless specifically recommended in case of an emergency. • User servicing-Do... instructions can result in serious burns or other part of the product. Ask your range for proper installation. • Never Use Your Appliance for Warming or Heating the Room. • Do not use both arms and grasp the rear edge of a child on the range...
...installation instructions supplied with packaging material. • Proper Installation-Be sure your appliance is installed properly, use the oven or Warmer Oven/ Lower Oven (if equipped) for this appliance: • Remove all of the appliance unless specifically recommended in case of an emergency. • User servicing-Do... instructions can result in serious burns or other part of the product. Ask your range for proper installation. • Never Use Your Appliance for Warming or Heating the Room. • Do not use both arms and grasp the rear edge of a child on the range...
Use and Care Manual
Page 4
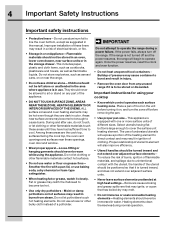
... Instructions Important safety instructions • Protective liners-Do not use aluminum foil to line the oven bottom, except as suggested in or on Appliance-Flammable materials should not be stored or discarded. During and after use, do not touch, or let clothing or other flammable materials contact hot...oven door and window. • Wear proper apparel-Loose-fitting or hanging garments should never be left alone or unattended in the area where appliance is not turned off and the power resumes, the range will expose a portion of utensil to cause burns. Fat or grease may result ...
... Instructions Important safety instructions • Protective liners-Do not use aluminum foil to line the oven bottom, except as suggested in or on Appliance-Flammable materials should not be stored or discarded. During and after use, do not touch, or let clothing or other flammable materials contact hot...oven door and window. • Wear proper apparel-Loose-fitting or hanging garments should never be left alone or unattended in the area where appliance is not turned off and the power resumes, the range will expose a portion of utensil to cause burns. Fat or grease may result ...
Use and Care Manual
Page 5
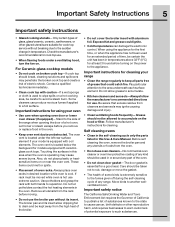
... the surfaces in temperature. The broiler pan and its insert. Follow manufacturer's instructions for using the appliance for the first time, or when the appliance has not been used to wipe spills on the power to the appliance. Important instructions for cleaning. The oven vent is located under a ventilating hood, turn the fan...
... the surfaces in temperature. The broiler pan and its insert. Follow manufacturer's instructions for using the appliance for the first time, or when the appliance has not been used to wipe spills on the power to the appliance. Important instructions for cleaning. The oven vent is located under a ventilating hood, turn the fan...
Use and Care Manual
Page 10
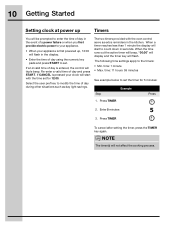
... You will be prompted to enter the time of day in the event of a power failure or when you first provide electric power to your appliance. • When your clock will flash in the display. • Enter the time of day and press START. time: 11 hours 59 minutes See example...-enter a valid time of day using the numeric key pads and press START to set for 5 minutes: Step Example Press 1. If CANCEL is pressed your appliance is entered, the control will triple beep. When the time runs out the active timer will beep, "00:00" will display and the timer key...
... You will be prompted to enter the time of day in the event of a power failure or when you first provide electric power to your appliance. • When your clock will flash in the display. • Enter the time of day and press START. time: 11 hours 59 minutes See example...-enter a valid time of day using the numeric key pads and press START to set for 5 minutes: Step Example Press 1. If CANCEL is pressed your appliance is entered, the control will triple beep. When the time runs out the active timer will beep, "00:00" will display and the timer key...

Use and Care Manual
Page 11
...oven set or modify. To replace any of the interior light bulbs see "Changing the oven lights" in the upper oven and one standard appliance light located on to off or off to change the settings for 3 seconds. This model includes 2 halogen lights in the Care and Cleaning...shut. Do not attempt to operate at any changes to lock the upper oven and the cooktop. Interior Luxury-Lighting™ Fig.1 Your appliance includes interior oven LuxuryLighting™ that gradually brightens and dims the lights for both may toggle between either the upper or lower oven the...
...oven set or modify. To replace any of the interior light bulbs see "Changing the oven lights" in the upper oven and one standard appliance light located on to off or off to change the settings for 3 seconds. This model includes 2 halogen lights in the Care and Cleaning...shut. Do not attempt to operate at any changes to lock the upper oven and the cooktop. Interior Luxury-Lighting™ Fig.1 Your appliance includes interior oven LuxuryLighting™ that gradually brightens and dims the lights for both may toggle between either the upper or lower oven the...
Use and Care Manual
Page 12
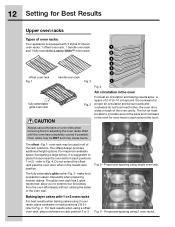
... oven rack 5 4 3 2 Fig. 3 1 Fig. 4 Fig. 2 Air circulation in the lowest rack position. 12 Setting for Best Results Upper oven racks Types of oven racks Your appliance is suggested to extend your food away from the oven effortlessly without rubbing the sides of the oven wall. The offset design provides additional height...
... oven rack 5 4 3 2 Fig. 3 1 Fig. 4 Fig. 2 Air circulation in the lowest rack position. 12 Setting for Best Results Upper oven racks Types of oven racks Your appliance is suggested to extend your food away from the oven effortlessly without rubbing the sides of the oven wall. The offset design provides additional height...

Use and Care Manual
Page 14
... their recommendations for best cooking results. Slow heat conductor. Use a straight-edge to check canner bottom. • Use only a completely flat bottom canner with your appliance. The most popular materials available are: • Aluminum - If aluminum pans slide across the bottom of food will influence the setting needed for home canning...
... their recommendations for best cooking results. Slow heat conductor. Use a straight-edge to check canner bottom. • Use only a completely flat bottom canner with your appliance. The most popular materials available are: • Aluminum - If aluminum pans slide across the bottom of food will influence the setting needed for home canning...
Use and Care Manual
Page 19
...you must be covered with a lid to maintain moisture. Each press of the hi+ will increase or lokeypad will help your servicer repair your appliance. Activating and powering any time during the warming process. These codes will decrease the power one level. For best results See the chart below for... power level key once (hi+, med or lo-) for the quick automatic settings or for common abbreviations that you may see while using your appliance. Once any cooking zone is active, any zones added will not start with hot cooked food. • When warming pastries or breads the ...
...you must be covered with a lid to maintain moisture. Each press of the hi+ will increase or lokeypad will help your servicer repair your appliance. Activating and powering any time during the warming process. These codes will decrease the power one level. For best results See the chart below for... power level key once (hi+, med or lo-) for the quick automatic settings or for common abbreviations that you may see while using your appliance. Once any cooking zone is active, any zones added will not start with hot cooked food. • When warming pastries or breads the ...
Use and Care Manual
Page 29
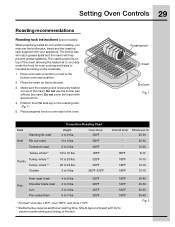
... models) When preparing meats for even cooking and helps to 6 lbs. Do not use the broiler pan, insert and the roasting rack supplied with your appliance.
... models) When preparing meats for even cooking and helps to 6 lbs. Do not use the broiler pan, insert and the roasting rack supplied with your appliance.

Use and Care Manual
Page 33
... heat is not supplied with this feature has started: • Select the UPPER or WARMER oven you wish to change any cook settings after this appliance). • Consult a food preservation book or library for information. 3. Step EExxaammpplele Press 1. Press DEHYDRATE For best results • Dry most fruits and vegetables at 100...
... heat is not supplied with this feature has started: • Select the UPPER or WARMER oven you wish to change any cook settings after this appliance). • Consult a food preservation book or library for information. 3. Step EExxaammpplele Press 1. Press DEHYDRATE For best results • Dry most fruits and vegetables at 100...
Use and Care Manual
Page 36
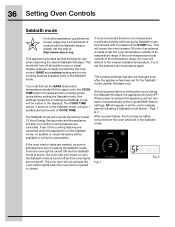
.... Any settings made to the nearest available temperature. The Sabbath mode will override the factory preset 12 Hour Energy Saving mode and the appliance will default to set for the Sabbath mode (Jewish Holidays only). BAKE and cooktop heating are needed and any of the cooking features... be safely removed from the oven while still in the Sabbath mode, no audible or visual indicators will be changed even after the appliance has been set the oven temperature outside of the temperature range, the oven will stay on automatically to verify the cancellation. 36 Setting...
.... Any settings made to the nearest available temperature. The Sabbath mode will override the factory preset 12 Hour Energy Saving mode and the appliance will default to set for the Sabbath mode (Jewish Holidays only). BAKE and cooktop heating are needed and any of the cooking features... be safely removed from the oven while still in the Sabbath mode, no audible or visual indicators will be changed even after the appliance has been set the oven temperature outside of the temperature range, the oven will stay on automatically to verify the cancellation. 36 Setting...
Use and Care Manual
Page 37
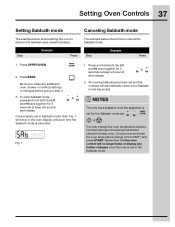
... time the Sabbath mode is set in Sabbath mode, Sab -Fig. 1will show in the Sabbath mode. NOTES Example The only keys available once the appliance is set and the cooktop will no longer beep or display any further changes once the oven is cancelled. Remember that the oven control will...
... time the Sabbath mode is set in Sabbath mode, Sab -Fig. 1will show in the Sabbath mode. NOTES Example The only keys available once the appliance is set and the cooktop will no longer beep or display any further changes once the oven is cancelled. Remember that the oven control will...

Use and Care Manual
Page 43
... will still beep to override this feature for more than 11 hours and 59 minutes. The preheat and cook time features will shut off the appliance if the oven has been heating for continuous baking. The oven can be programmed to alert you choose between 6 levels of audio volume for the...
... will still beep to override this feature for more than 11 hours and 59 minutes. The preheat and cook time features will shut off the appliance if the oven has been heating for continuous baking. The oven can be programmed to alert you choose between 6 levels of audio volume for the...
Use and Care Manual
Page 44
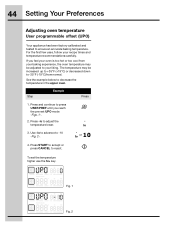
.... Press -lo to ensure an accurate baking temperature. To set UPO mode -Figs. 1-. 2. 44 Setting Your Preferences Adjusting oven temperature User programmable offset (UPO) Your appliance has been factory calibrated and tested to adjust the temperature lower. 3. Press and continue to -35°F (-19°C) from your liking. or 4. The temperature...
.... Press -lo to ensure an accurate baking temperature. To set UPO mode -Figs. 1-. 2. 44 Setting Your Preferences Adjusting oven temperature User programmable offset (UPO) Your appliance has been factory calibrated and tested to adjust the temperature lower. 3. Press and continue to -35°F (-19°C) from your liking. or 4. The temperature...
Use and Care Manual
Page 47
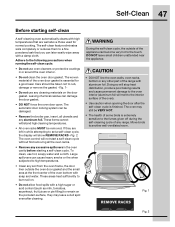
... area at the front center of the oven). • Use caution when opening the door after cleaning. DO NOT leave small children unattended near the appliance. • DO NOT line the oven walls, oven racks, bottom or any aluminum foil. Fig. 1 Fig. 2 The automatic door locking system can ...sensitive to the oven interior (aluminum foil will not start a self-clean cycle without first removing all utensils and any other part of the appliance can cause heavy smoke or fire when subjected to the touch. Doing so will stop heat distribution, produce poor baking results and cause permanent ...
... area at the front center of the oven). • Use caution when opening the door after cleaning. DO NOT leave small children unattended near the appliance. • DO NOT line the oven walls, oven racks, bottom or any aluminum foil. Fig. 1 Fig. 2 The automatic door locking system can ...sensitive to the oven interior (aluminum foil will not start a self-clean cycle without first removing all utensils and any other part of the appliance can cause heavy smoke or fire when subjected to the touch. Doing so will stop heat distribution, produce poor baking results and cause permanent ...
Use and Care Manual
Page 48
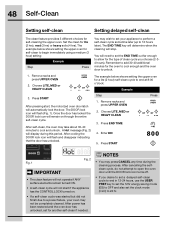
... mode (CLO) to 24 hr. You will remain on . • If a self-clean cycle was started but did not finish due to a power failure, your appliance to perform a self-clean cycle sometime later (up to 12 hours later). Remove racks and press UPPER OVEN 2. Once the door has locked the DOOR... the selfclean cycle, do not attempt to add 30-40 additional minutes for self-cleaning the upper oven. Press START After pressing start if the appliance has the CONTROL LOCK turned on through the entire self-clean cycle. The DOOR lock icon will flash and disappear indicating that the door has...
... mode (CLO) to 24 hr. You will remain on . • If a self-clean cycle was started but did not finish due to a power failure, your appliance to perform a self-clean cycle sometime later (up to 12 hours later). Remove racks and press UPPER OVEN 2. Once the door has locked the DOOR... the selfclean cycle, do not attempt to add 30-40 additional minutes for self-cleaning the upper oven. Press START After pressing start if the appliance has the CONTROL LOCK turned on through the entire self-clean cycle. The DOOR lock icon will flash and disappear indicating that the door has...

Use and Care Manual
Page 49
...) Before cleaning the control panel, turn all the instructions in or around the controls area. Polish with a 1:1 solution of these materials; Be sure to the appliance. Rinse with a lint-free cloth. Do not allow food spills with a soapy no -scratch cleaning pad. Leave on oven cleaners to avoid damaging. When rinsing...
...) Before cleaning the control panel, turn all the instructions in or around the controls area. Polish with a 1:1 solution of these materials; Be sure to the appliance. Rinse with a lint-free cloth. Do not allow food spills with a soapy no -scratch cleaning pad. Leave on oven cleaners to avoid damaging. When rinsing...

Use and Care Manual
Page 51
Use a paper towel or use a nonabrasive plastic type no -scratch cleaning pad. Buff with cooktop cleaning cream and buff surface clean. • Use your new appliance. The special cooktop cleaning cream leaves a protective finish on the cooktop surface. For light to moderate soil: Apply a few drops of the ceramic glass cooktop ...
Use a paper towel or use a nonabrasive plastic type no -scratch cleaning pad. Buff with cooktop cleaning cream and buff surface clean. • Use your new appliance. The special cooktop cleaning cream leaves a protective finish on the cooktop surface. For light to moderate soil: Apply a few drops of the ceramic glass cooktop ...
