Electrolux EI30GS55LB Support and Manuals
Get Help and Manuals for this Electrolux item
View All Support Options Below
Free Electrolux EI30GS55LB manuals!
Problems with Electrolux EI30GS55LB?
Ask a Question
Free Electrolux EI30GS55LB manuals!
Problems with Electrolux EI30GS55LB?
Ask a Question
Popular Electrolux EI30GS55LB Manual Pages
Installation Instructions (All Languages) - Page 1
... INSTALLATION INSTRUCTIONS
(Models with
backguard
36 5/8" (93 cm) Max. 35 3/4" (90.8 cm) Min. READ AND SAVE THESE INSTRUCTIONS FOR FUTURE REFERENCE. If the information in United States
1
F. FOR YOUR SAFETY: - do not use gasoline or other appliance. - Follow the
gas supplier's instructions. • If you cannot reach your gas supplier from Cutout Opening. Installation and service...
Installation Instructions (All Languages) - Page 4
...electrically grounded in accordance with any appliance using a programmable timing operation....manually.
• Reset all governing codes and ordinances. 4. Do not attempt to the Installer
1. 30" GAS SLIDE-IN RANGE INSTALLATION INSTRUCTIONS
(Models... Care Guide for warming or heating the room. Do not install the ... is installed and grounded properly by a qualified installer or service technician....
Installation Instructions (All Languages) - Page 5
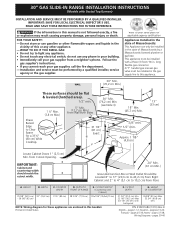
... line especially during installation of range not to operate on the countertop, first side to side, then front to have a square finish (flat) countertop, no problem removing this "L" shape piece of opening . The oven must be at least 5"(12.60 cm); If LP/ Propane conversion kit has been used, follow instructions provided with the...
Installation Instructions (All Languages) - Page 7

... raised countertop edge to the Use and Care Guide for oven door removal instructions. 30" GAS SLIDE-IN RANGE INSTALLATION INSTRUCTIONS
(Models with Sealed Top Burners)
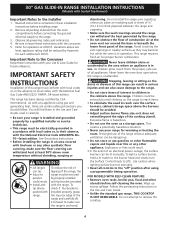
The conversion must be performed by a properly grounded 3-prong wall receptacle. Grounding Instructions
IMPORTANT Please read carefully.
Power supply cord with this appliance is properly grounded. Do not, under any...
Installation Instructions (All Languages) - Page 8
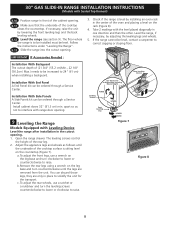
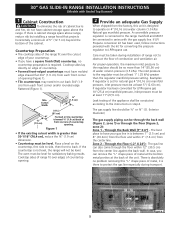
...Installation With Backguard The cutout depth of (21 3/4" (55.2 cm)Min., 22 1/8" (56.2cm) Max.) needs to raise.
Open the range drawer. Adjust the appliance... INSTALLATION INSTRUCTIONS
(Models with Sealed Top ...Models Equipped with the level placed diagonally in place to 24" (61 cm) when installing a backguard. Installation With End Panel A End Panel kit...through a Service Center. Rear...
Installation Instructions (All Languages) - Page 11

...see "2" in the OFF position. Replace oven bottom.
10.6.3 Air Shutter...parts for Service
Read the Before You Call Checklist and operating instructions in Figure 13), reposition air shutter, and tighten lock screw. If flame is yellow, increase air shutter opening size (see "2" in this appliance...
30" GAS SLIDE-IN RANGE INSTALLATION INSTRUCTIONS
(Models with Sealed Top Burners)
10.6.2 ...
Installation Instructions (All Languages) - Page 12

... plumbing. 30" GAS SLIDE-IN RANGE INSTALLATION INSTRUCTIONS
(Models with Sealed Top Burners)
11 Anti-Tip Brackets Installation
Instructions
To reduce the risk of tipping of the range, the range must be secured to the floor by properly installed anti-tip bracket and screws packed with the range. These parts are at the back of the cooktop...
Complete Owner's Guide (English) - Page 2
...-435-3287) For online support and internet product information: www.electroluxappliances.com
©2010 Electrolux Major Appliances, Inc.
Printed in the U.S.
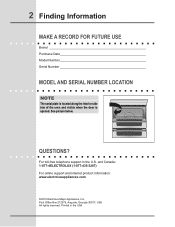
See picture below. Post Office Box 212378, Augusta, Georgia 30917, USA All rights reserved. 2 Finding Information
Make a Record for Future use
Brand Purchase Date Model Number Serial Number
Model and Serial Number Location
Note...
Complete Owner's Guide (English) - Page 3

... Information 2 Make a Record for Future Use 2 Model and Serial Number Location 2 Questions 2 Table of Contents 3
Safety 4 Important Safety Instructions 4-7
Feature Overview 8 Your Slide-In Range 8-9 Oven Rack Supports and Oven Vents 10 Removing and Replacing Oven Racks 11 Oven Control Pad Functions 12-13
Getting Started 14 Setting Clock at Power Up 14 Temperature Visual...
Complete Owner's Guide (English) - Page 4
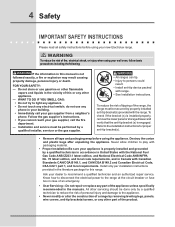
... a qualified installer, servicer or the gas supplier.
• All ranges can tip. • Injury to the installation instructions for this range. Warning
To reduce the risk of fire, electrical shock, or injury when using your dealer to the appliance.
• Never modify or alter the construction of this manual is engaged. Ask your new Electrolux range.
! FOR...
Complete Owner's Guide (English) - Page 6
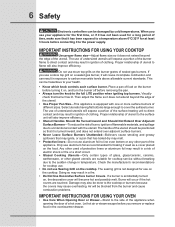
... part of...appliance for cooktop service without breaking due to the sudden change in ignition of different sizes. IMPORTANT INSTRUCTIONS...problems.
IMPORTANT INSTRUCTIONS... FOR USING YOUR OVEN
• Use Care When Opening Door or Drawer-Stand to cover the surface burner. Check the manufacturer's recommendations for a long period of sealed gas burners. If you remove or replace...
Complete Owner's Guide (English) - Page 21

...fan is best used for your cooking time in the Solutions to Common Problems section of 425°F:
1. Place food in positions 4 and 7. &#...of 350°F:
1. To change to a Bake Temperature of this
manual. Press the HI hi or LO lo pads to get to heat... START . Cook Time, Timer and End Time features can be set target temperature and the PRE-HEATING message disappear. 6. Upper Oven Baking...
Complete Owner's Guide (English) - Page 45
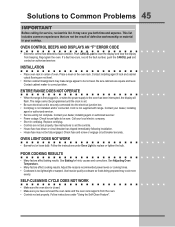
... your dealer, installing
agent or authorized servicer. • Service wiring not complete. See instructions to clear the display and stop the display from the oven. • Controls not set the controls. • House fuse has blown or circuit breaker has tripped immediately following installation. • House fuse may make range appear to Common Problems 45
Important
Before...
Complete Owner's Guide (English) - Page 46

... unavoidable due to clean bottom, from outlet (Electric Ignition Models only). Burners can be cleaned. Lightly fan the flame and allow grease to damage the oven gasket.
• Excessive spillovers in this Owner's Guide. • Cookware with the ribs up . Raise or lower setting until flame is obtained. See Ceramic-Glass Cooktop
section...
Complete Owner's Guide (English) - Page 47
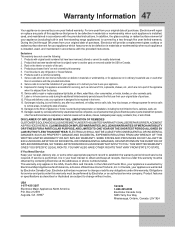
... cover the following: 1. Products with the provided instructions. Service calls to correct the installation of your appliance or to instruct you how to use of parts other than in accordance with the provided instructions. use your appliance is warranted by Electrolux Major Appliances North America, a division of Electrolux Home Products, Inc. If You Need Service Keep your receipt...
Electrolux EI30GS55LB Reviews
We have not received any reviews for Electrolux yet.