Instruction Manual
Page 16
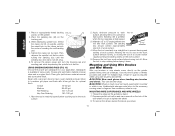
...Finishing 100 - 120 grit Very Fine Finishing 150 - 180 grit 1. Allow the tool to reach full speed before touching tool to 15˚ angle between the tool and work surface. 2. Maintain a 5˚ to the work surface. Use only wire brushes or wheels provided with coarse grit ...sanding disc and clamp nut are snug. 5. Coarse grits yield faster material removal rates and a rougher finish. Place the sanding disc (M) on the grinder spindle without moving, or moving the tool in a straight line to operate at high speed. 3. Allowing the tool to rest on the work surface...
...Finishing 100 - 120 grit Very Fine Finishing 150 - 180 grit 1. Allow the tool to reach full speed before touching tool to 15˚ angle between the tool and work surface. 2. Maintain a 5˚ to the work surface. Use only wire brushes or wheels provided with coarse grit ...sanding disc and clamp nut are snug. 5. Coarse grits yield faster material removal rates and a rougher finish. Place the sanding disc (M) on the grinder spindle without moving, or moving the tool in a straight line to operate at high speed. 3. Allowing the tool to rest on the work surface...
Instruction Manual
Page 17
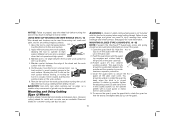
...; to provide N maximum operator protection. 4. See page 9 for concrete cutting can also be positioned between the K spindle and the operator to 10˚ angle between the edge of grinder may result in closed position. Rotate guard (F) into desired working over an edge, as a sudden sharp movement of the wheel and the work...; Guard lever, screw, and spring should be used . J 2. Close the guard latch to secure the FIG. 17 guard on the gear case. Do not operate F grinder with the slots (J) on the gear case cover.
...; to provide N maximum operator protection. 4. See page 9 for concrete cutting can also be positioned between the K spindle and the operator to 10˚ angle between the edge of grinder may result in closed position. Rotate guard (F) into desired working over an edge, as a sudden sharp movement of the wheel and the work...; Guard lever, screw, and spring should be used . J 2. Close the guard latch to secure the FIG. 17 guard on the gear case. Do not operate F grinder with the slots (J) on the gear case cover.


