
Setup Guide
Page 13
... need to complete. NOTE: For more information on the screen. Setting Up Your XPS Laptop Set Up Microsoft Windows Your Dell computer is recommended that you download and install the latest BIOS and drivers for the first time, follow the instructions on the operating system and features..., go to support.dell.com/MyNewDell. 11 Doing so may take you through several procedures including accepting license agreements, setting ...
... need to complete. NOTE: For more information on the screen. Setting Up Your XPS Laptop Set Up Microsoft Windows Your Dell computer is recommended that you download and install the latest BIOS and drivers for the first time, follow the instructions on the operating system and features..., go to support.dell.com/MyNewDell. 11 Doing so may take you through several procedures including accepting license agreements, setting ...
Setup Guide
Page 37
NOTE: Battery charging can also be required to disable the battery charging feature while on an airplane flight. Using Your XPS Laptop Disabling Battery Charging You may be disabled in the System Setup (BIOS) utility. 35 To quickly disable the battery charging feature: 1. Press the battery health meter key on the function key row on . 2. In the Battery Life tab, select the Disable battery charging check box. Ensure that your computer is turned on the keyboard. 3.
NOTE: Battery charging can also be required to disable the battery charging feature while on an airplane flight. Using Your XPS Laptop Disabling Battery Charging You may be disabled in the System Setup (BIOS) utility. 35 To quickly disable the battery charging feature: 1. Press the battery health meter key on the function key row on . 2. In the Battery Life tab, select the Disable battery charging check box. Ensure that your computer is turned on the keyboard. 3.
Setup Guide
Page 40
... select Function Key or Multimedia Key. Press the < > keys or touch the Windows Mobility Center control strip to enter the System Setup (BIOS) utility. 2. To use the multimedia controls, press the required key. In the Function Key Behavior, select Multimedia Key First or Function Key ... function key. Multimedia Key First - on the keyboard using the System Setup (BIOS) utility or Windows Mobility Center. You can configure the multimedia control keys on the control 38 Using Your XPS Laptop Multimedia Control Keys The multimedia control keys are located on the function key row...
... select Function Key or Multimedia Key. Press the < > keys or touch the Windows Mobility Center control strip to enter the System Setup (BIOS) utility. 2. To use the multimedia controls, press the required key. In the Function Key Behavior, select Multimedia Key First or Function Key ... function key. Multimedia Key First - on the keyboard using the System Setup (BIOS) utility or Windows Mobility Center. You can configure the multimedia control keys on the control 38 Using Your XPS Laptop Multimedia Control Keys The multimedia control keys are located on the function key row...
Setup Guide
Page 59
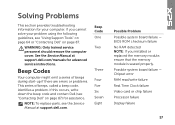
... if there are errors or problems. This series of beeps, called a beep code, identifies a problem. BIOS ROM checksum failure No RAM detected NOTE: If you cannot solve your computer. See the Service Manual at support.dell.com. Chipset error RAM read/write failure Real Time Clock failure Video card or chip failure...
... if there are errors or problems. This series of beeps, called a beep code, identifies a problem. BIOS ROM checksum failure No RAM detected NOTE: If you cannot solve your computer. See the Service Manual at support.dell.com. Chipset error RAM read/write failure Real Time Clock failure Video card or chip failure...
Setup Guide
Page 69
..., select the option that you can use the Hardware Troubleshooter to resolve the incompatibility. Dell Diagnostics If you contact Dell for technical assistance. NOTE: Dell Diagnostics works only on page 62 and run Dell Diagnostics before you experience a problem with your computer. Type hardware troubleshooter in "Lockups and...Support Tools Hardware Troubleshooter If a device is either not detected during POST (Power On Self Test) to enter the System Setup (BIOS) utility. Ensure that the device that best describes the problem and follow the remaining troubleshooting steps.
..., select the option that you can use the Hardware Troubleshooter to resolve the incompatibility. Dell Diagnostics If you contact Dell for technical assistance. NOTE: Dell Diagnostics works only on page 62 and run Dell Diagnostics before you experience a problem with your computer. Type hardware troubleshooter in "Lockups and...Support Tools Hardware Troubleshooter If a device is either not detected during POST (Power On Self Test) to enter the System Setup (BIOS) utility. Ensure that the device that best describes the problem and follow the remaining troubleshooting steps.

Service Manual
Page 7
Replacing the USB Board 88 20 TV Tuner Connector 91 Removing the TV Tuner Connector 91 Replacing the TV Tuner Connector 92 21 Heat Sink 95 Removing the Heat Sink 95 Replacing the Heat Sink 96 22 Processor Module 99 Removing the Processor Module 99 Replacing the Processor Module 101 23 System Board 103 Removing the System Board 103 Replacing the System Board 105 Entering the Service Tag in the BIOS 106 24 Speakers 109 Removing the Speakers 109 Replacing the Speakers 110 Contents 7
Replacing the USB Board 88 20 TV Tuner Connector 91 Removing the TV Tuner Connector 91 Replacing the TV Tuner Connector 92 21 Heat Sink 95 Removing the Heat Sink 95 Replacing the Heat Sink 96 22 Processor Module 99 Removing the Processor Module 99 Replacing the Processor Module 101 23 System Board 103 Removing the System Board 103 Replacing the System Board 105 Entering the Service Tag in the BIOS 106 24 Speakers 109 Removing the Speakers 109 Replacing the Speakers 110 Contents 7

Service Manual
Page 8
25 Flashing the BIOS 113 8 Contents
25 Flashing the BIOS 113 8 Contents

Service Manual
Page 9
... order. and then click Shut 3 Ensure that the following tools: • Small flat-blade screwdriver • Phillips screwdriver • Plastic scribe • BIOS executable update program available at support.dell.com Turning Off Your Computer CAUTION: To avoid losing data, save and close all open files and exit all open programs. 2 To...
... order. and then click Shut 3 Ensure that the following tools: • Small flat-blade screwdriver • Phillips screwdriver • Plastic scribe • BIOS executable update program available at support.dell.com Turning Off Your Computer CAUTION: To avoid losing data, save and close all open files and exit all open programs. 2 To...

Service Manual
Page 106
...in damage to the computer. 15 Turn on the computer. Entering the Service Tag in the BIOS 1 Ensure that no stray screws remain inside the computer. NOTE: After you have replaced the system ...board, enter the computer Service Tag into the BIOS of the replacement system board. 16 Enter the service tag (see "Entering the Service Tag in "... to the connector on the system board. 8 Follow the instructions from step 9 to step 12 in the BIOS" on page 106). 4 Connect the Bluetooth cable and AC-adapter cable to the connectors on the system board...
...in damage to the computer. 15 Turn on the computer. Entering the Service Tag in the BIOS 1 Ensure that no stray screws remain inside the computer. NOTE: After you have replaced the system ...board, enter the computer Service Tag into the BIOS of the replacement system board. 16 Enter the service tag (see "Entering the Service Tag in "... to the connector on the system board. 8 Follow the instructions from step 9 to step 12 in the BIOS" on page 106). 4 Connect the Bluetooth cable and AC-adapter cable to the connectors on the system board...
Service Manual
Page 113
... on a label at the bottom of product in the Enter a service tag: field, click Go, and proceed to support.dell.com/support/downloads. 3 Locate the BIOS update file for your computer: NOTE: The Service Tag for your computer is located on your desktop and is available or when... replacing the system board. Flashing the BIOS 113 b Select the type of your desktop. 7 Click Close if the Download Complete window appears. Click BIOS. 5 Click Download Now to your computer. b Enter your desktop. c Select the product brand...
... on a label at the bottom of product in the Enter a service tag: field, click Go, and proceed to support.dell.com/support/downloads. 3 Locate the BIOS update file for your computer: NOTE: The Service Tag for your computer is located on your desktop and is available or when... replacing the system board. Flashing the BIOS 113 b Select the type of your desktop. 7 Click Close if the Download Complete window appears. Click BIOS. 5 Click Download Now to your computer. b Enter your desktop. c Select the product brand...

Service Manual
Page 114
8 Double-click the file icon on the desktop and follow the instructions on the screen. 114 Flashing the BIOS
8 Double-click the file icon on the desktop and follow the instructions on the screen. 114 Flashing the BIOS


