Owner's Manual
Page 29
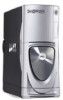
... systems might not read DVD-RAM media. Use blank CD-Rs to All Programs→ Sonic→ RecordNow!→ RecordNow! 2 Click either the audio tab or the data tab, depending on your source CD or DVD and click Copy. Currently, five DVD-writable disc formats available: DVD+R, DVD+...cannot be used to permanently store large amounts of information. After creating a CD-R, you have inserted your computer hard drive. The DVD-writable drives installed in Dell™ computers will need to erase, rewrite, or update the information on that you may not read all five formats. How to Copy a...
... systems might not read DVD-RAM media. Use blank CD-Rs to All Programs→ Sonic→ RecordNow!→ RecordNow! 2 Click either the audio tab or the data tab, depending on your source CD or DVD and click Copy. Currently, five DVD-writable disc formats available: DVD+R, DVD+...cannot be used to permanently store large amounts of information. After creating a CD-R, you have inserted your computer hard drive. The DVD-writable drives installed in Dell™ computers will need to erase, rewrite, or update the information on that you may not read all five formats. How to Copy a...

Owner's Manual
Page 30
... Internet connection between computers in most home or car stereos. • You cannot create audio DVDs with Sonic RecordNow. • Music MP3 files can also use CD-Rs to burn music CDs that have MP3 software installed. • Do not burn a blank CD-R or CD-RW to a blank CD...home or small office. 1 Click the Start button, point to practice CD recording until you are familiar with Windows XP SP1. 4 Complete the checklist and required preparations. www.dell.com | support.dell.com Helpful Tips • Use Microsoft® Windows® Explorer to drag and drop files to a CD-R ...
... Internet connection between computers in most home or car stereos. • You cannot create audio DVDs with Sonic RecordNow. • Music MP3 files can also use CD-Rs to burn music CDs that have MP3 software installed. • Do not burn a blank CD-R or CD-RW to a blank CD...home or small office. 1 Click the Start button, point to practice CD recording until you are familiar with Windows XP SP1. 4 Complete the checklist and required preparations. www.dell.com | support.dell.com Helpful Tips • Use Microsoft® Windows® Explorer to drag and drop files to a CD-R ...

Owner's Manual
Page 89
...interface cable interface connector Most interface connectors are keyed for correct insertion; Removing and Installing Parts 89 When you connect two cables-a DC power cable and a data cable-to the back of the audio cable attaches to the drive connector and the other connector. When connecting and disconnecting... ensure that is, a notch or a missing pin on one end of the drive and to the system board. Connecting Drive Cables When you install a drive, you disconnect an IDE cable, grasp the colored pull tab and pull until the connector detaches. one connector matches a tab or a...
...interface cable interface connector Most interface connectors are keyed for correct insertion; Removing and Installing Parts 89 When you connect two cables-a DC power cable and a data cable-to the back of the audio cable attaches to the drive connector and the other connector. When connecting and disconnecting... ensure that is, a notch or a missing pin on one end of the drive and to the system board. Connecting Drive Cables When you install a drive, you disconnect an IDE cable, grasp the colored pull tab and pull until the connector detaches. one connector matches a tab or a...

Owner's Manual
Page 100
www.dell.com | support.dell.com 3 If you are installing a replacement drive and the new drive does not have the bracket rails ...bracket rails and then inserting and tightening all four screws (two screws on the system board. 100 Removing and Installing Parts If you are adding a drive that secure each rail). Attach the bracket to the new drive by... removing the two screws that has an audio cable, connect the audio cable to the audio connector on each rail to the drive. drive bracket rails (2) screws (4) 4 Gently slide the ...
www.dell.com | support.dell.com 3 If you are installing a replacement drive and the new drive does not have the bracket rails ...bracket rails and then inserting and tightening all four screws (two screws on the system board. 100 Removing and Installing Parts If you are adding a drive that secure each rail). Attach the bracket to the new drive by... removing the two screws that has an audio cable, connect the audio cable to the audio connector on each rail to the drive. drive bracket rails (2) screws (4) 4 Gently slide the ...
Owner's Manual
Page 117
...Blinking green in , line-out, microphone, surround, and center/Low Frequency Effects (LFE) channel; Blinking amber indicates a problem with an installed device; two front-panel connectors for headphones and microphones 40-pin connector on PCI local bus four 7-pin connectors 34-pin connector 5-pin ...pin connector push button green light - Connectors External connectors: Serial Parallel IEEE 1394 Video Network adapter PS/2 (keyboard and mouse) USB Audio System board connectors: Primary IDE drive Serial ATA Floppy drive Fan PCI 2.3 PCI Express x1 PCI Express x16 Telephony (TAPI) Controls...
...Blinking green in , line-out, microphone, surround, and center/Low Frequency Effects (LFE) channel; Blinking amber indicates a problem with an installed device; two front-panel connectors for headphones and microphones 40-pin connector on PCI local bus four 7-pin connectors 34-pin connector 5-pin ...pin connector push button green light - Connectors External connectors: Serial Parallel IEEE 1394 Video Network adapter PS/2 (keyboard and mouse) USB Audio System board connectors: Primary IDE drive Serial ATA Floppy drive Fan PCI 2.3 PCI Express x1 PCI Express x16 Telephony (TAPI) Controls...

Owner's Manual
Page 121
... board as the computer name, the BIOS version number and date, system tags, and other system-specific information. Enables or disables the onboard audio controller. Appendix 121 System System Info CPU Info Memory Info Date/Time Boot Sequence Drives Diskette Drive Drives 0 through 5 Drive Controller Onboard Devices...and move it so it becomes the first device in the system setup menu. The computer attempts to boot from the sequence of memory installed. When the On w/ PXE setting is not available from the network server, the computer attempts to boot from the next device in this...
... board as the computer name, the BIOS version number and date, system tags, and other system-specific information. Enables or disables the onboard audio controller. Appendix 121 System System Info CPU Info Memory Info Date/Time Boot Sequence Drives Diskette Drive Drives 0 through 5 Drive Controller Onboard Devices...and move it so it becomes the first device in the system setup menu. The computer attempts to boot from the sequence of memory installed. When the On w/ PXE setting is not available from the network server, the computer attempts to boot from the next device in this...

Owner's Manual
Page 149
Index A audio. See sound B badge color, 14 battery problems, 37 replacing, 113 BIOS, 119 boot sequence, 124 changing, 124-125 option settings, 124 booting to a USB device, 124 C cards installing PCI, 80 installing PCI Express, 84 PCI, 80 PCI Express, 83 PCI Express slots, 72 PCI slots, 72 removing PCI, 82 ...OUT, 71 USB, 70, 72 VGA, 72 video, 72 copying CDs and DVDs, 28 cover closing, 114 cover release latch, 71 opening, 73 D Dell contacting, 129 Dell Solution Center, 9 support policy, 127 support site, 11 Dell Diagnostics, 56 Dell Premier Support website, 10 diagnostic lights, 53 Index 149
Index A audio. See sound B badge color, 14 battery problems, 37 replacing, 113 BIOS, 119 boot sequence, 124 changing, 124-125 option settings, 124 booting to a USB device, 124 C cards installing PCI, 80 installing PCI Express, 84 PCI, 80 PCI Express, 83 PCI Express slots, 72 PCI slots, 72 removing PCI, 82 ...OUT, 71 USB, 70, 72 VGA, 72 video, 72 copying CDs and DVDs, 28 cover closing, 114 cover release latch, 71 opening, 73 D Dell contacting, 129 Dell Solution Center, 9 support policy, 127 support site, 11 Dell Diagnostics, 56 Dell Premier Support website, 10 diagnostic lights, 53 Index 149


