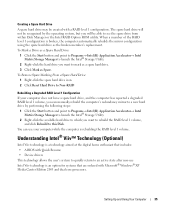
Owner's Manual
Page 6
... Cards 77 PCI Express Cards 81 Drive Panels 89 Removing the Drive Panel 89 Removing the Drive-Panel Insert 90 Replacing the Drive-Panel Insert 90 Replacing the Drive Panel 91 Drives 92 General Installation Guidelines 92 Hard Drive 92 Removing a Hard Drive 93 Installing a Hard Drive 94 Adding a Second Hard Drive 95 Floppy Drive 96 Removing a Floppy Drive 96 Installing a Floppy Drive 98 Media Card Reader 99 Removing...
... Cards 77 PCI Express Cards 81 Drive Panels 89 Removing the Drive Panel 89 Removing the Drive-Panel Insert 90 Replacing the Drive-Panel Insert 90 Replacing the Drive Panel 91 Drives 92 General Installation Guidelines 92 Hard Drive 92 Removing a Hard Drive 93 Installing a Hard Drive 94 Adding a Second Hard Drive 95 Floppy Drive 96 Removing a Floppy Drive 96 Installing a Floppy Drive 98 Media Card Reader 99 Removing...

Owner's Manual
Page 29
.... RAID Level 1 Configuration RAID level 1 uses a data-redundancy storage technique known as "mirroring." A replacement drive can use a RAID level 0 configuration. You can then be rebuilt using two 120-GB hard drives collectively has a maximum of two methods to configure RAID hard drive volumes. You must have installed the operating system Setting Up and Using Your Computer...
.... RAID Level 1 Configuration RAID level 1 uses a data-redundancy storage technique known as "mirroring." A replacement drive can use a RAID level 0 configuration. You can then be rebuilt using two 120-GB hard drives collectively has a maximum of two methods to configure RAID hard drive volumes. You must have installed the operating system Setting Up and Using Your Computer...
Owner's Manual
Page 35
... that are ordered with a RAID level 1 configuration. Creating a Spare Hard Drive A spare hard drive may be created with Microsoft® Windows® XP Media Center Edition 2005 and dual core processors. Setting Up and Using Your Computer 35 To Mark a Drive as the broken member's replacement. The spare hard drive will not be recognized by performing the following steps...
... that are ordered with a RAID level 1 configuration. Creating a Spare Hard Drive A spare hard drive may be created with Microsoft® Windows® XP Media Center Edition 2005 and dual core processors. Setting Up and Using Your Computer 35 To Mark a Drive as the broken member's replacement. The spare hard drive will not be recognized by performing the following steps...

Owner's Manual
Page 93
... and Installing Parts 93 Removing a Hard Drive 1 Disconnect the power and hard drive cables from the drive. hard drive cable power cable 2 Press in on the tabs on each side of the drive and slide the drive up your files before you begin this procedure. 2 Follow the procedures in "Before You Begin" ...computer cover (see page 68). NOTICE: To avoid damage to the drive, do not set the drive on a surface, such as a foam pad, that will sufficiently cushion it on a hard surface. Instead, set it . 1 If you are replacing a hard drive that contains data you want to keep, back up and out.
... and Installing Parts 93 Removing a Hard Drive 1 Disconnect the power and hard drive cables from the drive. hard drive cable power cable 2 Press in on the tabs on each side of the drive and slide the drive up your files before you begin this procedure. 2 Follow the procedures in "Before You Begin" ...computer cover (see page 68). NOTICE: To avoid damage to the drive, do not set the drive on a surface, such as a foam pad, that will sufficiently cushion it on a hard surface. Instead, set it . 1 If you are replacing a hard drive that contains data you want to keep, back up and out.

Owner's Manual
Page 94
hard drive hard drive bracket 6 Connect the power and hard drive cables to the hard drive. hard drive cable power cable 7 Check all connectors to be certain that the drive is configured for your computer. 3 If your replacement hard drive does not have the hard drive bracket attached, remove the bracket from the old hard drive by unsnapping it from the drive. 4 Snap the hard drive bracket onto the replacement hard drive. 5 Install the hard drive into...
hard drive hard drive bracket 6 Connect the power and hard drive cables to the hard drive. hard drive cable power cable 7 Check all connectors to be certain that the drive is configured for your computer. 3 If your replacement hard drive does not have the hard drive bracket attached, remove the bracket from the old hard drive by unsnapping it from the drive. 4 Snap the hard drive bracket onto the replacement hard drive. 5 Install the hard drive into...

Owner's Manual
Page 95
.... NOTICE: Do not install any software required for your replacement hard drive does not have removed the hard drive bracket from the electrical outlet before opening the cover. hard drive hard drive bracket 6 Gently slide the drive into place until you have the hard drive bracket attached, remove the bracket from the old hard drive by unsnapping it is configured for the operation of...
.... NOTICE: Do not install any software required for your replacement hard drive does not have removed the hard drive bracket from the electrical outlet before opening the cover. hard drive hard drive bracket 6 Gently slide the drive into place until you have the hard drive bracket attached, remove the bracket from the old hard drive by unsnapping it is configured for the operation of...


