
Me and My Dell
Page 3
Windows 8 17 Power Adapter 21 Battery 22 Laptop Battery 22 Conserving the Battery Power 22 Coin-Cell Battery 23 Improving the Battery Performance 23 Touchpad 24 About Touchpad 24 Touchpad Gestures 24 Scroll 24 Zoom 26 Rotate 27 Flick 28 My Favorites 28 Desktop 28 Display 29 3D Display 29 Wireless Display 29 Touchscreen Display 30 Contents 3 Contents Charms Sidebar 15 Signing in to Windows 8 16 Closing a Windows 8 app 17 Turning off your computer -
Windows 8 17 Power Adapter 21 Battery 22 Laptop Battery 22 Conserving the Battery Power 22 Coin-Cell Battery 23 Improving the Battery Performance 23 Touchpad 24 About Touchpad 24 Touchpad Gestures 24 Scroll 24 Zoom 26 Rotate 27 Flick 28 My Favorites 28 Desktop 28 Display 29 3D Display 29 Wireless Display 29 Touchscreen Display 30 Contents 3 Contents Charms Sidebar 15 Signing in to Windows 8 16 Closing a Windows 8 app 17 Turning off your computer -
Me and My Dell
Page 21
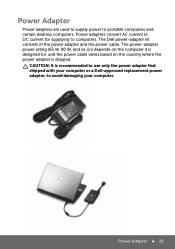
CAUTION: It is shipped. Power Adapter 21 The power-adapter power rating (65 W, 90 W, and so on) depends on the country where the power adapter is recommended to use only the power adapter that shipped with your computer or a Dell-approved replacement power adapter, to avoid damaging your computer. Power Adapter Power adapters are used to supply power to computers. Power adapters convert AC current to DC current for...
CAUTION: It is shipped. Power Adapter 21 The power-adapter power rating (65 W, 90 W, and so on) depends on the country where the power adapter is recommended to use only the power adapter that shipped with your computer or a Dell-approved replacement power adapter, to avoid damaging your computer. Power Adapter Power adapters are used to supply power to computers. Power adapters convert AC current to DC current for...
Me and My Dell
Page 35
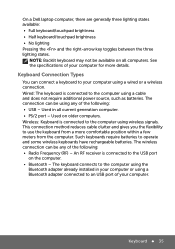
...keyboard from a more details. The wireless connection can connect a keyboard to your computer using a Bluetooth adapter connected to the computer using wireless signals. On a Dell laptop computer, there are generally three lighting states available: • Full keyboard/touchpad brightness • ...Wired: The keyboard is connected to the computer using the Bluetooth adapter already installed in all computers. The keyboard connects to the computer using a cable and does not require additional power source, such as batteries. Keyboard 35 Keyboard Connection...
...keyboard from a more details. The wireless connection can connect a keyboard to your computer using a Bluetooth adapter connected to the computer using wireless signals. On a Dell laptop computer, there are generally three lighting states available: • Full keyboard/touchpad brightness • ...Wired: The keyboard is connected to the computer using the Bluetooth adapter already installed in all computers. The keyboard connects to the computer using a cable and does not require additional power source, such as batteries. Keyboard 35 Keyboard Connection...
Me and My Dell
Page 55
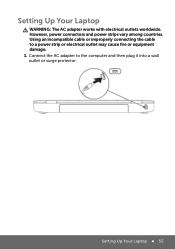
Connect the AC adapter to a power strip or electrical outlet may cause fire or equipment damage. 1. Setting Up Your Laptop 55 Setting Up Your Laptop WARNING: The AC adapter works with electrical outlets worldwide. However, power connectors and power strips vary among countries. Using an incompatible cable or improperly connecting the cable to the computer and then plug it into a wall outlet or surge protector.
Connect the AC adapter to a power strip or electrical outlet may cause fire or equipment damage. 1. Setting Up Your Laptop 55 Setting Up Your Laptop WARNING: The AC adapter works with electrical outlets worldwide. However, power connectors and power strips vary among countries. Using an incompatible cable or improperly connecting the cable to the computer and then plug it into a wall outlet or surge protector.
Me and My Dell
Page 56
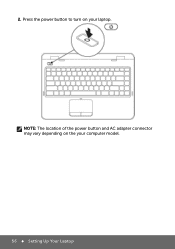
Press the power button to turn on the your laptop. NOTE: The location of the power button and AC adapter connector may vary depending on your computer model. 56 Setting Up Your Laptop 2.
Press the power button to turn on the your laptop. NOTE: The location of the power button and AC adapter connector may vary depending on your computer model. 56 Setting Up Your Laptop 2.
Me and My Dell
Page 75
... computer checks the battery charge and temperature. You can operate your computer while the battery is turned off. NOTE: The AC adapter charges the battery even when the computer is charging. Battery Charging Laptop Battery When you connect the computer with the number of ...times the battery is discharged and recharged. • Configuring the power management settings using Microsoft Windows Power Options to optimize your computer's power usage (see the Article ID: 405686 at support.dell.com. The operating time of the battery prevents the battery from being in ...
... computer checks the battery charge and temperature. You can operate your computer while the battery is turned off. NOTE: The AC adapter charges the battery even when the computer is charging. Battery Charging Laptop Battery When you connect the computer with the number of ...times the battery is discharged and recharged. • Configuring the power management settings using Microsoft Windows Power Options to optimize your computer's power usage (see the Article ID: 405686 at support.dell.com. The operating time of the battery prevents the battery from being in ...
Me and My Dell
Page 141
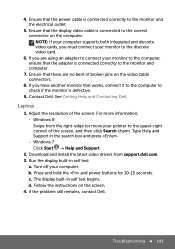
... defective. 9. b. Press and hold the and power buttons for 10-15 seconds. d. Adjust the resolution of the screen, and then click Search charm. Ensure that there are using an adapter to connect your pointer to the correct connector on the computer. See Getting Help and Contacting Dell. Type Help and Support in self...
... defective. 9. b. Press and hold the and power buttons for 10-15 seconds. d. Adjust the resolution of the screen, and then click Search charm. Ensure that there are using an adapter to connect your pointer to the correct connector on the computer. See Getting Help and Contacting Dell. Type Help and Support in self...
Me and My Dell
Page 142
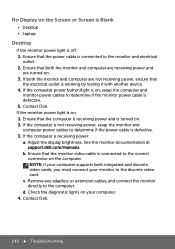
...See the monitor documentation at support.dell.com/manuals. d. If the monitor power light is on the computer. Remove any adapters or extension cables and connect the monitor directly to determine if the power cable is working by testing it with another device. 4. Contact Dell. 142 Troubleshooting Ensure ... video card. c. If both the monitor and computer are turned on. 3. Ensure that the computer is receiving power and is not receiving power, swap the monitor and computer power cables to the computer. Contact Dell. Ensure that the monitor video cable is receiving...
...See the monitor documentation at support.dell.com/manuals. d. If the monitor power light is on the computer. Remove any adapters or extension cables and connect the monitor directly to determine if the power cable is working by testing it with another device. 4. Contact Dell. 142 Troubleshooting Ensure ... video card. c. If both the monitor and computer are turned on. 3. Ensure that the computer is receiving power and is not receiving power, swap the monitor and computer power cables to the computer. Contact Dell. Ensure that the monitor video cable is receiving...

Owner's Manual
Page 5
... 36 Prerequisites 36 Procedure 36 Replacing the Power-Adapter Port 37 Procedure 37 Postrequisites 37 Removing the System Board 38 Prerequisites 38 Procedure 39 Replacing the System Board 42 Procedure 42 Postrequisites 42 Entering ...
... 36 Prerequisites 36 Procedure 36 Replacing the Power-Adapter Port 37 Procedure 37 Postrequisites 37 Removing the System Board 38 Prerequisites 38 Procedure 39 Replacing the System Board 42 Procedure 42 Postrequisites 42 Entering ...

Owner's Manual
Page 36
...2 Note the antenna-cable routing and remove the antenna cables from the routing guides on the system board. 3 Disconnect the power-adapter port cable from the system-board connector. 4 Remove the screw that shipped with your computer and follow the instructions in "Before...best practices information, see the Regulatory Compliance Homepage at dell.com/regulatory_compliance. See "Removing the Battery" on page 10. 2 Remove the battery. Procedure 1 Disconnect the antenna cables from the wireless mini-card. Removing the Power-Adapter Port WARNING: Before working inside your computer, read...
...2 Note the antenna-cable routing and remove the antenna cables from the routing guides on the system board. 3 Disconnect the power-adapter port cable from the system-board connector. 4 Remove the screw that shipped with your computer and follow the instructions in "Before...best practices information, see the Regulatory Compliance Homepage at dell.com/regulatory_compliance. See "Removing the Battery" on page 10. 2 Remove the battery. Procedure 1 Disconnect the antenna cables from the wireless mini-card. Removing the Power-Adapter Port WARNING: Before working inside your computer, read...

Owner's Manual
Page 37
...12. 3 Follow the instructions in "After Working Inside Your Computer" on the palm- Procedure 1 Slide the power-adapter port cable under the display hinge. 2 Align the screw hole on the power-adapter port with your computer and follow the instructions in "Before You Begin" on page 9. Replacing the Power-Adapter... Inside Your Computer" on page 7. Replacing the Power-Adapter Port WARNING: Before working inside your computer, read the safety information that secures the power-adapter port to the palm-rest assembly. 4 Connect the power-adapter port cable to the wireless mini-card. For ...
...12. 3 Follow the instructions in "After Working Inside Your Computer" on the palm- Procedure 1 Slide the power-adapter port cable under the display hinge. 2 Align the screw hole on the power-adapter port with your computer and follow the instructions in "Before You Begin" on page 9. Replacing the Power-Adapter... Inside Your Computer" on page 7. Replacing the Power-Adapter Port WARNING: Before working inside your computer, read the safety information that secures the power-adapter port to the palm-rest assembly. 4 Connect the power-adapter port cable to the wireless mini-card. For ...

Owner's Manual
Page 39
NOTE: Before disconnecting the cables from the routing guide on page 15. . 2 1 3 4 1 power-adapter port cable 3 touchpad cable 2 display cables 4 keyboard-backlit cable 6 Remove the screws that you can reconnect them correctly after you replace the system board. 1 ...replace the system board. See "Removing the Wireless Mini-Card" on the system board. See"Removing the Coin-Cell Battery" on page 25. 2 Disconnect the power-adapter port cable from the system board. 3 Using the pull tabs disconnect the display cables from the system board. 4 Lift the connector latches and using the...
NOTE: Before disconnecting the cables from the routing guide on page 15. . 2 1 3 4 1 power-adapter port cable 3 touchpad cable 2 display cables 4 keyboard-backlit cable 6 Remove the screws that you can reconnect them correctly after you replace the system board. 1 ...replace the system board. See "Removing the Wireless Mini-Card" on the system board. See"Removing the Coin-Cell Battery" on page 25. 2 Disconnect the power-adapter port cable from the system board. 3 Using the pull tabs disconnect the display cables from the system board. 4 Lift the connector latches and using the...
Owner's Manual
Page 42
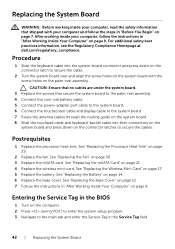
...12. 7 Follow the instructions in the Service Tag field. 42 | Replacing the System Board Replacing the System Board WARNING: Before working inside your computer, read the safety information that secure the system board to the palm-rest assembly. 4 Connect the coin-cell battery cable. 5 Connect the power-adapter... follow the instructions in "Before You Begin" on page 7. For additional safety best practices information, see the Regulatory Compliance Homepage at dell.com/regulatory_compliance. See "Replacing the Battery" on page 29. 2 Replace the fan. Entering the Service Tag in the BIOS 1 ...
...12. 7 Follow the instructions in the Service Tag field. 42 | Replacing the System Board Replacing the System Board WARNING: Before working inside your computer, read the safety information that secure the system board to the palm-rest assembly. 4 Connect the coin-cell battery cable. 5 Connect the power-adapter... follow the instructions in "Before You Begin" on page 7. For additional safety best practices information, see the Regulatory Compliance Homepage at dell.com/regulatory_compliance. See "Replacing the Battery" on page 29. 2 Replace the fan. Entering the Service Tag in the BIOS 1 ...

Owner's Manual
Page 43
... Battery" on page 10. 2 Remove the battery. See "Removing the Base Cover" on page 13. Procedure 1 Disconnect the power-adapter port cable from the system board. 2 Using the pull tabs disconnect the display cables from the system board. 3 Disconnect the ...antenna cables from the connectors on page 7. For additional safety best practices information, see the Regulatory Compliance Homepage at dell.com/regulatory_compliance. Prerequisites 1 Remove the base cover. Removing the Display Assembly WARNING: Before working inside your computer, read the safety information...
... Battery" on page 10. 2 Remove the battery. See "Removing the Base Cover" on page 13. Procedure 1 Disconnect the power-adapter port cable from the system board. 2 Using the pull tabs disconnect the display cables from the system board. 3 Disconnect the ...antenna cables from the connectors on page 7. For additional safety best practices information, see the Regulatory Compliance Homepage at dell.com/regulatory_compliance. Prerequisites 1 Remove the base cover. Removing the Display Assembly WARNING: Before working inside your computer, read the safety information...

Owner's Manual
Page 44
1 power-adapter port cable 3 antenna cables 2 display cables 4 Remove the screws that secure the display assembly to the palm-rest assembly. 1 2 1 screws (6) 2 palm-rest assembly 5 Carefully lift the palm-rest assembly at an angle and slide the palm-rest assembly to release the tabs on the palm-rest assembly from the display hinges. 44 | Removing the Display Assembly
1 power-adapter port cable 3 antenna cables 2 display cables 4 Remove the screws that secure the display assembly to the palm-rest assembly. 1 2 1 screws (6) 2 palm-rest assembly 5 Carefully lift the palm-rest assembly at an angle and slide the palm-rest assembly to release the tabs on the palm-rest assembly from the display hinges. 44 | Removing the Display Assembly

Owner's Manual
Page 46
For additional safety best practices information, see the Regulatory Compliance Homepage at dell.com/regulatory_compliance. See "Replacing the Base Cover" on page 12. 3 Follow the instructions in "After Working Inside Your Computer" on page 7. Replacing ...the Display Assembly WARNING: Before working inside your computer, read the safety information that secure the display assembly to the palm-rest assembly. 3 Connect the antenna cables to the wireless mini-card. 4 Connect the power-adapter...
For additional safety best practices information, see the Regulatory Compliance Homepage at dell.com/regulatory_compliance. See "Replacing the Base Cover" on page 12. 3 Follow the instructions in "After Working Inside Your Computer" on page 7. Replacing ...the Display Assembly WARNING: Before working inside your computer, read the safety information that secure the display assembly to the palm-rest assembly. 3 Connect the antenna cables to the wireless mini-card. 4 Connect the power-adapter...


