
Service Manual
Page 3
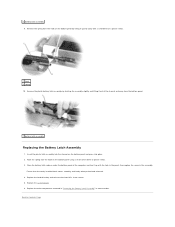
.... Replace the hard drive bay and reinsert the three M2 x 3-mm screws. 5. Back to Contents Page Insert the plastic latch assembly into place. 2. Hook the spring over the hook on the bottom panel and press into the channel on the bottom panel using a small screw driver or plastic scribe. 3. Replace the... the screw in reverse order. Replace the system board. 6. Ensure that the newly installed latch moves smoothly and freely when pushed and released. 4. Remove the spring from the bottom panel. 1 battery latch assembly Replacing the Battery Latch Assembly 1.
.... Replace the hard drive bay and reinsert the three M2 x 3-mm screws. 5. Back to Contents Page Insert the plastic latch assembly into place. 2. Hook the spring over the hook on the bottom panel and press into the channel on the bottom panel using a small screw driver or plastic scribe. 3. Replace the... the screw in reverse order. Replace the system board. 6. Ensure that the newly installed latch moves smoothly and freely when pushed and released. 4. Remove the spring from the bottom panel. 1 battery latch assembly Replacing the Battery Latch Assembly 1.
Service Manual
Page 20
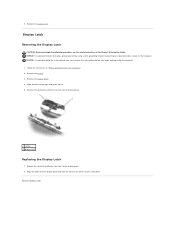
... begin working inside the computer. 1. Slide the latch to secure it into place. Replace the display bezel. Remove the spring that attaches the latch to the display panel. 2. Back to the display panel. 1 spring 2 display latch Replacing the Display Latch 1. Remove the display bezel. 4. Display Latch Removing the Display Latch CAUTION: Before...
... begin working inside the computer. 1. Slide the latch to secure it into place. Replace the display bezel. Remove the spring that attaches the latch to the display panel. 2. Back to the display panel. 1 spring 2 display latch Replacing the Display Latch 1. Remove the display bezel. 4. Display Latch Removing the Display Latch CAUTION: Before...