Setup and Quick Reference Guide
Page 7
...may be available in certain countries. Document/Media/Label Service Tag/Express Service Code The Service Tag/Express Service Code is a CD or DVD that may not be included on your operating system Finding Information 7 Contents • Use the Service Tag to identify your computer when... support. • A diagnostic program for your computer • Drivers for your computer NOTE: Drivers and documentation updates can be found at support.dell.com. • Desktop System Software (DSS) • Readme files NOTE: Readme files may ship with your computer. Some features or media may...
...may be available in certain countries. Document/Media/Label Service Tag/Express Service Code The Service Tag/Express Service Code is a CD or DVD that may not be included on your operating system Finding Information 7 Contents • Use the Service Tag to identify your computer when... support. • A diagnostic program for your computer • Drivers for your computer NOTE: Drivers and documentation updates can be found at support.dell.com. • Desktop System Software (DSS) • Readme files NOTE: Readme files may ship with your computer. Some features or media may...
Setup and Quick Reference Guide
Page 34
...5.25-inch Optical Disk Drives one media card reader (optional) Vostro 220s: one 5.25-inch Optical Disk Drive one media card reader (optional) Internally accessible Vostro 420: one to 1 TB optional) • SATA DVD, SATA CD-RW/DVD Combo, SATA DVD+/-RW, SATA BD Combo (Blu-Ray playback only), SATA Blu-... including HDD and short bay devices. Available devices • 3.5-inch SATA hard drives (80 GB to four 3.5-inch SATA drive bays Vostro 220/220s: one 3.5-inch USB media card reader with Bluetooth® • external USB floppy disk drive Connectors External connectors: Video Network...
...5.25-inch Optical Disk Drives one media card reader (optional) Vostro 220s: one 5.25-inch Optical Disk Drive one media card reader (optional) Internally accessible Vostro 420: one to 1 TB optional) • SATA DVD, SATA CD-RW/DVD Combo, SATA DVD+/-RW, SATA BD Combo (Blu-Ray playback only), SATA Blu-... including HDD and short bay devices. Available devices • 3.5-inch SATA hard drives (80 GB to four 3.5-inch SATA drive bays Vostro 220/220s: one 3.5-inch USB media card reader with Bluetooth® • external USB floppy disk drive Connectors External connectors: Video Network...

Setup and Quick Reference Guide
Page 36
...supply unit. Connectors (continued) Front panel audio HDA header Processor Memory Power 12V Power one 10-pin connector one 775-pin connector Vostro 420: four 240-pin connectors Vostro 220/220s: two 240-pin connectors one 4-pin connector one 24-pin connector Controls and Lights Front of computer: Link integrity light ... network and the computer. off - A blinking blue light indicates the computer is not detecting a physical connection to the SATA hard drive or CD/DVD. Rear of computer: Power button push button Power light blue light - Network activity light (on green light -
...supply unit. Connectors (continued) Front panel audio HDA header Processor Memory Power 12V Power one 10-pin connector one 775-pin connector Vostro 420: four 240-pin connectors Vostro 220/220s: two 240-pin connectors one 4-pin connector one 24-pin connector Controls and Lights Front of computer: Link integrity light ... network and the computer. off - A blinking blue light indicates the computer is not detecting a physical connection to the SATA hard drive or CD/DVD. Rear of computer: Power button push button Power light blue light - Network activity light (on green light -
Setup and Quick Reference Guide
Page 49
... in the system setup program. 3 When the boot device list appears, highlight CD/DVD/CD-RW and press . 4 Select the Boot from CD-ROM option from the menu that no diagnostics utility partition has been found, run the Dell Diagnostics from the diagnostics utility partition on your hard drive, and follow the...
... in the system setup program. 3 When the boot device list appears, highlight CD/DVD/CD-RW and press . 4 Select the Boot from CD-ROM option from the menu that no diagnostics utility partition has been found, run the Dell Diagnostics from the diagnostics utility partition on your hard drive, and follow the...
Setup and Quick Reference Guide
Page 53
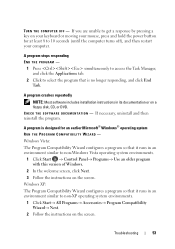
...; Programs→ Use an older program with this version of Windows. 2 In the welcome screen, click Next. 3 Follow the instructions on a floppy disk, CD, or DVD.
...; Programs→ Use an older program with this version of Windows. 2 In the welcome screen, click Next. 3 Follow the instructions on a floppy disk, CD, or DVD.

Setup and Quick Reference Guide
Page 54
...needed to check the hard drive, floppy disks, CDs, or DVDs • Save and close any open files or programs and shut down your computer through the Start menu Dell Technical Update Service The Dell Technical Update service provides proactive e-mail notification of software and ...hardware updates for at least 8 to support.dell.com/technicalupdate. 54 Troubleshooting See the software documentation for the Dell Technical Update service, go to 10 seconds (until the computer turns off), and then restart your computer....
...needed to check the hard drive, floppy disks, CDs, or DVDs • Save and close any open files or programs and shut down your computer through the Start menu Dell Technical Update Service The Dell Technical Update service provides proactive e-mail notification of software and ...hardware updates for at least 8 to support.dell.com/technicalupdate. 54 Troubleshooting See the software documentation for the Dell Technical Update service, go to 10 seconds (until the computer turns off), and then restart your computer....

Setup and Quick Reference Guide
Page 64
... in the system setup program. 5 When the boot device list appears, highlight CD/DVD/CD-RW Drive and press . 6 Press any key to Boot from which you ordered your computer. Use the Dell Drivers and Utilities media to complete the installation. 64 Reinstalling Software On the next start... then, shut down your primary hard drive. After you reinstall the operating system, you see the Microsoft® Windows® desktop; When the DELL logo appears, press immediately. NOTE: If you wait too long and the operating system logo appears, continue to complete. To reinstall Windows, you ...
... in the system setup program. 5 When the boot device list appears, highlight CD/DVD/CD-RW Drive and press . 6 Press any key to Boot from which you ordered your computer. Use the Dell Drivers and Utilities media to complete the installation. 64 Reinstalling Software On the next start... then, shut down your primary hard drive. After you reinstall the operating system, you see the Microsoft® Windows® desktop; When the DELL logo appears, press immediately. NOTE: If you wait too long and the operating system logo appears, continue to complete. To reinstall Windows, you ...

Service Manual
Page 42
...the chassis support bracket (see Removing the Computer Cover). 3. Disconnect all front panel cables from the system board. 7. Disconnect all the CD/DVD/hard drive data cables from the system board (see Replacing or Adding a Memory Module) and place them temporarily in Before Working on the... and place it into antistatic packaging. Slide the optical drive forward far enough to gain access to Contents Page System Board Dell™ Vostro™ 420/220/220s Service Manual Remove the System Board Replacing a System Board CAUTION: Before working inside your computer, read the safety...
...the chassis support bracket (see Removing the Computer Cover). 3. Disconnect all front panel cables from the system board. 7. Disconnect all the CD/DVD/hard drive data cables from the system board (see Replacing or Adding a Memory Module) and place them temporarily in Before Working on the... and place it into antistatic packaging. Slide the optical drive forward far enough to gain access to Contents Page System Board Dell™ Vostro™ 420/220/220s Service Manual Remove the System Board Replacing a System Board CAUTION: Before working inside your computer, read the safety...
Service Manual
Page 54
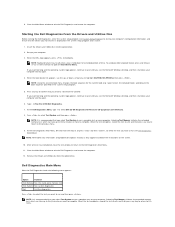
...select the test you select Test System to start from the optical drive. arrow keys to exit the Dell Diagnostics and restart the computer. NOTE: It is held down your computer's configuration information, and ensure that... system logo appears, continue to run a complete test on your computer. 3. If you want to select Dell 32-bit Diagnostics for the current boot only. Insert the Drivers and Utilities disc into the optical drive. ... Press any key to return to Run the 32 Bit Dell Diagnostics. 7. Close the Main Menu window to highlight CD/DVD/CD-RW Drive then press .
...select the test you select Test System to start from the optical drive. arrow keys to exit the Dell Diagnostics and restart the computer. NOTE: It is held down your computer's configuration information, and ensure that... system logo appears, continue to run a complete test on your computer. 3. If you want to select Dell 32-bit Diagnostics for the current boot only. Insert the Drivers and Utilities disc into the optical drive. ... Press any key to return to Run the 32 Bit Dell Diagnostics. 7. Close the Main Menu window to highlight CD/DVD/CD-RW Drive then press .

Service Manual
Page 56
... - Turn off standby mode in the Setup and Quick Reference Guide. Right-click Local Disk C:. 3. See Hardware Troubleshooter. Run the Dell Diagnostics - If the stream is defective. Check the cable connections Run the Hardware Troubleshooter - l Click the speaker icon in Windows Help... Check the speakers and subwoofer - Click Start and click My Computer. 2. Hard drive problems Run Check Disk - Try closing all DVD drives. See "Cleaning Your Computer" in Windows before you begin any boxes that the original drive is interrupted, an error occurs. ...
... - Turn off standby mode in the Setup and Quick Reference Guide. Right-click Local Disk C:. 3. See Hardware Troubleshooter. Run the Dell Diagnostics - If the stream is defective. Check the cable connections Run the Hardware Troubleshooter - l Click the speaker icon in Windows Help... Check the speakers and subwoofer - Click Start and click My Computer. 2. Hard drive problems Run Check Disk - Try closing all DVD drives. See "Cleaning Your Computer" in Windows before you begin any boxes that the original drive is interrupted, an error occurs. ...

Service Manual
Page 57
...Tools® Check Now. If you are trying to remove. 3. otherwise, contact your computer. For additional safety best practices information, see Contacting Dell). If the error message is not accessible. A required .DLL file was running when the message appeared. To remove and then reinstall the ...the desired action. 4. The program that shipped with your administrator to restart your computer. Click Uninstall. 4. Insert a bootable CD or DVD. NOTE: Your computer supports only IEEE 1394a standard. A filename cannot contain any of bad sectors and click Start. In some programs ...
...Tools® Check Now. If you are trying to remove. 3. otherwise, contact your computer. For additional safety best practices information, see Contacting Dell). If the error message is not accessible. A required .DLL file was running when the message appeared. To remove and then reinstall the ...the desired action. 4. The program that shipped with your administrator to restart your computer. Click Uninstall. 4. Insert a bootable CD or DVD. NOTE: Your computer supports only IEEE 1394a standard. A filename cannot contain any of bad sectors and click Start. In some programs ...
Service Manual
Page 59
...necessary, uninstall and then reinstall the program. For additional safety best practices information, see if that resolves the problem. l Run the Dell Diagnostics (see Replacing or Adding a Memory Module). If necessary, uninstall and then reinstall the program. In the welcome screen, click ...program crashes repeatedly NOTE: Most software includes installation instructions in this version of the procedures in its documentation or on a CD or DVD. If you receive an insufficient memory message - Follow the instructions on the screen. Click Start ® Control Panel® ...
...necessary, uninstall and then reinstall the program. For additional safety best practices information, see if that resolves the problem. l Run the Dell Diagnostics (see Replacing or Adding a Memory Module). If necessary, uninstall and then reinstall the program. In the welcome screen, click ...program crashes repeatedly NOTE: Most software includes installation instructions in this version of the procedures in its documentation or on a CD or DVD. If you receive an insufficient memory message - Follow the instructions on the screen. Click Start ® Control Panel® ...


