Setup and Features Information Tech Sheet
Page 2
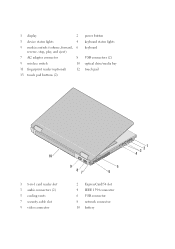
1 display 2 3 device status lights 4 5 media controls (volume, forward, 6 reverse, stop, play, and eject) 7 AC adapter connector 8 9 wireless switch 10 11 fingerprint reader (optional) 12 13 touch pad buttons (2) power button keyboard status lights keyboard USB connectors (2) optical drive/media bay touch pad 10 1 8-in-1 card reader slot 3 audio connectors (2) 5 cooling vents 7 security cable slot 9 video connector 9 87 5 6 2 ExpressCard/54 slot 4 IEEE 1394 connector 6 USB connector 8 network connector 10 battery 3 21 4
1 display 2 3 device status lights 4 5 media controls (volume, forward, 6 reverse, stop, play, and eject) 7 AC adapter connector 8 9 wireless switch 10 11 fingerprint reader (optional) 12 13 touch pad buttons (2) power button keyboard status lights keyboard USB connectors (2) optical drive/media bay touch pad 10 1 8-in-1 card reader slot 3 audio connectors (2) 5 cooling vents 7 security cable slot 9 video connector 9 87 5 6 2 ExpressCard/54 slot 4 IEEE 1394 connector 6 USB connector 8 network connector 10 battery 3 21 4

Setup and Features Information Tech Sheet
Page 3
The chassis color of Vostro 1510 is Black and the chassis color of Vostro 2510 is the color of the chassis. Vostro 1510/2510 NOTE: The difference between Vostro 1510 and Vostro 2510 is Cherry Red. 1 2 3 4 5 6 9 A 16 15 14 13 12 11 9 10 1 display 2 3 device status lights 4 5 media controls (volume, forward, 6 reverse, stop, play, and eject) power button keyboard status lights keyboard 7 8
The chassis color of Vostro 1510 is Black and the chassis color of Vostro 2510 is the color of the chassis. Vostro 1510/2510 NOTE: The difference between Vostro 1510 and Vostro 2510 is Cherry Red. 1 2 3 4 5 6 9 A 16 15 14 13 12 11 9 10 1 display 2 3 device status lights 4 5 media controls (volume, forward, 6 reverse, stop, play, and eject) power button keyboard status lights keyboard 7 8
Setup and Features Information Tech Sheet
Page 5
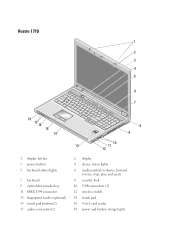
Vostro 1710 1 2 3 4 5 6 9 7 A 18 17 16 15 14 8 9 10 13 11 12 1 display latches 3 power button 5 keyboard status lights 7 keyboard 9 optical drive/media bay 11 IEEE 1394 connector 13 fingerprint reader (optional) 15 touch pad buttons(2) 17 audio connectors(2) 2 display 4 device status lights 6 media controls (volume, forward, reverse, stop, play, and eject) 8 security lock 10 USB connectors (2) 12 wireless switch 14 touch pad 16 8-in-1 card reader 18 power and battery charge lights
Vostro 1710 1 2 3 4 5 6 9 7 A 18 17 16 15 14 8 9 10 13 11 12 1 display latches 3 power button 5 keyboard status lights 7 keyboard 9 optical drive/media bay 11 IEEE 1394 connector 13 fingerprint reader (optional) 15 touch pad buttons(2) 17 audio connectors(2) 2 display 4 device status lights 6 media controls (volume, forward, reverse, stop, play, and eject) 8 security lock 10 USB connectors (2) 12 wireless switch 14 touch pad 16 8-in-1 card reader 18 power and battery charge lights

Setup and Features Information Tech Sheet
Page 7
... adapter to the AC adapter connector on the computer and to the electrical outlet. 2 Connect the network cable. 3 Connect USB devices, such as a mouse or keyboard. 4 Connect IEEE 1394 devices, such as a DVD player. 5 Open the computer display and press the power button to turn on the AC adapter to avoid...
... adapter to the AC adapter connector on the computer and to the electrical outlet. 2 Connect the network cable. 3 Connect USB devices, such as a mouse or keyboard. 4 Connect IEEE 1394 devices, such as a DVD player. 5 Open the computer display and press the power button to turn on the AC adapter to avoid...
Setup and Quick Reference Guide
Page 8
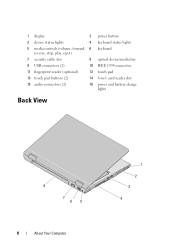
1 display 2 3 device status lights 4 5 media controls (volume, forward, 6 reverse, stop, play, eject) 7 security cable slot 8 9 USB connectors (2) 10 11 fingerprint reader (optional) 12 13 touch pad buttons (2) 14 15 audio connectors (2) 16 power button keyboard status lights keyboard optical device/media bay IEEE 1394 connector touch pad 8-in-1 card reader slot power and battery charge lights Back View 8 7 65 8 About Your Computer 1 2 3 4
1 display 2 3 device status lights 4 5 media controls (volume, forward, 6 reverse, stop, play, eject) 7 security cable slot 8 9 USB connectors (2) 10 11 fingerprint reader (optional) 12 13 touch pad buttons (2) 14 15 audio connectors (2) 16 power button keyboard status lights keyboard optical device/media bay IEEE 1394 connector touch pad 8-in-1 card reader slot power and battery charge lights Back View 8 7 65 8 About Your Computer 1 2 3 4
Setup and Quick Reference Guide
Page 12
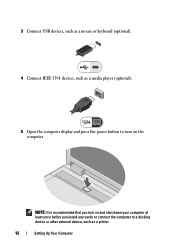
3 Connect USB devices, such as a mouse or keyboard (optional). 4 Connect IEEE 1394 devices, such as a media player (optional). 5 Open the computer display and press the power button to a docking device or other external device, such as a printer. 12 Setting Up Your Computer NOTE: It is recommended that you install any cards or connect the computer to turn on and shut down your computer at least once before you turn on the computer.
3 Connect USB devices, such as a mouse or keyboard (optional). 4 Connect IEEE 1394 devices, such as a media player (optional). 5 Open the computer display and press the power button to a docking device or other external device, such as a printer. 12 Setting Up Your Computer NOTE: It is recommended that you install any cards or connect the computer to turn on and shut down your computer at least once before you turn on the computer.
Setup and Quick Reference Guide
Page 24
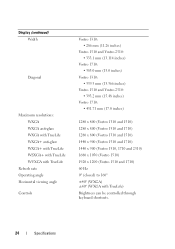
... and 1710) 1280 x 800 (Vostro 1310 and 1510) 1440 x 900 (Vostro 1510 and 1710) 1440 x 900 (Vostro 1510, 1710 and 2510) 1680 x 1050 (Vostro 1510) 1920 x 1200 (Vostro 1510 and 1710) 60 Hz 0° (closed) to 160° ±40° (WXGA) ±40° (WXGA with TrueLife) Brightness can be controlled through keyboard shortcuts. 24 Specifications
... and 1710) 1280 x 800 (Vostro 1310 and 1510) 1440 x 900 (Vostro 1510 and 1710) 1440 x 900 (Vostro 1510, 1710 and 2510) 1680 x 1050 (Vostro 1510) 1920 x 1200 (Vostro 1510 and 1710) 60 Hz 0° (closed) to 160° ±40° (WXGA) ±40° (WXGA with TrueLife) Brightness can be controlled through keyboard shortcuts. 24 Specifications

Setup and Quick Reference Guide
Page 25
Keyboard Number of keys Layout Size: Standard Maximum Touch Pad X/Y position resolution (graphics table mode) Size: Width Height Vostro 1310, Vostro 1510, and Vostro 2510: • 84 (U.S./Canada); 85 (Europe); 88 (Japan) Vostro 1710: • 105 (U.S./Chinese); 106 (Europe/Brazil); 109 (Japan) QWERTY/AZERTY/Kanji full sized Vostro 1310, Vostro 1510, and Vostro 2510: • 283.1 mm x 118.9 mm x 5.2 mm (11...
Keyboard Number of keys Layout Size: Standard Maximum Touch Pad X/Y position resolution (graphics table mode) Size: Width Height Vostro 1310, Vostro 1510, and Vostro 2510: • 84 (U.S./Canada); 85 (Europe); 88 (Japan) Vostro 1710: • 105 (U.S./Chinese); 106 (Europe/Brazil); 109 (Japan) QWERTY/AZERTY/Kanji full sized Vostro 1310, Vostro 1510, and Vostro 2510: • 283.1 mm x 118.9 mm x 5.2 mm (11...
Setup and Quick Reference Guide
Page 31
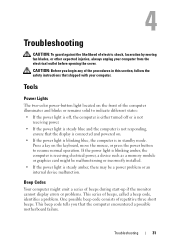
Press a key on the keyboard, move the mouse, or press the power button to indicate different states: • If the power light is off, the computer is either turned off ...
Press a key on the keyboard, move the mouse, or press the power button to indicate different states: • If the power light is off, the computer is either turned off ...
Setup and Quick Reference Guide
Page 35
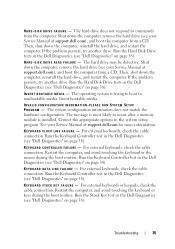
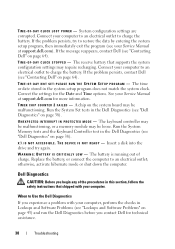
...hard drive may be defective. Run the Hard Disk Drive tests in the Dell Diagnostics (see "Dell Diagnostics" on page 38). The message is installed. Run the Keyboard Controller test in the system setup program. Troubleshooting 35 Shut down the computer... D A T A L I N E F A I L U R E - Then, shut down the computer, remove the hard drive (see "Dell Diagnostics" on page 38). Run the Keyboard Controller test in the Dell Diagnostics (see your Service Manual at support.dell.com), and boot the computer from the computer. The hard drive does not respond to commands from...
...hard drive may be defective. Run the Hard Disk Drive tests in the Dell Diagnostics (see "Dell Diagnostics" on page 38). The message is installed. Run the Keyboard Controller test in the system setup program. Troubleshooting 35 Shut down the computer... D A T A L I N E F A I L U R E - Then, shut down the computer, remove the hard drive (see "Dell Diagnostics" on page 38). Run the Keyboard Controller test in the Dell Diagnostics (see your Service Manual at support.dell.com), and boot the computer from the computer. The hard drive does not respond to commands from...
Setup and Quick Reference Guide
Page 38
System configuration settings are corrupted. If the problem persists, contact Dell (see "Contacting Dell" on the system board may be loose. A chip on page 64). The keyboard controller may be malfunctioning, or a memory module may require recharging. Insert a disk into the drive and try to restore the data by entering the system ...
System configuration settings are corrupted. If the problem persists, contact Dell (see "Contacting Dell" on the system board may be loose. A chip on page 64). The keyboard controller may be malfunctioning, or a memory module may require recharging. Insert a disk into the drive and try to restore the data by entering the system ...
Setup and Quick Reference Guide
Page 41
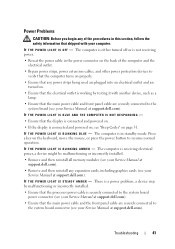
...). • Remove and then reinstall any expansion cards, including graphics cards (see your Service Manual at support.dell.com). Press a key on the keyboard, move the mouse, or press the power button to resume normal operation. I F T H E P O W E R L I G H T I N G A M B E R - The computer is either turned...Ensure that the main power cable and front panel cable are securely connected to the system board (see your Service Manual at support.dell.com). Troubleshooting 41 Power Problems CAUTION: Before you begin any of the computer and the electrical outlet. • Bypass power strips...
...). • Remove and then reinstall any expansion cards, including graphics cards (see your Service Manual at support.dell.com). Press a key on the keyboard, move the mouse, or press the power button to resume normal operation. I F T H E P O W E R L I G H T I N G A M B E R - The computer is either turned...Ensure that the main power cable and front panel cable are securely connected to the system board (see your Service Manual at support.dell.com). Troubleshooting 41 Power Problems CAUTION: Before you begin any of the computer and the electrical outlet. • Bypass power strips...
Setup and Quick Reference Guide
Page 42
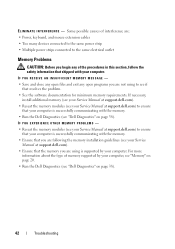
... that your computer. If necessary, install additional memory (see your Service Manual at support.dell.com). • Reseat the memory modules (see your Service Manual at support.dell.com). • Ensure that the memory you are : • Power, keyboard, and mouse extension cables • Too many devices connected to the same power strip...
... that your computer. If necessary, install additional memory (see your Service Manual at support.dell.com). • Reseat the memory modules (see your Service Manual at support.dell.com). • Ensure that the memory you are : • Power, keyboard, and mouse extension cables • Too many devices connected to the same power strip...
Setup and Quick Reference Guide
Page 43
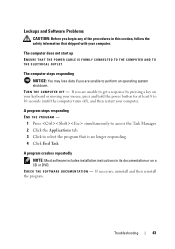
... by pressing a key on a CD or DVD. Lockups and Software Problems CAUTION: Before you begin any of the procedures in its documentation or on your keyboard or moving your mouse, press and hold the power button for at least 8 to select the program that shipped with your computer. Troubleshooting 43 TU...
... by pressing a key on a CD or DVD. Lockups and Software Problems CAUTION: Before you begin any of the procedures in its documentation or on your keyboard or moving your mouse, press and hold the power button for at least 8 to select the program that shipped with your computer. Troubleshooting 43 TU...
Setup and Quick Reference Guide
Page 44
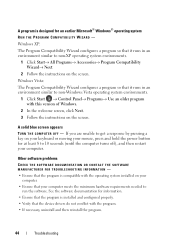
... run the software. A program is installed and configured properly. • Verify that the device drivers do not conflict with the operating system installed on your keyboard or moving your mouse, press and hold the power button for an earlier Microsoft® Windows® operating system RUN THE PROGRAM COMPATIBILITY WIZARD - If...
... run the software. A program is installed and configured properly. • Verify that the device drivers do not conflict with the operating system installed on your keyboard or moving your mouse, press and hold the power button for an earlier Microsoft® Windows® operating system RUN THE PROGRAM COMPATIBILITY WIZARD - If...
Setup and Quick Reference Guide
Page 52
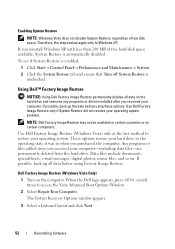
.... 2 Select Repair Your Computer. If you purchased the computer. The System Recovery Options window appears. 3 Select a keyboard layout and click Next. 52 Reinstalling Software NOTE: Dell Factory Image Restore may not be available in when you reinstall Windows XP with less than 200 MB of low disk...Any programs or files added since you received your operating system. Enabling System Restore NOTE: Windows Vista does not disable System Restore; Use Dell Factory Image Restore (Windows Vista) only as the last method to the operating state it was in certain countries or on the computer....
.... 2 Select Repair Your Computer. If you purchased the computer. The System Recovery Options window appears. 3 Select a keyboard layout and click Next. 52 Reinstalling Software NOTE: Dell Factory Image Restore may not be available in when you reinstall Windows XP with less than 200 MB of low disk...Any programs or files added since you received your operating system. Enabling System Restore NOTE: Windows Vista does not disable System Restore; Use Dell Factory Image Restore (Windows Vista) only as the last method to the operating state it was in certain countries or on the computer....

Setup and Quick Reference Guide
Page 54
... too long and the operating system logo appears, continue to load any open files and exit any required drivers. Windows Vista: Dell Factory Image Restore 1 Turn on the region from CD-ROM, and follow the instructions on the screen to Boot from which ... System media. 3 If the Install Windows message appears, click Exit. 4 Restart the computer. The System Recovery Options window appears. 3 Select a keyboard layout and click Next. 54 Reinstalling Software Reinstalling Windows The reinstallation process can take 1 to 2 hours to access the Vista Advanced Boot Options Window....
... too long and the operating system logo appears, continue to load any open files and exit any required drivers. Windows Vista: Dell Factory Image Restore 1 Turn on the region from CD-ROM, and follow the instructions on the screen to Boot from which ... System media. 3 If the Install Windows message appears, click Exit. 4 Restart the computer. The System Recovery Options window appears. 3 Select a keyboard layout and click Next. 54 Reinstalling Software Reinstalling Windows The reinstallation process can take 1 to 2 hours to access the Vista Advanced Boot Options Window....
Setup and Quick Reference Guide
Page 62
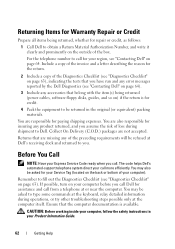
...prominently on your computer before you call Dell for assistance and call for your region, see "Diagnostics Checklist" on page 64. You may be asked to type some commands at the keyboard, relay detailed information during shipment to Dell. Remember to fill out the Diagnostics Checklist... (see "Contacting Dell" on page 63). Collect On Delivery (C.O.D.) packages are also responsible for paying shipping ...
...prominently on your computer before you call Dell for assistance and call for your region, see "Diagnostics Checklist" on page 64. You may be asked to type some commands at the keyboard, relay detailed information during shipment to Dell. Remember to fill out the Diagnostics Checklist... (see "Contacting Dell" on page 63). Collect On Delivery (C.O.D.) packages are also responsible for paying shipping ...
Service Manual
Page 1
...; n Series computer, any manner whatsoever without notice. © 2008 Dell Inc. Dell™ Vostro™ 2510 Service Manual Troubleshooting Before Working on Your Computer Hard Drive Wireless Local Area Network (WLAN) Card Fan Processor Heat Sink Processor Module Memory Hinge Cover Keyboard Display Palm Rest Fingerprint Reader Internal Card With Bluetooth® Wireless Technology Optical...
...; n Series computer, any manner whatsoever without notice. © 2008 Dell Inc. Dell™ Vostro™ 2510 Service Manual Troubleshooting Before Working on Your Computer Hard Drive Wireless Local Area Network (WLAN) Card Fan Processor Heat Sink Processor Module Memory Hinge Cover Keyboard Display Palm Rest Fingerprint Reader Internal Card With Bluetooth® Wireless Technology Optical...
Service Manual
Page 2
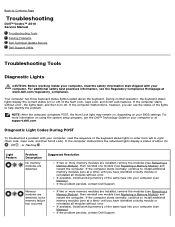
Back to Contents Page Troubleshooting Dell™ Vostro™ 2510 Service Manual Troubleshooting Tools Solving Problems Dell Technical Update Service Dell Support Utility Troubleshooting Tools Diagnostic Lights ...CAUTION: Before working inside your computer, read the sequence of the Num Lock, Caps Lock, and Scroll Lock features. If the computer starts without error, the lights flash, and then turn off ) of the keyboard...
Back to Contents Page Troubleshooting Dell™ Vostro™ 2510 Service Manual Troubleshooting Tools Solving Problems Dell Technical Update Service Dell Support Utility Troubleshooting Tools Diagnostic Lights ...CAUTION: Before working inside your computer, read the sequence of the Num Lock, Caps Lock, and Scroll Lock features. If the computer starts without error, the lights flash, and then turn off ) of the keyboard...


