
Owners Manual
Page 5
... 56 Dell QuickSet Battery Meter 56 Charge Gauge 57 Low-Battery Warning 58 Microsoft® Windows® XP Battery Meter . . . . . 58 Microsoft® Windows® Vista Battery Meter . . . . 58 Conserving Battery Power 58 Power Management Modes 59 Standby and Sleep Mode 59 Hibernate Mode 59 Configuring Power Management Settings 60 Accessing Power Options Properties 60 Charging the Battery 61 Replacing the Battery 61 Storing a Battery 62 7 Using the Optional Camera 63 Accessing the Camera's Help File 63 Manually Adjusting the Camera Settings 64 Creating a Picture or a Video 64...
... 56 Dell QuickSet Battery Meter 56 Charge Gauge 57 Low-Battery Warning 58 Microsoft® Windows® XP Battery Meter . . . . . 58 Microsoft® Windows® Vista Battery Meter . . . . 58 Conserving Battery Power 58 Power Management Modes 59 Standby and Sleep Mode 59 Hibernate Mode 59 Configuring Power Management Settings 60 Accessing Power Options Properties 60 Charging the Battery 61 Replacing the Battery 61 Storing a Battery 62 7 Using the Optional Camera 63 Accessing the Camera's Help File 63 Manually Adjusting the Camera Settings 64 Creating a Picture or a Video 64...

Owners Manual
Page 11
... Turning Off Your Computer 164 Before Working Inside Your Computer 164 Hard Drive 166 Removing the Hard Drive 166 Replacing the Hard Drive 168 Returning a Hard Drive to Dell 168 Optical Drive 169 Removing the Optical Drive 169 Replacing the Optical Drive 170 Central Control Cover 170 Removing the Central Control Cover 171 Replacing the Central Control Cover 171 Keyboard 172 Removing the Keyboard 172 Replacing the Keyboard 173 Memory 174 Removing the Memory Module 174 Replacing the Memory Module 176 Modem 177 Subscriber Identity Module 179 Wireless Mini-Cards 179 Removing...
... Turning Off Your Computer 164 Before Working Inside Your Computer 164 Hard Drive 166 Removing the Hard Drive 166 Replacing the Hard Drive 168 Returning a Hard Drive to Dell 168 Optical Drive 169 Removing the Optical Drive 169 Replacing the Optical Drive 170 Central Control Cover 170 Removing the Central Control Cover 171 Replacing the Central Control Cover 171 Keyboard 172 Removing the Keyboard 172 Replacing the Keyboard 173 Memory 174 Removing the Memory Module 174 Replacing the Memory Module 176 Modem 177 Subscriber Identity Module 179 Wireless Mini-Cards 179 Removing...
Owners Manual
Page 18
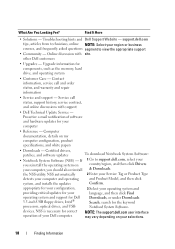
...; Dell Technical Update Service - Service call and order status, and warranty and repair information • Service and support - Certified drivers, patches, and software updates To download Notebook System Software: • Notebook System Software (NSS) - appropriate for your configuration, 3 Select your operating system and providing critical updates for your language, and then click Find operating system and support for Dell 3.5-inch USB floppy drives, Intel® Downloads, or under Downloads Search, search for components, such as the memory, hard drive...
...; Dell Technical Update Service - Service call and order status, and warranty and repair information • Service and support - Certified drivers, patches, and software updates To download Notebook System Software: • Notebook System Software (NSS) - appropriate for your configuration, 3 Select your operating system and providing critical updates for your language, and then click Find operating system and support for Dell 3.5-inch USB floppy drives, Intel® Downloads, or under Downloads Search, search for components, such as the memory, hard drive...
Owners Manual
Page 107
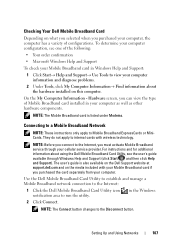
... and diagnose problems. 2 Under Tools, click My Computer Information→ Find information about using the Dell Mobile Broadband Card Utility, see the user's guide available through your Mobile Broadband card if you can view the type of Mobile Broadband card installed in the Windows 2 Click Connect. The user's guide is listed under Modems. Connecting to a Mobile Broadband Network NOTE: These instructions only apply to run the utility. Setting Up and Using Networks 107...
... and diagnose problems. 2 Under Tools, click My Computer Information→ Find information about using the Dell Mobile Broadband Card Utility, see the user's guide available through your Mobile Broadband card if you can view the type of Mobile Broadband card installed in the Windows 2 Click Connect. The user's guide is listed under Modems. Connecting to a Mobile Broadband Network NOTE: These instructions only apply to run the utility. Setting Up and Using Networks 107...
Owners Manual
Page 120
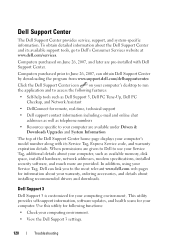
...'s model number along with Dell Support Center. Dell Support 3 Dell Support 3 is customized for remote, real-time, technical support • Dell support contact information including e-mail and online chat addresses as well as available memory, disk space, installed hardware, network addresses, modem specifications, installed security software, and much more are pre-installed with its available support tools, go to Dell's Consumer Services website at www.dell.com/services. To obtain detailed information about installing recommended drivers and downloads. Dell Support...
...'s model number along with Dell Support Center. Dell Support 3 Dell Support 3 is customized for remote, real-time, technical support • Dell support contact information including e-mail and online chat addresses as well as available memory, disk space, installed hardware, network addresses, modem specifications, installed security software, and much more are pre-installed with its available support tools, go to Dell's Consumer Services website at www.dell.com/services. To obtain detailed information about installing recommended drivers and downloads. Dell Support...
Owners Manual
Page 122
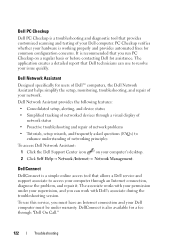
...; Network /Internet→ Network Management. DellConnect DellConnect is a simple online access tool that provides customized scanning and testing of networking principles To access Dell Network Assistant: 1 Click the Dell Support Center icon on a regular basis or before contacting Dell for common configuration concerns. Dell PC Checkup Dell PC Checkup is a troubleshooting and diagnostic tool that allows a Dell service and support associate to access your computer through an Internet connection, diagnose the problem, and repair...
...; Network /Internet→ Network Management. DellConnect DellConnect is a simple online access tool that provides customized scanning and testing of networking principles To access Dell Network Assistant: 1 Click the Dell Support Center icon on a regular basis or before contacting Dell for common configuration concerns. Dell PC Checkup Dell PC Checkup is a troubleshooting and diagnostic tool that allows a Dell service and support associate to access your computer through an Internet connection, diagnose the problem, and repair...
Owners Manual
Page 127
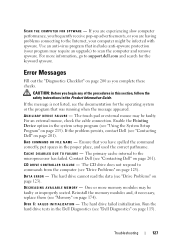
...). The touch pad or external mouse may be faulty or improperly seated. C A C H E D I S A B L E D D U E T O F A I A R Y DEVICE FAILURE - Contact Dell (see "Using the System Setup Program" on page 201). DATA ERROR - The hard drive failed initialization. Enable the Pointing Device option in the Dell Diagnostics (see "Contacting Dell" on page 115). Run the hard drive tests in the system setup program (see "Contacting Dell" on page 213). S C A N T H E C O M P U T E R F O R S P Y W A R E - For more memory modules may require an upgrade) to support.dell.com...
...). The touch pad or external mouse may be faulty or improperly seated. C A C H E D I S A B L E D D U E T O F A I A R Y DEVICE FAILURE - Contact Dell (see "Using the System Setup Program" on page 201). DATA ERROR - The hard drive failed initialization. Enable the Pointing Device option in the Dell Diagnostics (see "Contacting Dell" on page 115). Run the hard drive tests in the system setup program (see "Contacting Dell" on page 213). S C A N T H E C O M P U T E R F O R S P Y W A R E - For more memory modules may require an upgrade) to support.dell.com...

Owners Manual
Page 129
..., reinstall the hard drive, and restart the computer. K E Y B O A R D D A T A L I N E F A I R E C T - Reinstall the memory modules and, if necessary, replace them (see "Hard Drive" on page 174). Shut down the computer, remove the hard drive (see "Memory" on page 166), and boot the computer from a CD. The operating system is installed. INVALID CONFIGURATION INFORMATION-PLEASE RUN SYSTEM SETUP PROGRAM - For external keyboards, check the cable connection. Run the Keyboard Controller test in the Dell Diagnostics (see "Dell Diagnostics...
..., reinstall the hard drive, and restart the computer. K E Y B O A R D D A T A L I N E F A I R E C T - Reinstall the memory modules and, if necessary, replace them (see "Hard Drive" on page 174). Shut down the computer, remove the hard drive (see "Memory" on page 166), and boot the computer from a CD. The operating system is installed. INVALID CONFIGURATION INFORMATION-PLEASE RUN SYSTEM SETUP PROGRAM - For external keyboards, check the cable connection. Run the Keyboard Controller test in the Dell Diagnostics (see "Dell Diagnostics...
Owners Manual
Page 140
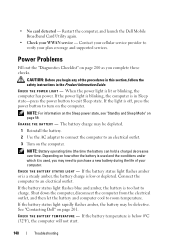
... Card Utility again. • Check your plan coverage and supported services. C HARGE THE BATTERY - If the battery status light flashes amber or is a steady amber, the battery charge is lit or blinking, the computer has power. CAUTION: Before you may be depleted. 1 Reinstall the battery. 2 Use the AC adapter to connect the computer to exit Sleep state. If the power light is blinking, the computer is in the Product Information Guide...
... Card Utility again. • Check your plan coverage and supported services. C HARGE THE BATTERY - If the battery status light flashes amber or is a steady amber, the battery charge is lit or blinking, the computer has power. CAUTION: Before you may be depleted. 1 Reinstall the battery. 2 Use the AC adapter to connect the computer to exit Sleep state. If the power light is blinking, the computer is in the Product Information Guide...
Owners Manual
Page 144
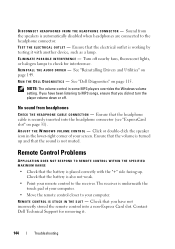
... device, such as a lamp. R EINSTALL THE AUDIO DRIVER - See "Dell Diagnostics" on page 149. Ensure that the battery is working by testing it . 144 Troubleshooting Check that the volume is automatically disabled when headphones are connected to the receiver. See "Reinstalling Drivers and Utilities" on page 115. No sound from the speakers is turned up . The receiver is securely inserted into a non-Express Card slot. Contact Dell...
... device, such as a lamp. R EINSTALL THE AUDIO DRIVER - See "Dell Diagnostics" on page 149. Ensure that the battery is working by testing it . 144 Troubleshooting Check that the volume is automatically disabled when headphones are connected to the receiver. See "Reinstalling Drivers and Utilities" on page 115. No sound from the speakers is turned up . The receiver is securely inserted into a non-Express Card slot. Contact Dell...
Owners Manual
Page 149
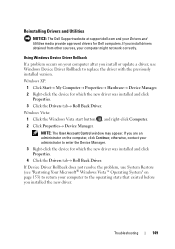
...: The Dell Support website at support.dell.com and your computer to the operating state that existed before you installed the new driver. If Device Driver Rollback does not resolve the problem, use Windows Device Driver Rollback to replace the driver with the previously installed version. NOTE: The User Account Control window may appear. otherwise, contact your computer might not work correctly. Troubleshooting 149 Windows XP: 1 Click Start→ My Computer→ Properties→ Hardware→ Device Manager...
...: The Dell Support website at support.dell.com and your computer to the operating state that existed before you installed the new driver. If Device Driver Rollback does not resolve the problem, use Windows Device Driver Rollback to replace the driver with the previously installed version. NOTE: The User Account Control window may appear. otherwise, contact your computer might not work correctly. Troubleshooting 149 Windows XP: 1 Click Start→ My Computer→ Properties→ Hardware→ Device Manager...

Owners Manual
Page 151
... must first enable the Consumer IR port in the previous section: Windows XP: 1 Click Start→ My Computer→ Properties→ Hardware→ Device Manager. 2 Double-click the type of device for which you are installing the driver (for example, Audio or Video). 3 Double-click the name of the device for which you are installing the driver. 4 Click the Driver tab→ Update Driver. 5 Click Install from a list or specific location (Advanced)→...
... must first enable the Consumer IR port in the previous section: Windows XP: 1 Click Start→ My Computer→ Properties→ Hardware→ Device Manager. 2 Double-click the type of device for which you are installing the driver (for example, Audio or Video). 3 Double-click the name of the device for which you are installing the driver. 4 Click the Driver tab→ Update Driver. 5 Click Install from a list or specific location (Advanced)→...
Owners Manual
Page 152
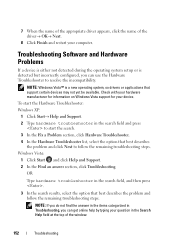
Troubleshooting Software and Hardware Problems If a device is either not detected during the operating system setup or is a new operating system, so drivers or applications that support certain devices may not yet be available. NOTE: If you do not find the answer in the items categorized in Troubleshooting, you can get online help by typing your question in the search field, and then press . 3 In...
Troubleshooting Software and Hardware Problems If a device is either not detected during the operating system setup or is a new operating system, so drivers or applications that support certain devices may not yet be available. NOTE: If you do not find the answer in the items categorized in Troubleshooting, you can get online help by typing your question in the search field, and then press . 3 In...

Owners Manual
Page 157
... the device drivers, virus protection program, and other software. After you reinstall the operating system, you see the Microsoft Windows desktop, then shut down your computer and try again. See "Contacting Dell" on the screen to reinstall Dell MediaDirect. NOTE: Your Drivers and Utilities media contains drivers that are installed on your hard drive. Use your Drivers and Utilities media to load any key to Boot from CD-ROM. 7 Follow the instructions on...
... the device drivers, virus protection program, and other software. After you reinstall the operating system, you see the Microsoft Windows desktop, then shut down your computer and try again. See "Contacting Dell" on the screen to reinstall Dell MediaDirect. NOTE: Your Drivers and Utilities media contains drivers that are installed on your hard drive. Use your Drivers and Utilities media to load any key to Boot from CD-ROM. 7 Follow the instructions on...
Owners Manual
Page 162
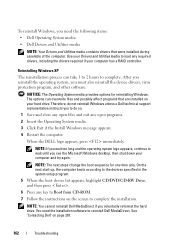
... next steps change the boot sequence for reinstalling Windows. You need the following items: • Dell Operating System media • Dell Drivers and Utilities media NOTE: Your Drivers and Utilities media contains drivers that are installed on your Drivers and Utilities media to load any key to Boot from CD-ROM. 7 Follow the instructions on page 201. 162 Troubleshooting Therefore, do not reinstall Windows unless a Dell technical support representative instructs you voluntarily reformat the hard drive. Use your hard drive. When the DELL logo...
... next steps change the boot sequence for reinstalling Windows. You need the following items: • Dell Operating System media • Dell Drivers and Utilities media NOTE: Your Drivers and Utilities media contains drivers that are installed on your Drivers and Utilities media to load any key to Boot from CD-ROM. 7 Follow the instructions on page 201. 162 Troubleshooting Therefore, do not reinstall Windows unless a Dell technical support representative instructs you voluntarily reformat the hard drive. Use your hard drive. When the DELL logo...
Owners Manual
Page 166
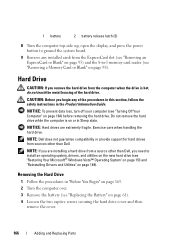
... hard drive from sources other than Dell. CAUTION: Before you are extremely fragile. Exercise care when handling the hard drive. NOTE: If you begin any installed cards from a source other than Dell, you need to ground the system board. 9 Remove any of the hard drive. 1 battery 2 battery release latch (2) 8 Turn the computer top-side up, open the display, and press the power button to install an operating system, drivers, and utilities on the new hard drive (see "Removing a Memory Card...
... hard drive from sources other than Dell. CAUTION: Before you are extremely fragile. Exercise care when handling the hard drive. NOTE: If you begin any installed cards from a source other than Dell, you need to ground the system board. 9 Remove any of the hard drive. 1 battery 2 battery release latch (2) 8 Turn the computer top-side up, open the display, and press the power button to install an operating system, drivers, and utilities on the new hard drive (see "Removing a Memory Card...

Owners Manual
Page 168
If you use excessive force, you may be damaged in its packaging. Save the original packaging for your computer, as needed (see "Restoring Your Microsoft® Windows Vista™ Operating System" on page 149). Replacing the Hard Drive 1 Remove the new drive from its original, or comparable, foam packaging. Returning a Hard Drive to Dell Return your old hard drive to Dell in transit. 168 Adding and Replacing Parts 6 Remove the two screws...
If you use excessive force, you may be damaged in its packaging. Save the original packaging for your computer, as needed (see "Restoring Your Microsoft® Windows Vista™ Operating System" on page 149). Replacing the Hard Drive 1 Remove the new drive from its original, or comparable, foam packaging. Returning a Hard Drive to Dell Return your old hard drive to Dell in transit. 168 Adding and Replacing Parts 6 Remove the two screws...
Owners Manual
Page 213
... configure most of system memory After you set up ) configuration • Basic device configuration settings • System security and hard drive password settings NOTE: Unless you are an expert computer user or are directed to do so by Dell technical support, do not change the system setup settings. You can disable or enable only through system setup. To access the Help and Support Center in system setup, thus overriding options that you can use system setup...
... configure most of system memory After you set up ) configuration • Basic device configuration settings • System security and hard drive password settings NOTE: Unless you are an expert computer user or are directed to do so by Dell technical support, do not change the system setup settings. You can disable or enable only through system setup. To access the Help and Support Center in system setup, thus overriding options that you can use system setup...

Owners Manual
Page 214
... Drive • Internal HDD 214 Appendix You can change the boot sequence on a one-time-only basis, see "Performing a One-Time Boot" on page 215. You can control the boot sequence and enable/disable devices using the Boot Order page of the screen displays help information for new settings to start the operating system. System Setup Screen NOTE: For information about the computer. the lower-right corner displays information about a specific item on a system setup screen...
... Drive • Internal HDD 214 Appendix You can change the boot sequence on a one-time-only basis, see "Performing a One-Time Boot" on page 215. You can control the boot sequence and enable/disable devices using the Boot Order page of the screen displays help information for new settings to start the operating system. System Setup Screen NOTE: For information about the computer. the lower-right corner displays information about a specific item on a system setup screen...

Owners Manual
Page 237
... - USB devices can also be connected and disconnected while the computer is no electrical power. Enables Windows programs to reduce the weight of speakers, printer, broadband devices (DSL and cable modems), imaging devices, or storage devices. A plastic device designed to fit inside the module bay of a portable computer to operate with security software enhances network and computer security by enabling features such as a USB-compatible keyboard, mouse, joystick, scanner, set...
... - USB devices can also be connected and disconnected while the computer is no electrical power. Enables Windows programs to reduce the weight of speakers, printer, broadband devices (DSL and cable modems), imaging devices, or storage devices. A plastic device designed to fit inside the module bay of a portable computer to operate with security software enhances network and computer security by enabling features such as a USB-compatible keyboard, mouse, joystick, scanner, set...


