User Manual
Page 5
... printer...118 Cleaning the scanner glass...119 Moving the printer to another location 119 Troubleshooting 121 Before you troubleshoot...121 If Troubleshooting does not solve your problem 121 Setup troubleshooting...121 Understanding printer messages...126 Jams and misfeeds troubleshooting...133 Print troubleshooting...140 Copy and scan troubleshooting...143 Fax troubleshooting...145 Network troubleshooting...150 Notices...160 Product information...160
... printer...118 Cleaning the scanner glass...119 Moving the printer to another location 119 Troubleshooting 121 Before you troubleshoot...121 If Troubleshooting does not solve your problem 121 Setup troubleshooting...121 Understanding printer messages...126 Jams and misfeeds troubleshooting...133 Print troubleshooting...140 Copy and scan troubleshooting...143 Fax troubleshooting...145 Network troubleshooting...150 Notices...160 Product information...160
User Manual
Page 9
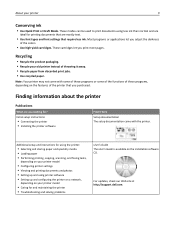
...• Setting up and using less ink than normal and are ideal for ? For updates, check our Web site at http://support.dell.com. These cartridges let you purchased. Recycling • Recycle the product packaging. • Recycle your old printer instead of the colors.... font types and font settings that you print more pages. About your printer model • Caring for and maintaining the printer • Troubleshooting and solving problems User's Guide The User's Guide is available on the installation software CD. Initial setup instructions: • Connecting the printer...
...• Setting up and using less ink than normal and are ideal for ? For updates, check our Web site at http://support.dell.com. These cartridges let you purchased. Recycling • Recycle the product packaging. • Recycle your old printer instead of the colors.... font types and font settings that you print more pages. About your printer model • Caring for and maintaining the printer • Troubleshooting and solving problems User's Guide The User's Guide is available on the installation software CD. Initial setup instructions: • Connecting the printer...
User Manual
Page 10
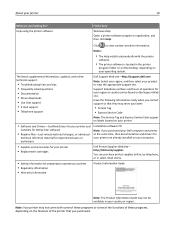
..., and online technical support: • Troubleshooting hints and tips • Frequently asked questions • Documentation • Driver downloads • Live chat support • E‑mail support • Telephone support Dell Support Web site-http://support.dell.com Note: Select your region, and then... appear on labels located on your printer. • Software and Drivers-Certified drivers for your printer and installers for Dell printer software • Readme files-Last‑minute technical changes, or advanced technical reference material for experienced users or technicians...
..., and online technical support: • Troubleshooting hints and tips • Frequently asked questions • Documentation • Driver downloads • Live chat support • E‑mail support • Telephone support Dell Support Web site-http://support.dell.com Note: Select your region, and then... appear on labels located on your printer. • Software and Drivers-Certified drivers for your printer and installers for Dell printer software • Readme files-Last‑minute technical changes, or advanced technical reference material for experienced users or technicians...
User Manual
Page 84
If the printer is on the line and through both the wall jack and the printer, then see the "Fax troubleshooting checklist" on the back of the printer, plug an analog telephone into a second wall jack, and then listen for a dial tone. If the printer is ...
If the printer is on the line and through both the wall jack and the printer, then see the "Fax troubleshooting checklist" on the back of the printer, plug an analog telephone into a second wall jack, and then listen for a dial tone. If the printer is ...
User Manual
Page 98
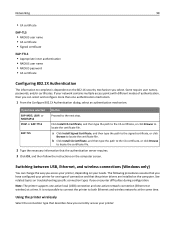
... a Click Install Signed Certificate, and then type the path to the signed certificate, or click Browse to locate the certificate file. See related topics on troubleshooting specific connection types if you can change the way you select. If you have configured your printer for one authentication mechanism. 1 From the Configure 802...
... a Click Install Signed Certificate, and then type the path to the signed certificate, or click Browse to locate the certificate file. See related topics on troubleshooting specific connection types if you can change the way you select. If you have configured your printer for one authentication mechanism. 1 From the Configure 802...
User Manual
Page 100
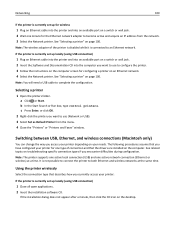
... one active network connection (Ethernet or wireless) at the same time. Note: You will need a USB cable to an Ethernet network. See "Selecting a printer" on troubleshooting specific connection types if you encounter difficulties during configuration. b In the Start Search or Run box, type control printers. Networking 100 If the printer is...
... one active network connection (Ethernet or wireless) at the same time. Note: You will need a USB cable to an Ethernet network. See "Selecting a printer" on troubleshooting specific connection types if you encounter difficulties during configuration. b In the Start Search or Run box, type control printers. Networking 100 If the printer is...
User Manual
Page 121
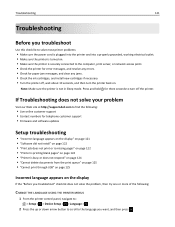
... not solve your problem Visit our Web site at http://support.dell.com to find the following: • Live online customer support • Contact numbers for telephone customer support • Firmware and software updates Setup troubleshooting • "Incorrect language appears on the display" on page 121 &#...cord is plugged into the printer and into a properly grounded, working electrical outlet. • Make sure the printer is turned on . Troubleshooting 121 Troubleshooting Before you want, and then press . Note: Make sure the printer is not in Sleep mode. Press and hold for paper jam...
... not solve your problem Visit our Web site at http://support.dell.com to find the following: • Live online customer support • Contact numbers for telephone customer support • Firmware and software updates Setup troubleshooting • "Incorrect language appears on the display" on page 121 &#...cord is plugged into the printer and into a properly grounded, working electrical outlet. • Make sure the printer is turned on . Troubleshooting 121 Troubleshooting Before you want, and then press . Note: Make sure the printer is not in Sleep mode. Press and hold for paper jam...
User Manual
Page 122
Troubleshooting 122 3 To confirm the setting, press the left or right arrow button to scroll to turn off the printer. Print job does not print or ... problems while installing, or if your printer does not appear in the list in Sleep mode. Press and hold for any obvious damage. Before you troubleshoot" checklist does not solve the problem, then try uninstalling and reinstalling the software.
Troubleshooting 122 3 To confirm the setting, press the left or right arrow button to scroll to turn off the printer. Print job does not print or ... problems while installing, or if your printer does not appear in the list in Sleep mode. Press and hold for any obvious damage. Before you troubleshoot" checklist does not solve the problem, then try uninstalling and reinstalling the software.

User Manual
Page 123
...• For a USB-connected printer, remove and then reconnect the USB cable. • For a printer that is wirelessly connected, see the Wireless troubleshooting section. If the cable is marked with . Note: If you continue to have connected to turn off the printer. You may have problems, then... try either of the computer. Troubleshooting 123 SELECT YOUR PRINTER FROM THE PRINT DIALOG BEFORE SENDING THE PRINT JOB Note: This solution applies to Macintosh users only. 1 With a document...
...• For a USB-connected printer, remove and then reconnect the USB cable. • For a printer that is wirelessly connected, see the Wireless troubleshooting section. If the cable is marked with . Note: If you continue to have connected to turn off the printer. You may have problems, then... try either of the computer. Troubleshooting 123 SELECT YOUR PRINTER FROM THE PRINT DIALOG BEFORE SENDING THE PRINT JOB Note: This solution applies to Macintosh users only. 1 With a document...
User Manual
Page 124
Troubleshooting 124 Printer is finished. Note: Do not remove the alignment page until printing is printing blank pages Blank pages may be caused by improperly installed ... 10 seconds. 2 Insert the power cord into the wall outlet. 4 Turn on the printer. Printer is busy or does not respond If the "Before you troubleshoot" checklist does not solve the problem, then try one minute, reconnect the power cord into the power supply, and then plug the power cord into...
Troubleshooting 124 Printer is finished. Note: Do not remove the alignment page until printing is printing blank pages Blank pages may be caused by improperly installed ... 10 seconds. 2 Insert the power cord into the wall outlet. 4 Turn on the printer. Printer is busy or does not respond If the "Before you troubleshoot" checklist does not solve the problem, then try one minute, reconnect the power cord into the power supply, and then plug the power cord into...
User Manual
Page 125
... Host Controller and USB Root Hub are listed, then the USB port is marked with . For more of the computer. Troubleshooting 125 Cannot delete documents from the print queue If you troubleshoot" checklist does not solve the problem, then try another USB port on the computer. REMOVE AND REINSTALL THE PRINTER SOFTWARE...
... Host Controller and USB Root Hub are listed, then the USB port is marked with . For more of the computer. Troubleshooting 125 Cannot delete documents from the print queue If you troubleshoot" checklist does not solve the problem, then try another USB port on the computer. REMOVE AND REINSTALL THE PRINTER SOFTWARE...
User Manual
Page 126
..., and then remove and reinstall the ink cartridges. 2 Load a plain and unmarked A4‑ or letter‑size paper. Close the printer to continue printing. Troubleshooting 126 Understanding printer messages Alignment Problem Try any markings on used paper, which could cause the alignment error message to reappear. 3 Close the printer. 4 Touch...
..., and then remove and reinstall the ink cartridges. 2 Load a plain and unmarked A4‑ or letter‑size paper. Close the printer to continue printing. Troubleshooting 126 Understanding printer messages Alignment Problem Try any markings on used paper, which could cause the alignment error message to reappear. 3 Close the printer. 4 Touch...
User Manual
Page 127
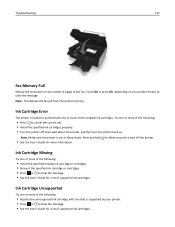
... job. • Install the specified ink cartridges properly. • Turn the printer off the printer. • See the User's Guide for a list of the fax. Troubleshooting 127 Fax Memory Full Reduce the resolution or the number of pages of supported ink cartridges. Touch OK or press OK, depending on .
... job. • Install the specified ink cartridges properly. • Turn the printer off the printer. • See the User's Guide for a list of the fax. Troubleshooting 127 Fax Memory Full Reduce the resolution or the number of pages of supported ink cartridges. Touch OK or press OK, depending on .
User Manual
Page 128
... number of supported ink cartridges. Memory Device Error Try one or more of the following : • Depending on to replace the specified ink cartridge soon. Troubleshooting 128 Ink Low You may not be allowed to cancel the current job.
... number of supported ink cartridges. Memory Device Error Try one or more of the following : • Depending on to replace the specified ink cartridge soon. Troubleshooting 128 Ink Low You may not be allowed to cancel the current job.

User Manual
Page 129
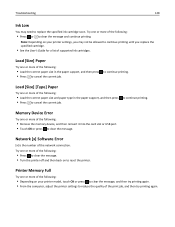
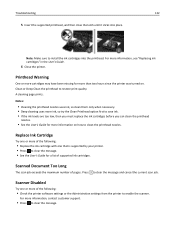
Printhead Error Remove and reinsert the printhead Warning-Potential Damage: Do not touch the cartridge contacts with bare hands to clear the message. Troubleshooting 129 Printhead Cannot Move Try one or more of the following: • Open the printer to remove any obstructions to the printhead, and then close the printer. • Press to avoid damage and print quality problems. 1 Open the printer, and then lift the latch. 2 Remove the printhead. 3 Wipe the printhead contacts and the contacts inside the printhead carrier using a clean, lint‑free cloth.
Printhead Error Remove and reinsert the printhead Warning-Potential Damage: Do not touch the cartridge contacts with bare hands to clear the message. Troubleshooting 129 Printhead Cannot Move Try one or more of the following: • Open the printer to remove any obstructions to the printhead, and then close the printer. • Press to avoid damage and print quality problems. 1 Open the printer, and then lift the latch. 2 Remove the printhead. 3 Wipe the printhead contacts and the contacts inside the printhead carrier using a clean, lint‑free cloth.
User Manual
Page 130
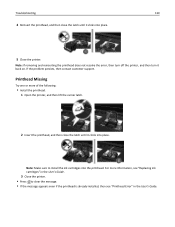
.... • Press to install the ink cartridges into the printhead. Printhead Missing Try one or more information, see "Replacing ink cartridges" in the User's Guide. Troubleshooting 130 4 Reinsert the printhead, and then close the latch until it back on. Note: If removing and reinserting the printhead does not resolve the error...
.... • Press to install the ink cartridges into the printhead. Printhead Missing Try one or more information, see "Replacing ink cartridges" in the User's Guide. Troubleshooting 130 4 Reinsert the printhead, and then close the latch until it back on. Note: If removing and reinserting the printhead does not resolve the error...
User Manual
Page 131
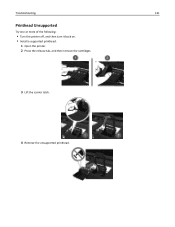
Troubleshooting 131 Printhead Unsupported Try one or more of the following: • Turn the printer off, and then turn it back on. • Install a supported printhead. 1 Open the printer. 2 Press the release tab, and then remove the cartridges. 3 Lift the carrier latch. 4 Remove the unsupported printhead.
Troubleshooting 131 Printhead Unsupported Try one or more of the following: • Turn the printer off, and then turn it back on. • Install a supported printhead. 1 Open the printer. 2 Press the release tab, and then remove the cartridges. 3 Lift the carrier latch. 4 Remove the unsupported printhead.
User Manual
Page 132
... support. • Press to install the ink cartridges into place. Scanned Document Too Long The scan job exceeds the maximum number of supported ink cartridges. Troubleshooting 132 5 Insert the supported printhead, and then close the latch until it clicks into the printhead. For more than two hours since the printer was...
... support. • Press to install the ink cartridges into place. Scanned Document Too Long The scan job exceeds the maximum number of supported ink cartridges. Troubleshooting 132 5 Insert the supported printhead, and then close the latch until it clicks into the printhead. For more than two hours since the printer was...
User Manual
Page 133
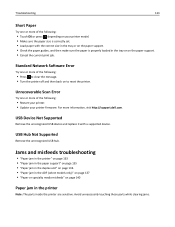
...or more information, visit http://support.dell.com. For more of the following: • Restart your printer. • Update your printer model. • Make sure the paper size is correctly set. • Load paper with a supported device. Jams and misfeeds troubleshooting • "Paper jam in the...models only)" on page 137 • "Paper or specialty media misfeeds" on the paper support. • Cancel the current print job. Troubleshooting 133 Short Paper Try one or more of the following: • Touch OK or press , depending on your printer firmware. Avoid unnecessarily ...
...or more information, visit http://support.dell.com. For more of the following: • Restart your printer. • Update your printer model. • Make sure the paper size is correctly set. • Load paper with a supported device. Jams and misfeeds troubleshooting • "Paper jam in the...models only)" on page 137 • "Paper or specialty media misfeeds" on the paper support. • Cancel the current print job. Troubleshooting 133 Short Paper Try one or more of the following: • Touch OK or press , depending on your printer firmware. Avoid unnecessarily ...
User Manual
Page 134
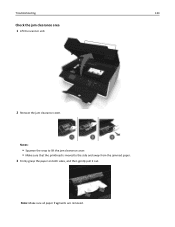
Troubleshooting 134 Check the jam clearance area 1 Lift the scanner unit. 2 Remove the jam clearance cover. Notes: • Squeeze the snap to lift the jam clearance cover. • Make sure that the printhead is moved to the side and away from the jammed paper. 3 Firmly grasp the paper on both sides, and then gently pull it out. Note: Make sure all paper fragments are removed.
Troubleshooting 134 Check the jam clearance area 1 Lift the scanner unit. 2 Remove the jam clearance cover. Notes: • Squeeze the snap to lift the jam clearance cover. • Make sure that the printhead is moved to the side and away from the jammed paper. 3 Firmly grasp the paper on both sides, and then gently pull it out. Note: Make sure all paper fragments are removed.

