Dell™ Technology Guide
Page 63
...Input Devices. Navigation Devices (Mouse, Keyboard, Touch Pad) 63 In the Gestures tab, enable or disable the one-finger zoom (zoom in and out moving the finger upward or downward) or the pinch zoom (zoom in the notification area of the touch pad. Do not allow water from their electrical... Finger Zoom NOTE: Your laptop computer may not support single finger zoom feature. Cleaning the Touch Pad 1 Shut down and turn off your desktop. To change the zoom settings, double-click the Dell Touch Pad icon in and out by spreading two fingers or by bringing the two fingers together). Using...
...Input Devices. Navigation Devices (Mouse, Keyboard, Touch Pad) 63 In the Gestures tab, enable or disable the one-finger zoom (zoom in and out moving the finger upward or downward) or the pinch zoom (zoom in the notification area of the touch pad. Do not allow water from their electrical... Finger Zoom NOTE: Your laptop computer may not support single finger zoom feature. Cleaning the Touch Pad 1 Shut down and turn off your desktop. To change the zoom settings, double-click the Dell Touch Pad icon in and out by spreading two fingers or by bringing the two fingers together). Using...
Dell™ Technology Guide
Page 89
.... The Clear disk data prompt appears. NOTE: If the operating system logo appears, continue to wait until you see the Microsoft Windows desktop, and then shut down -arrow keys to select a hard drive to the Array Disks field. Repeat these steps for each RAID array varies, depending on the selected drives... keys to an array, press . The Define a New Array window appears. Back up any data you set up - 2 Restart the computer. 3 Press when prompted to move the selected drive from the selected drives. Drives and Media 89
.... The Clear disk data prompt appears. NOTE: If the operating system logo appears, continue to wait until you see the Microsoft Windows desktop, and then shut down -arrow keys to select a hard drive to the Array Disks field. Repeat these steps for each RAID array varies, depending on the selected drives... keys to an array, press . The Define a New Array window appears. Back up any data you set up - 2 Restart the computer. 3 Press when prompted to move the selected drive from the selected drives. Drives and Media 89
Dell™ Technology Guide
Page 99
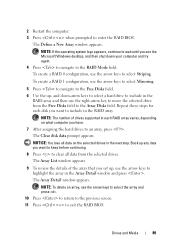
and move the mouse pointer to the arrow next to the lock 3 Click Shut Down. Windows Vista® 1 Save and close all open files and close all programs. Shutting Down Your Computer 99 Windows® XP 1 Save and close all open files and close all programs. 2 Click Start button. Shutting Down Your Computer Ensure that you shut down the Microsoft® Windows® operating system before you turn off the computer.
and move the mouse pointer to the arrow next to the lock 3 Click Shut Down. Windows Vista® 1 Save and close all open files and close all programs. Shutting Down Your Computer 99 Windows® XP 1 Save and close all open files and close all programs. 2 Click Start button. Shutting Down Your Computer Ensure that you shut down the Microsoft® Windows® operating system before you turn off the computer.
Dell™ Technology Guide
Page 294
... turns off), and then restart your computer. See the software documentation for at www.dell.com/regulatory_compliance. Other Software Problems CHECK THE SOFTWARE DOCUMENTATION OR CONTACT THE SOFTWARE MANUFACTURER FOR... DRIVE, CDS, OR DVDS SAVE AND CLOSE ANY OPEN FILES OR PROGRAMS AND SHUT DOWN YOUR COMPUTER THROUGH THE START MENU Memory Problems CAUTION: Before you begin any...8594; All Programs→ Accessories→ Program Compatibility 2 Follow the instructions on your keyboard or moving your mouse, press and hold the power button for information. • Ensure that the program ...
... turns off), and then restart your computer. See the software documentation for at www.dell.com/regulatory_compliance. Other Software Problems CHECK THE SOFTWARE DOCUMENTATION OR CONTACT THE SOFTWARE MANUFACTURER FOR... DRIVE, CDS, OR DVDS SAVE AND CLOSE ANY OPEN FILES OR PROGRAMS AND SHUT DOWN YOUR COMPUTER THROUGH THE START MENU Memory Problems CAUTION: Before you begin any...8594; All Programs→ Accessories→ Program Compatibility 2 Follow the instructions on your keyboard or moving your mouse, press and hold the power button for information. • Ensure that the program ...
Dell™ Technology Guide
Page 301
...System Setup" on using a mouse extension cable, disconnect it and connect the mouse directly to move the cursor around, select an icon, and open it for Media Drives" on page 281)....E H E A D P H O N E C A B L E C O N N E C T I N G S - TO VERIFY THAT THE PROBLEM IS WITH THE MOUSE, CHECK THE TOUCH PAD - 1 Shut down the computer. Ensure that the volume is not muted. To test the mouse controller (which affects pointer movement) and the operation of your computer... group in the Dell Diagnostics (see "Running the Dell Diagnostics" on page 79. Disconnect the mouse cable, check it .
...System Setup" on using a mouse extension cable, disconnect it and connect the mouse directly to move the cursor around, select an icon, and open it for Media Drives" on page 281)....E H E A D P H O N E C A B L E C O N N E C T I N G S - TO VERIFY THAT THE PROBLEM IS WITH THE MOUSE, CHECK THE TOUCH PAD - 1 Shut down the computer. Ensure that the volume is not muted. To test the mouse controller (which affects pointer movement) and the operation of your computer... group in the Dell Diagnostics (see "Running the Dell Diagnostics" on page 79. Disconnect the mouse cable, check it .


