
Dell™ Technology Guide
Page 83
For information about these levels, see support.dell.com. For Windows® XP: Click Start → My Computer. 2 Right-click Local Disk (C:). 3 Click Properties→ Tools→ Check Now. otherwise, contact your data. ... RAID A redundant array of all data. Perform regular backups to protect your administrator to continue the desired action. 4 Click to check Scan for and attempt recovery of data integrity. • RAID level 0+1 is recommended for higher performance and data integrity • RAID level 5 is a disk storage configuration that increases performance or...
For information about these levels, see support.dell.com. For Windows® XP: Click Start → My Computer. 2 Right-click Local Disk (C:). 3 Click Properties→ Tools→ Check Now. otherwise, contact your data. ... RAID A redundant array of all data. Perform regular backups to protect your administrator to continue the desired action. 4 Click to check Scan for and attempt recovery of data integrity. • RAID level 0+1 is recommended for higher performance and data integrity • RAID level 5 is a disk storage configuration that increases performance or...
Dell™ Technology Guide
Page 268
... e-mail messages, digital photos, music files, and so on as a local user. The System Recovery Options window appears. 3 Select a keyboard layout and click Next. 4 To access the recovery options, log on . NOTE: Depending upon your configuration, you want to continue reformatting the hard ...drive and restoring the system software to reboot the system. 268 Restoring Your Operating System The Confirm Data Deletion screen appears. When the Dell logo appears,...
... e-mail messages, digital photos, music files, and so on as a local user. The System Recovery Options window appears. 3 Select a keyboard layout and click Next. 4 To access the recovery options, log on . NOTE: Depending upon your configuration, you want to continue reformatting the hard ...drive and restoring the system software to reboot the system. 268 Restoring Your Operating System The Confirm Data Deletion screen appears. When the Dell logo appears,...

Dell™ Technology Guide
Page 286
... problems or order status. • Alerts - Click to view alerts from the Start menu. Click to access online backup and recovery service offered by Dell for your computing environment. The icon in the taskbar functions differently when you click, doubleclick, or right-click the icon. Click ...to access multiple options for your computer. • Dell Datasafe™ Online Backup - Double-Clicking the Dell Support Center Icon Double-click the icon to open the home page to identify and fix problems with your computer. ...
... problems or order status. • Alerts - Click to view alerts from the Start menu. Click to access online backup and recovery service offered by Dell for your computing environment. The icon in the taskbar functions differently when you click, doubleclick, or right-click the icon. Click ...to access multiple options for your computer. • Dell Datasafe™ Online Backup - Double-Clicking the Dell Support Center Icon Double-click the icon to open the home page to identify and fix problems with your computer. ...
Dell™ Technology Guide
Page 289
...action. 4 Follow the instructions on the computer, click Continue; For additional safety best practices information, see the Regulatory Compliance Homepage at www.dell.com/regulatory_compliance. Windows XP 1 Click Start and click My Computer. 2 Right-click Local Disk C:. 3 Click Properties→ Tools→...modem and connect it ). • Ensure that the telephone line is connected to a telephone, then listen for and attempt recovery of the procedures in this section, follow the safety instructions shipped with your computer has a modem, connect the modem to ...
...action. 4 Follow the instructions on the computer, click Continue; For additional safety best practices information, see the Regulatory Compliance Homepage at www.dell.com/regulatory_compliance. Windows XP 1 Click Start and click My Computer. 2 Right-click Local Disk C:. 3 Click Properties→ Tools→...modem and connect it ). • Ensure that the telephone line is connected to a telephone, then listen for and attempt recovery of the procedures in this section, follow the safety instructions shipped with your computer has a modem, connect the modem to ...

Setup Guide
Page 40
.... The home page provides links to access: • Self Help (Troubleshooting, Security, System Performance, Network/Internet, Backup/ Recovery, and Windows Vista) • Alerts (technical support alerts relevant to run the application. Using Support Tools Dell Support Center The Dell Support Center helps you find the service, support, and system-specific information you need.
.... The home page provides links to access: • Self Help (Troubleshooting, Security, System Performance, Network/Internet, Backup/ Recovery, and Windows Vista) • Alerts (technical support alerts relevant to run the application. Using Support Tools Dell Support Center The Dell Support Center helps you find the service, support, and system-specific information you need.

Setup Guide
Page 48
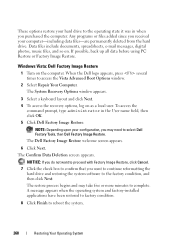
If possible, back up all data before using Dell Factory Image Restore. Dell Factory Image Restore 1. The System Recovery Options window appears. 4. To access the recovery options, log on certain computers. Restoring Your Operating System NOTE: Dell Factory Image Restore may need to restore your hard drive ...the operating state it was in when you received your computer and try again. 2. Select a keyboard layout and click Next. 5. Use Dell Factory Image Restore only as a local user. NOTE: Depending upon your configuration, you see the Microsoft® Windows® desktop; NOTE...
If possible, back up all data before using Dell Factory Image Restore. Dell Factory Image Restore 1. The System Recovery Options window appears. 4. To access the recovery options, log on certain computers. Restoring Your Operating System NOTE: Dell Factory Image Restore may need to restore your hard drive ...the operating state it was in when you received your computer and try again. 2. Select a keyboard layout and click Next. 5. Use Dell Factory Image Restore only as a local user. NOTE: Depending upon your configuration, you see the Microsoft® Windows® desktop; NOTE...


