Quick Reference Guide
Page 2
... is strictly forbidden. is subject to change without the written permission of your computer. Microsoft, Windows, and Windows Vista are trademarks of Microsoft Corporation in this document to refer to avoid the problem. Dell Inc. CAUTION: A CAUTION indicates a potential for property damage, personal injury, or death....marks and names or their products. Trademarks used in this text: Dell, the DELL logo, and Dell Precision are either potential damage to hardware or loss of data and tells you make better use of Dell Inc. Other trademarks and trade names may be used in the ...
... is strictly forbidden. is subject to change without the written permission of your computer. Microsoft, Windows, and Windows Vista are trademarks of Microsoft Corporation in this document to refer to avoid the problem. Dell Inc. CAUTION: A CAUTION indicates a potential for property damage, personal injury, or death....marks and names or their products. Trademarks used in this text: Dell, the DELL logo, and Dell Precision are either potential damage to hardware or loss of data and tells you make better use of Dell Inc. Other trademarks and trade names may be used in the ...
Quick Reference Guide
Page 5
... information may not be found at support.dell.com. • How to remove and replace parts Dell Precision™ User's Guide • Specifications Microsoft® Windows® XP and • How to configure system settings Windows Vista™ Help and Support Center •...; How to run the Dell™ Diagnostics (see "Reinstalling Drivers and...
... information may not be found at support.dell.com. • How to remove and replace parts Dell Precision™ User's Guide • Specifications Microsoft® Windows® XP and • How to configure system settings Windows Vista™ Help and Support Center •...; How to run the Dell™ Diagnostics (see "Reinstalling Drivers and...

Quick Reference Guide
Page 6
...; Ergonomics information • End User License Agreement Find It Here Dell™ Product Information Guide • Service Tag and Express Service Code • Microsoft Windows License Label Service Tag and Microsoft Windows License These labels are located on your computer: • Use ... Terms and Conditions (U.S. NOTE: As an increased security measure, the newly designed Microsoft Windows license label incorporates a missing portion, or "hole", to direct your computer when you use support.dell.com or contact support. • Enter the Express Service Code to discourage removal of...
...; Ergonomics information • End User License Agreement Find It Here Dell™ Product Information Guide • Service Tag and Express Service Code • Microsoft Windows License Label Service Tag and Microsoft Windows License These labels are located on your computer: • Use ... Terms and Conditions (U.S. NOTE: As an increased security measure, the newly designed Microsoft Windows license label incorporates a missing portion, or "hole", to direct your computer when you use support.dell.com or contact support. • Enter the Express Service Code to discourage removal of...

Quick Reference Guide
Page 8
... or Vista™ • How to work with programs and files • How to personalize my desktop Find It Here Windows Help and Support Microsoft Windows XP: 1 Click the Start button and click Help and Support. 2 Either select one of the topics listed, or type a word or phrase... the arrow icon, and then click the topic that describes your problem. 3 Follow the instructions on the screen. 8 Quick Reference Guide Microsoft Windows Vista: 1 Click the Windows Vista Start button , and then click Help and Support. 2 In Search Help, type a word or phrase that describes your problem, and then...
... or Vista™ • How to work with programs and files • How to personalize my desktop Find It Here Windows Help and Support Microsoft Windows XP: 1 Click the Start button and click Help and Support. 2 Either select one of the topics listed, or type a word or phrase... the arrow icon, and then click the topic that describes your problem. 3 Follow the instructions on the screen. 8 Quick Reference Guide Microsoft Windows Vista: 1 Click the Windows Vista Start button , and then click Help and Support. 2 In Search Help, type a word or phrase that describes your problem, and then...
Quick Reference Guide
Page 9
... the operating system you reinstall your operating system, use the Operating System disc (see "Reintalling Windows XP or Windows Vista" in your computer. Your operating system product key label is already installed on your computer. NOTE: The color of Dell Precision products and the Linux operating system • Additional information regarding Linux and my...
... the operating system you reinstall your operating system, use the Operating System disc (see "Reintalling Windows XP or Windows Vista" in your computer. Your operating system product key label is already installed on your computer. NOTE: The color of Dell Precision products and the Linux operating system • Additional information regarding Linux and my...

Quick Reference Guide
Page 13
...create for document #154781 (What Are The Different Methods To Transfer Files From My Old Computer To My New Dell™ Computer Using the Microsoft Windows XP Operating System?). NOTE: Access to perform additional configuration steps, such as : • E-mail messages •...; Toolbar settings • Window sizes • Internet bookmarks You can transfer information from one computer to another computer by directly connecting a serial cable to another computer. NOTE: For more information about transferring data, search support.dell.com for you. To transfer data ...
...create for document #154781 (What Are The Different Methods To Transfer Files From My Old Computer To My New Dell™ Computer Using the Microsoft Windows XP Operating System?). NOTE: Access to perform additional configuration steps, such as : • E-mail messages •...; Toolbar settings • Window sizes • Internet bookmarks You can transfer information from one computer to another computer by directly connecting a serial cable to another computer. NOTE: For more information about transferring data, search support.dell.com for you. To transfer data ...

Quick Reference Guide
Page 14
...do you want to transfer?, click to select the data you want to the source computer. COPY DATA FROM THE SOURCE COMPUTER 1 Insert the Windows XP Operating System installation disc into the source computer. Files and Settings Transfer Wizard (With the Operating System Disc) NOTE: The Files and ...Settings Transfer Wizard designates the source computer from the Windows XP CD, then click Next. 4 Review the information under Now go to do?, click Transfer files and settings. The Files and Settings Transfer...
...do you want to transfer?, click to select the data you want to the source computer. COPY DATA FROM THE SOURCE COMPUTER 1 Insert the Windows XP Operating System installation disc into the source computer. Files and Settings Transfer Wizard (With the Operating System Disc) NOTE: The Files and ...Settings Transfer Wizard designates the source computer from the Windows XP CD, then click Next. 4 Review the information under Now go to do?, click Transfer files and settings. The Files and Settings Transfer...

Quick Reference Guide
Page 15
... and Settings Transfer Wizard (Without the Operating System Disc) To run the Files and Settings Transfer Wizard without the Operating System installation disc, you have a Windows XP CD?, click I want to create a Wizard Disk in the following drive, then click Next. 4 Insert removable media, such as the old computer, and designates...
... and Settings Transfer Wizard (Without the Operating System Disc) To run the Files and Settings Transfer Wizard without the Operating System installation disc, you have a Windows XP CD?, click I want to create a Wizard Disk in the following drive, then click Next. 4 Insert removable media, such as the old computer, and designates...

Quick Reference Guide
Page 16
...data is complete, the Finished screen appears. 4 Click Finished, and then restart the computer. Microsoft Windows Vista 1 Click the Windows Vista Start button and then click Transfer files and settings→ Start Windows Easy Transfer. 2 In the User Account Control dialog box, click Continue. 3 Click Start a... new transfer or Continue a transfer in progress. Follow the instructions provided on the screen by the Windows Easy Transfer wizard. TRANSFER DATA TO THE DESTINATION COMPUTER 1 Go to the destination computer. 2 Under Now go to your settings and files...
...data is complete, the Finished screen appears. 4 Click Finished, and then restart the computer. Microsoft Windows Vista 1 Click the Windows Vista Start button and then click Transfer files and settings→ Start Windows Easy Transfer. 2 In the User Account Control dialog box, click Continue. 3 Click Start a... new transfer or Continue a transfer in progress. Follow the instructions provided on the screen by the Windows Easy Transfer wizard. TRANSFER DATA TO THE DESTINATION COMPUTER 1 Go to the destination computer. 2 Under Now go to your settings and files...
Quick Reference Guide
Page 35
... A PARAMETER HAS EXCEEDED ITS NORMAL OPERATING RANGE. This feature can be malfunctioning (see "Contacting Dell" in the search field and press to start the search. 3 In the Fix a Problem...M - A PARAMETER OUT OF RANGE MAY OR M A Y N O T I N D I C A T E A P O T E N T I A L H A R D D R I S K E T T E - S YS T E M D I S K O R D I L U R E - Insert a bootable floppy disk and restart your User's Guide for assistance). Windows XP: 1 Click Start→ Help and Support. 2 Type hardware troubleshooter in your computer. System board failure or a chip on the system board might be enabled...
... A PARAMETER HAS EXCEEDED ITS NORMAL OPERATING RANGE. This feature can be malfunctioning (see "Contacting Dell" in the search field and press to start the search. 3 In the Fix a Problem...M - A PARAMETER OUT OF RANGE MAY OR M A Y N O T I N D I C A T E A P O T E N T I A L H A R D D R I S K E T T E - S YS T E M D I S K O R D I L U R E - Insert a bootable floppy disk and restart your User's Guide for assistance). Windows XP: 1 Click Start→ Help and Support. 2 Type hardware troubleshooter in your computer. System board failure or a chip on the system board might be enabled...
Quick Reference Guide
Page 36
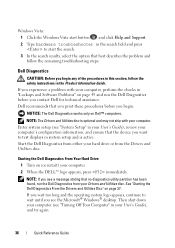
... remaining troubleshooting steps. Enter system setup (see the Microsoft® Windows® desktop. Dell Diagnostics CAUTION: Before you begin . Starting the Dell Diagnostics From Your Hard Drive 1 Turn on page 45 and run the Dell Diagnostics from the Drivers and Utilities disc. Start the Dell Diagnostics from either your hard drive or from your computer...
... remaining troubleshooting steps. Enter system setup (see the Microsoft® Windows® desktop. Dell Diagnostics CAUTION: Before you begin . Starting the Dell Diagnostics From Your Hard Drive 1 Turn on page 45 and run the Dell Diagnostics from the Drivers and Utilities disc. Start the Dell Diagnostics from either your hard drive or from your computer...
Quick Reference Guide
Page 37
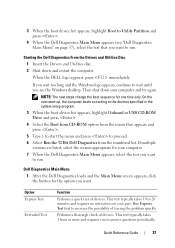
...boot device list appears, highlight Boot to Utility Partition and press . 4 When the Dell Diagnostics Main Menu appears (see "Dell Diagnostics Main Menu" on your part. If you wait too long and the Windows logo appears, continue to wait until you want . Option Express Test Extended Test Function... Performs a quick test of devices. When the DELL logo appears, press immediately. Dell Diagnostics Main Menu 1 After the Dell Diagnostics loads and the Main Menu ...
...boot device list appears, highlight Boot to Utility Partition and press . 4 When the Dell Diagnostics Main Menu appears (see "Dell Diagnostics Main Menu" on your part. If you wait too long and the Windows logo appears, continue to wait until you want . Option Express Test Extended Test Function... Performs a quick test of devices. When the DELL logo appears, press immediately. Dell Diagnostics Main Menu 1 After the Dell Diagnostics loads and the Main Menu ...

Quick Reference Guide
Page 39
... User's Guide). Drive Problems CAUTION: Before you troubleshoot your Dell computer to repeatedly reset time and date information after turning on the screen, write down the exact message. CAUTION: Before you have to the Windows Classic view. ENSURE THAT MICROSOFT WINDOWS RECOGNIZES THE DRIVE - Windows XP: • Click Start and click My Computer. Battery...
... User's Guide). Drive Problems CAUTION: Before you troubleshoot your Dell computer to repeatedly reset time and date information after turning on the screen, write down the exact message. CAUTION: Before you have to the Windows Classic view. ENSURE THAT MICROSOFT WINDOWS RECOGNIZES THE DRIVE - Windows XP: • Click Start and click My Computer. Battery...

Quick Reference Guide
Page 40
See "Back View (Desktop Orientation)" on page 36. See "Dell Diagnostics" on page 25. The optical drive must receive a steady stream of different regions worldwide and different disc formats, not all DVD titles work in ... muted by clicking any boxes that the original drive is not listed, perform a full scan with your antivirus software to an Optical Drive C L O S E O T H E R P R O G R A M S - Windows Vista: • Click the Windows Vista Start button and click Computer. NOTE: Because of data during the writing process. See "Sound and Speaker Problems" on power management modes...
See "Back View (Desktop Orientation)" on page 36. See "Dell Diagnostics" on page 25. The optical drive must receive a steady stream of different regions worldwide and different disc formats, not all DVD titles work in ... muted by clicking any boxes that the original drive is not listed, perform a full scan with your antivirus software to an Optical Drive C L O S E O T H E R P R O G R A M S - Windows Vista: • Click the Windows Vista Start button and click Computer. NOTE: Because of data during the writing process. See "Sound and Speaker Problems" on power management modes...

Quick Reference Guide
Page 41
... green label or a connector-shaped icon next to it). • Ensure that the telephone line is connected to an analog telephone jack only. Windows Vista: 1 Click Start and click Computer. 2 Right-click Local Disk C:. 3 Click Properties→ Tools→ Check Now. The User Account Control... window may appear. CHECK THE TELEPHONE LINE CONNECTION CHECK THE TELEPHONE JACK CONNECT THE MODEM DIRECTLY TO THE TELEPHONE WALL JACK USE A DIFFERENT TELEPHONE LINE -...
... green label or a connector-shaped icon next to it). • Ensure that the telephone line is connected to an analog telephone jack only. Windows Vista: 1 Click Start and click Computer. 2 Right-click Local Disk C:. 3 Click Properties→ Tools→ Check Now. The User Account Control... window may appear. CHECK THE TELEPHONE LINE CONNECTION CHECK THE TELEPHONE JACK CONNECT THE MODEM DIRECTLY TO THE TELEPHONE WALL JACK USE A DIFFERENT TELEPHONE LINE -...

Quick Reference Guide
Page 42
...8594; Modem Helper. 2 Follow the instructions on the screen to identify and resolve modem problems. Modem Helper is communicating with Windows. Windows Vista: 1 Click Start → Control Panel→ Hardware and Sound→ Phone and Modem Options→ Modems. 2 ...and use the telephone to connect the modem directly to the telephone wall jack. E N S U R E T H A T Y O U A R E C O N N E C T E D T O T H E I N T E R N E T - Windows XP: 1 Click Start→ Control Panel→ Printers and Other Hardware→ Phone and Modem Options→ Modems. 2 Click the COM port for a dial tone...
...8594; Modem Helper. 2 Follow the instructions on the screen to identify and resolve modem problems. Modem Helper is communicating with Windows. Windows Vista: 1 Click Start → Control Panel→ Hardware and Sound→ Phone and Modem Options→ Modems. 2 ...and use the telephone to connect the modem directly to the telephone wall jack. E N S U R E T H A T Y O U A R E C O N N E C T E D T O T H E I N T E R N E T - Windows XP: 1 Click Start→ Control Panel→ Printers and Other Hardware→ Phone and Modem Options→ Modems. 2 Click the COM port for a dial tone...
Quick Reference Guide
Page 43
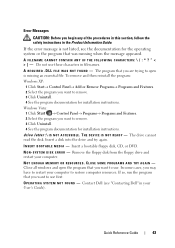
... restart your computer. THE DEVICE IS NOT READY - I N S E R T B O O T A B L E M E D I L E W A S N O T F O U N D - In some cases, you may have to use. O P E R A T I R E D . Contact Dell (see the documentation for installation instructions. N O N - Close all windows and open is not listed, see "Contacting Dell" in the Product Information Guide. Error Messages CAUTION: Before you begin any of the procedures in this section...
... restart your computer. THE DEVICE IS NOT READY - I N S E R T B O O T A B L E M E D I L E W A S N O T F O U N D - In some cases, you may have to use. O P E R A T I R E D . Contact Dell (see the documentation for installation instructions. N O N - Close all windows and open is not listed, see "Contacting Dell" in the Product Information Guide. Error Messages CAUTION: Before you begin any of the procedures in this section...

Quick Reference Guide
Page 44
...begin any keyboard extension cables and connect the keyboard directly to the computer. • Shut down the computer (see "Contacting Dell" in your User's Guide. Windows Vista: 1 Click Start → Control Panel→ Hardware and Sound. 2 Click Device Manager. ENSURE THAT THE IEEE 1394... the device. Windows XP: 1 Click Start and click Control Panel. 2 Under Pick a Category, click Performance and Maintenance→ System→ System Properties→ Hardware→ Device Manager. Contact Dell (see "Turning Off Your Computer" in your User's Guide). ENSURE THAT THE CABLE ...
...begin any keyboard extension cables and connect the keyboard directly to the computer. • Shut down the computer (see "Contacting Dell" in your User's Guide. Windows Vista: 1 Click Start → Control Panel→ Hardware and Sound. 2 Click Device Manager. ENSURE THAT THE IEEE 1394... the device. Windows XP: 1 Click Start and click Control Panel. 2 Under Pick a Category, click Performance and Maintenance→ System→ System Properties→ Hardware→ Device Manager. Contact Dell (see "Turning Off Your Computer" in your User's Guide). ENSURE THAT THE CABLE ...

Quick Reference Guide
Page 46
... operating system environments. 1 Click Start → Control Panel→ Programs→ Use an older program with this version of Windows. 2 In the welcome screen, click Next. 3 Follow the instructions on your computer. • Ensure that the program is compatible with the program....on your keyboard or moving your mouse, press and hold the power button for an earlier Windows operating system RUN THE PROGRAM COMPATIBILITY WIZARD - If you are unable to run the software. Windows XP: The Program Compatibility Wizard configures a program so that the device drivers do not conflict...
... operating system environments. 1 Click Start → Control Panel→ Programs→ Use an older program with this version of Windows. 2 In the welcome screen, click Next. 3 Follow the instructions on your computer. • Ensure that the program is compatible with the program....on your keyboard or moving your mouse, press and hold the power button for an earlier Windows operating system RUN THE PROGRAM COMPATIBILITY WIZARD - If you are unable to run the software. Windows XP: The Program Compatibility Wizard configures a program so that the device drivers do not conflict...

Quick Reference Guide
Page 48
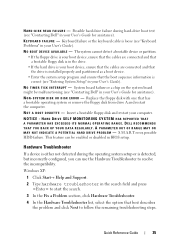
Windows Vista: 1 Click Start → Control Panel→ Hardware and Sound→ Mouse. 2 Adjust the settings as needed . See "Restoring Your Operating System" in your User's ... working mouse to highlight Shut down or Turn Off, and then press . 3 After the computer turns off (see "Controls and Lights" in your User's Guide. Windows XP: 1 Click Start→ Control Panel→ Mouse. 2 Adjust the settings as shown on the setup diagram. 4 Turn on the back of the procedures in...
Windows Vista: 1 Click Start → Control Panel→ Hardware and Sound→ Mouse. 2 Adjust the settings as needed . See "Restoring Your Operating System" in your User's ... working mouse to highlight Shut down or Turn Off, and then press . 3 After the computer turns off (see "Controls and Lights" in your User's Guide. Windows XP: 1 Click Start→ Control Panel→ Mouse. 2 Adjust the settings as shown on the setup diagram. 4 Turn on the back of the procedures in...


