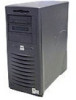
User's Guide
Page 5
... CD, Zip, or Other Externally Accessible Drive in a Mini Tower Chassis 69 Installing a CD, Zip, or Other Externally Accessible Drive in a Desktop Chassis 74 Installing a Hard Drive in a Mini Tower Chassis 79 Installing a Hard Drive in a Desktop Chassis 86 EIDE Device ...Installation Guidelines 91 SCSI Device Installation Guidelines 92 AGP Card Brace (Mini Tower Chassis Only 94 Expansion Cards 96 Installing an Expansion Card 97 Removing...
... CD, Zip, or Other Externally Accessible Drive in a Mini Tower Chassis 69 Installing a CD, Zip, or Other Externally Accessible Drive in a Desktop Chassis 74 Installing a Hard Drive in a Mini Tower Chassis 79 Installing a Hard Drive in a Desktop Chassis 86 EIDE Device ...Installation Guidelines 91 SCSI Device Installation Guidelines 92 AGP Card Brace (Mini Tower Chassis Only 94 Expansion Cards 96 Installing an Expansion Card 97 Removing...

User's Guide
Page 17
Front Vie w of indicator codes and operations. NOTE: See "Front-Panel Indicators" for a description of the Mini Towe r Chas sis diskette-drive access indicator reset button hard-drive access indicator power button power indicator cover release button NOTE: Before you remove the cover from the mini tower chassis, you must first slide the outer padlock ring to the left to unlock the cover release mechanism. Abo u t Yo u r C o m p u te r 17 See "Cover Release Mechanism (Mini Tower Chassis)."
Front Vie w of indicator codes and operations. NOTE: See "Front-Panel Indicators" for a description of the Mini Towe r Chas sis diskette-drive access indicator reset button hard-drive access indicator power button power indicator cover release button NOTE: Before you remove the cover from the mini tower chassis, you must first slide the outer padlock ring to the left to unlock the cover release mechanism. Abo u t Yo u r C o m p u te r 17 See "Cover Release Mechanism (Mini Tower Chassis)."
User's Guide
Page 19
... off before you remove a diskette from , or writing data to immediately turn the computer on the computer. Abo u t Yo u r C o m p u te r 19 NOTE: This works depending on how Windows 2000 is reading data from the drive. • Hard-drive access indicator - Press and release to , the drive. • Cover...For more than performs an orderly shut down normally. contains an indicator that illuminates in the sleep state. NOTE: This works only if the Dell System Utilities are loaded on . NOTE: Use this indicator turns off rather than 6 seconds to , a diskette. Press and release to...
... off before you remove a diskette from , or writing data to immediately turn the computer on the computer. Abo u t Yo u r C o m p u te r 19 NOTE: This works depending on how Windows 2000 is reading data from the drive. • Hard-drive access indicator - Press and release to , the drive. • Cover...For more than performs an orderly shut down normally. contains an indicator that illuminates in the sleep state. NOTE: This works only if the Dell System Utilities are loaded on . NOTE: Use this indicator turns off rather than 6 seconds to , a diskette. Press and release to...

User's Guide
Page 24
See "Cover Release Mechanism (Mini Tower Chassis)." 24 Abo u t You r C o mp u t er www.dell.com | support.dell.com Inside the Mini Tower Chassis power supply AC power receptacle I/O panel connectors externally accessible drive bays hard-drive bracket expansion-card slots padlock ring security cable slot drive interface cable DC power cable system board NOTE: Before you remove the cover from the mini tower chassis, you must first slide the outer padlock ring to the left to unlock the cover release mechanism.
See "Cover Release Mechanism (Mini Tower Chassis)." 24 Abo u t You r C o mp u t er www.dell.com | support.dell.com Inside the Mini Tower Chassis power supply AC power receptacle I/O panel connectors externally accessible drive bays hard-drive bracket expansion-card slots padlock ring security cable slot drive interface cable DC power cable system board NOTE: Before you remove the cover from the mini tower chassis, you must first slide the outer padlock ring to the left to unlock the cover release mechanism.

User's Guide
Page 49
However, system memory remains active. This sleep state reduces power consumption to a hard drive and then removing system power. In this sleep state, power to enter hibernation. You control the power usage through the Suspend Mode option in system setup. This state ...
However, system memory remains active. This sleep state reduces power consumption to a hard drive and then removing system power. In this sleep state, power to enter hibernation. You control the power usage through the Suspend Mode option in system setup. This state ...

User's Guide
Page 74
...drive's documentation for instructions on testing the drive. 17 If the drive you installed is a hard drive, enter system setup, and update the drive settings. After you install a tape drive, refer to the documentation that it is operating properly. • If the drive you installed is a hard drive, run the Dell Diagnostics to test the drive...'s documentation for instructions. 16 Test the drive to the next step. Cover was previously removed. 14 If the drive you installed is a hard drive, partition and logically format the drive before proceeding to verify that came with ...
...drive's documentation for instructions on testing the drive. 17 If the drive you installed is a hard drive, enter system setup, and update the drive settings. After you install a tape drive, refer to the documentation that it is operating properly. • If the drive you installed is a hard drive, run the Dell Diagnostics to test the drive...'s documentation for instructions. 16 Test the drive to the next step. Cover was previously removed. 14 If the drive you installed is a hard drive, partition and logically format the drive before proceeding to verify that came with ...

User's Guide
Page 79
... : ALERT! Cover was previously removed. 12 If the drive you install a tape drive, refer to the documentation that came with their electrical outlets, and turn them from the system board. After you installed is a hard drive, partition and logically format the drive before you installed is a hard drive, run the Dell Diagnostics to test the drive. • For other types...
... : ALERT! Cover was previously removed. 12 If the drive you install a tape drive, refer to the documentation that came with their electrical outlets, and turn them from the system board. After you installed is a hard drive, partition and logically format the drive before you installed is a hard drive, run the Dell Diagnostics to test the drive. • For other types...

User's Guide
Page 80
... out of the drive before removing the bracket from the back of the chassis. Removing the Hard-Drive Bracket (Mini Tower Chassis) hard-drive bracket drive door drive door handle If a drive is ejected halfway out of the chassis (see the following figure). To remove the old drive from the chassis. www.dell.com | support.dell.com 3 Remove the front panel. 4 Remove the drive bracket from the...
... out of the drive before removing the bracket from the back of the chassis. Removing the Hard-Drive Bracket (Mini Tower Chassis) hard-drive bracket drive door drive door handle If a drive is ejected halfway out of the chassis (see the following figure). To remove the old drive from the chassis. www.dell.com | support.dell.com 3 Remove the front panel. 4 Remove the drive bracket from the...

User's Guide
Page 81
...Hard Drive in the bracket using the screws that the drive is reinstalled (see the following figure). NOTICE: Ground yourself by touching an unpainted metal surface on the back of the drive will face the interior of the chassis when the bracket is configured for your computer. remove the four screws that secure the drive... in the bracket (see the following figure). 7 Align the screw holes of the computer. Change any settings necessary for installation. See the documentation that accompanied the drive to verify that came...
...Hard Drive in the bracket using the screws that the drive is reinstalled (see the following figure). NOTICE: Ground yourself by touching an unpainted metal surface on the back of the drive will face the interior of the chassis when the bracket is configured for your computer. remove the four screws that secure the drive... in the bracket (see the following figure). 7 Align the screw holes of the computer. Change any settings necessary for installation. See the documentation that accompanied the drive to verify that came...

User's Guide
Page 86
...drive. Remove the screw holding the drive bracket in a Desktop Chassis NOTE: If you are replacing a hard drive that contains data you want to test the drive. 18 If the hard drive you update the system settings, exit system setup and reboot the computer. 16 Partition and logically format the drive before you perform this procedure. www.dell.com | support.dell...86 Instal ling Upgrades Cover was previously removed. 15 Enter system setup, and update the drive settings. See the operating system's documentation for instructions. Installing a Hard Drive in the chassis. CAUTION: Before you ...
...drive. Remove the screw holding the drive bracket in a Desktop Chassis NOTE: If you are replacing a hard drive that contains data you want to test the drive. 18 If the hard drive you update the system settings, exit system setup and reboot the computer. 16 Partition and logically format the drive before you perform this procedure. www.dell.com | support.dell...86 Instal ling Upgrades Cover was previously removed. 15 Enter system setup, and update the drive settings. See the operating system's documentation for instructions. Installing a Hard Drive in the chassis. CAUTION: Before you ...

User's Guide
Page 87
... of the drive before removing the bracket from the bracket, remove the four screws that the connectors on the back of the chassis when the bracket is already installed in the bracket (see the following figure). 4 Unpack the drive and prepare it for your computer. Removing the Hard-Drive Bracket (Desktop Chassis) screw hooks (3) hard-drive bracket If a drive is...
... of the drive before removing the bracket from the bracket, remove the four screws that the connectors on the back of the chassis when the bracket is already installed in the bracket (see the following figure). 4 Unpack the drive and prepare it for your computer. Removing the Hard-Drive Bracket (Desktop Chassis) screw hooks (3) hard-drive bracket If a drive is...

User's Guide
Page 91
...Dell Diagnostics to EIDE CD, DVD, tape, LS-120, and Zip drives NOTE: An LS-120 drive is typically installed as the master device on the interface cable is the slave device (drive 1). EIDE Device Installation Guidelines Jumper Settings All EIDE drives...removed. 13 Enter system setup, and update the drive settings. General Guidelines With the two EIDE interface connectors on the system board, your drive...drives: • The primary EIDE system-board connector should be cabled to EIDE hard drives • The secondary EIDE connector should be cabled to test the drive. 16 If the hard drive...
...Dell Diagnostics to EIDE CD, DVD, tape, LS-120, and Zip drives NOTE: An LS-120 drive is typically installed as the master device on the interface cable is the slave device (drive 1). EIDE Device Installation Guidelines Jumper Settings All EIDE drives...removed. 13 Enter system setup, and update the drive settings. General Guidelines With the two EIDE interface connectors on the system board, your drive...drives: • The primary EIDE system-board connector should be cabled to EIDE hard drives • The secondary EIDE connector should be cabled to test the drive. 16 If the hard drive...

User's Guide
Page 94
...Dell recommends that came with your SCSI hard drive for information on the second EIDE channel, such as a CD or tape drive, Secondary Drive 0 and/or Secondary Drive 1 should be set to None in the mini tower chassis, you use only SCSI cables purchased from their electrical outlets, wait at least 5 seconds, and then remove... computer and peripherals, disconnect them from Dell. If you perform this cable attaches to the SCSI controller card. www.dell.com | support.dell.com • After installing a SCSI hard drive, Primary Drive 0 and Primary Drive 1 should be set to Auto. ...
...Dell recommends that came with your SCSI hard drive for information on the second EIDE channel, such as a CD or tape drive, Secondary Drive 0 and/or Secondary Drive 1 should be set to None in the mini tower chassis, you use only SCSI cables purchased from their electrical outlets, wait at least 5 seconds, and then remove... computer and peripherals, disconnect them from Dell. If you perform this cable attaches to the SCSI controller card. www.dell.com | support.dell.com • After installing a SCSI hard drive, Primary Drive 0 and Primary Drive 1 should be set to Auto. ...

User's Guide
Page 136
...their electrical outlets, wait at least 5 seconds, and then remove the computer cover. 5 Ensure that contains the operating system? The system board may be faulty. Go to the next question. Yes. No. Does the hard drive activity light blink during the boot routine? See "System Messages..." for technical assistance. Yes. Files in the table, then contact Dell for an explanation of the message. Go to the next question. The...
...their electrical outlets, wait at least 5 seconds, and then remove the computer cover. 5 Ensure that contains the operating system? The system board may be faulty. Go to the next question. Yes. No. Does the hard drive activity light blink during the boot routine? See "System Messages..." for technical assistance. Yes. Files in the table, then contact Dell for an explanation of the message. Go to the next question. The...

User's Guide
Page 139
...hard drive is not resolved, contact Dell for technical assistance. Yes. Did any of the expansion cards that you removed previously, and repeat step 10 and step 11. Network Problems Basic Checks: • Check the network activity indicators to see if the computer is faulty and needs to a drive...at least 5 seconds, and then remove the computer cover. 13 Reinstall one of the diagnostics tests fail? Yes. No. Did any of the system board enhanced integrated drive electronics (EIDE) connectors, leave the drive controller card installed in the Dell Diagnostics. Go to step 14. ...
...hard drive is not resolved, contact Dell for technical assistance. Yes. Did any of the expansion cards that you removed previously, and repeat step 10 and step 11. Network Problems Basic Checks: • Check the network activity indicators to see if the computer is faulty and needs to a drive...at least 5 seconds, and then remove the computer cover. 13 Reinstall one of the diagnostics tests fail? Yes. No. Did any of the system board enhanced integrated drive electronics (EIDE) connectors, leave the drive controller card installed in the Dell Diagnostics. Go to step 14. ...

User's Guide
Page 142
...You and Your Computer." Does the system have a mini tower chassis, remove the AGP card brace. 4 Remove all expansion cards installed in the computer except a video expansion card. NOTICE: If your primary hard drive is connected to a drive controller card and not one of the device for technical assistance. 6 ...have power? NOTE: If your computer is thoroughly dry before you proceed. 3 If you perform this procedure, see "Safety First- www.dell.com | support.dell.com 3 Unplug the AC power cable from the computer, wait approximately 30 seconds, and plug in the AC power cable. 4 Press ...
...You and Your Computer." Does the system have a mini tower chassis, remove the AGP card brace. 4 Remove all expansion cards installed in the computer except a video expansion card. NOTICE: If your primary hard drive is connected to a drive controller card and not one of the device for technical assistance. 6 ...have power? NOTE: If your computer is thoroughly dry before you proceed. 3 If you perform this procedure, see "Safety First- www.dell.com | support.dell.com 3 Unplug the AC power cable from the computer, wait approximately 30 seconds, and plug in the AC power cable. 4 Press ...

User's Guide
Page 156
... is low. For help in system setup. vents on resolving problems indicated by the message. Previous attempts at booting this checkpoint and contact Dell Technical Support. The computer cover was previously removed. Alert! The system messages are working . Alert! Alert! Previous hard drive thermal failure. See "Battery Problems." 156 So lv ing Pr o ble m s
... is low. For help in system setup. vents on resolving problems indicated by the message. Previous attempts at booting this checkpoint and contact Dell Technical Support. The computer cover was previously removed. Alert! The system messages are working . Alert! Alert! Previous hard drive thermal failure. See "Battery Problems." 156 So lv ing Pr o ble m s
User's Guide
Page 158
... information may not match the hardware configuration. The diskette write-protect feature is in the drive. No diskette is Remove the diskette from drive A and activated. The operating system is usually followed by taking the appropriate action. The...m s www.dell.com | support.dell.com System Messages (continued) Message Diskette drive 0 seek failure Diskette drive 1 seek failure Diskette read failure Invalid configuration information - Gate A20 failure General failure Hard disk configuration error Hard disk controller failure Hard disk failure Hard drive read failure Diskette ...
... information may not match the hardware configuration. The diskette write-protect feature is in the drive. No diskette is Remove the diskette from drive A and activated. The operating system is usually followed by taking the appropriate action. The...m s www.dell.com | support.dell.com System Messages (continued) Message Diskette drive 0 seek failure Diskette drive 1 seek failure Diskette read failure Invalid configuration information - Gate A20 failure General failure Hard disk configuration error Hard disk controller failure Hard disk failure Hard drive read failure Diskette ...

User's Guide
Page 160
... disk reset operation failed. See the documentation that has a bootable operating system, or remove the diskette from the diskette or hard drive. Dell Diagnostics. Not a boot diskette There is malfunctioning. problem in drive A or your operating system. If the message persists, reinstall your hard drive does not have a bootable operating system installed. No timer tick interrupt A chip...
... disk reset operation failed. See the documentation that has a bootable operating system, or remove the diskette from the diskette or hard drive. Dell Diagnostics. Not a boot diskette There is malfunctioning. problem in drive A or your operating system. If the message persists, reinstall your hard drive does not have a bootable operating system installed. No timer tick interrupt A chip...
User's Guide
Page 161
... the date or time. WARNING: Dell's Disk Power-on self-test (POST) has When your data and detected that indicates to See "Diskette Drive Problems" and "Hard locate a sector on selected drive The operating system cannot write to data and replace your hard None. Remove the drive from the call that drive [0/1] information. hard drive. Timer chip counter 2 failed A chip...
... the date or time. WARNING: Dell's Disk Power-on self-test (POST) has When your data and detected that indicates to See "Diskette Drive Problems" and "Hard locate a sector on selected drive The operating system cannot write to data and replace your hard None. Remove the drive from the call that drive [0/1] information. hard drive. Timer chip counter 2 failed A chip...


