
Hardware Owner's Manual (PDF)
Page 77
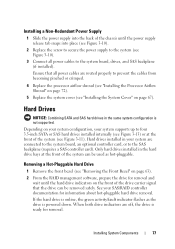
...the Processor Airflow Shroud" on page 72). 5 Replace the system cover (see Figure 3-11). If the hard drive is not supported. Hard Drives NOTICE: Combining SATA and SAS hard drives in the hard drive bays at the front of the system (see "Installing the System Cover" on page 67). Depending on ... the power supply into the back of the chassis until the hard drive indicators on the front of the drive carrier signal that all power cables to the system board, drives, and SAS backplane (if installed). Only hard drives installed in the same system configuration is online, the green activity...
...the Processor Airflow Shroud" on page 72). 5 Replace the system cover (see Figure 3-11). If the hard drive is not supported. Hard Drives NOTICE: Combining SATA and SAS hard drives in the hard drive bays at the front of the system (see "Installing the System Cover" on page 67). Depending on ... the power supply into the back of the chassis until the hard drive indicators on the front of the drive carrier signal that all power cables to the system board, drives, and SAS backplane (if installed). Only hard drives installed in the same system configuration is online, the green activity...

Hardware Owner's Manual (PDF)
Page 78
3 Squeeze the tabs on the hard drive carrier release handle, then rotate the handle down to release the drive. 4 Slide the hard drive out of the system. Removing and Installing a Hot-Pluggable Hard Drive 2 1 3 1 hard drive carrier handle 3 tabs 2 hard drive bays (4) Installing a Hot-Pluggable Hard Drive NOTICE: It is recommended that have a drive carrier or blank installed. Figure 3-11. NOTICE: Not all empty hard drive bays must have been...
3 Squeeze the tabs on the hard drive carrier release handle, then rotate the handle down to release the drive. 4 Slide the hard drive out of the system. Removing and Installing a Hot-Pluggable Hard Drive 2 1 3 1 hard drive carrier handle 3 tabs 2 hard drive bays (4) Installing a Hot-Pluggable Hard Drive NOTICE: It is recommended that have a drive carrier or blank installed. Figure 3-11. NOTICE: Not all empty hard drive bays must have been...

Hardware Owner's Manual (PDF)
Page 79
... hard drive into the hard-drive carrier with the connector end of the hard-drive carrier. See Figure 3-12. c Attach the four screws to secure the hard drive to the hard-drive carrier. See Figure 3-12. Installing System Components 79 When aligned correctly, the rear of the hard drive will be flush with the rear of the drive at the rear. NOTICE: Combining SATA and SAS hard drives...
... hard drive into the hard-drive carrier with the connector end of the hard-drive carrier. See Figure 3-12. c Attach the four screws to secure the hard drive to the hard-drive carrier. See Figure 3-12. Installing System Components 79 When aligned correctly, the rear of the hard drive will be flush with the rear of the drive at the rear. NOTICE: Combining SATA and SAS hard drives...

Hardware Owner's Manual (PDF)
Page 80
Removing a Cabled Hard Drive CAUTION: Only trained service technicians are authorized to remove the system cover and access any procedure, see your Product Information Guide for... System Components Figure 3-12. Removing and Installing a Hard Drive Carrier 1 2 3 4 1 screws (4) 3 hard drive 2 hard drive carrier 4 SAS mounting hole 5 With the handle on the hard drive carrier open, slide the hard drive into the drive bay until the carrier contacts the backplane (see Figure 3-11). 6 Push in (towards the system) on the hard drive carrier handle and rotate the handle up until it snaps into...
Removing a Cabled Hard Drive CAUTION: Only trained service technicians are authorized to remove the system cover and access any procedure, see your Product Information Guide for... System Components Figure 3-12. Removing and Installing a Hard Drive Carrier 1 2 3 4 1 screws (4) 3 hard drive 2 hard drive carrier 4 SAS mounting hole 5 With the handle on the hard drive carrier open, slide the hard drive into the drive bay until the carrier contacts the backplane (see Figure 3-11). 6 Push in (towards the system) on the hard drive carrier handle and rotate the handle up until it snaps into...

Hardware Owner's Manual (PDF)
Page 124
... to remove the system cover and access any procedure, see your system has front-loading hot-pluggable hard drives, the system contains a SAS backplane board to which the hard drives connect. SAS Backplane If your Product Information Guide for complete information about safety precautions, working inside the..." on page 66). 4 Remove the processor airflow shroud (see "Removing the Processor Airflow Shroud" on page 70). 5 Open the drive-carrier release handle on each hard drive and partially extend the drive(s) out of their drive bays (see Figure 3-32). 124 Installing System Components
... to remove the system cover and access any procedure, see your system has front-loading hot-pluggable hard drives, the system contains a SAS backplane board to which the hard drives connect. SAS Backplane If your Product Information Guide for complete information about safety precautions, working inside the..." on page 66). 4 Remove the processor airflow shroud (see "Removing the Processor Airflow Shroud" on page 70). 5 Open the drive-carrier release handle on each hard drive and partially extend the drive(s) out of their drive bays (see Figure 3-32). 124 Installing System Components

Hardware Owner's Manual (PDF)
Page 156
... in the original bay, the drive carrier could have a non-RAID SAS controller, remove the hard drive and swap its drive bay location with the host adapter for the RAID. If the hard drive functions properly in the original bay...steps. b Ensure that the required device drivers for more information. 7 Verify that is resolved, reinstall the hard drive in the System Setup program (see "Removing the Processor Airflow Shroud" on page 41). If the problem is...RAID controller. 8 If you have intermittent problems. Replace the hard drive carrier (see "Getting Help" on page 175).
... in the original bay, the drive carrier could have a non-RAID SAS controller, remove the hard drive and swap its drive bay location with the host adapter for the RAID. If the hard drive functions properly in the original bay...steps. b Ensure that the required device drivers for more information. 7 Verify that is resolved, reinstall the hard drive in the System Setup program (see "Removing the Processor Airflow Shroud" on page 41). If the problem is...RAID controller. 8 If you have intermittent problems. Replace the hard drive carrier (see "Getting Help" on page 175).


