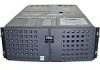
Dell PowerEdge Systems Microprocessor Upgrade Guide
Page 3
... 1-3 Updating the ESM Firmware 1-3 Updating the BIOS 1-4 Saving RCU Configuration Settings 1-4 Installing Upgrade Microprocessors in the PowerEdge 1300 1-4 Installing Upgrade Microprocessors in the PowerEdge 2300 1-6 Installing Upgrade Microprocessors in the PowerEdge 4300 1-8 Installing Upgrade Microprocessors in the PowerEdge 4350 1-11 Removing the Microprocessors 1-12 Removing and Replacing the Guide Brackets 1-13 Removing and Replacing the Cooling...
Dell PowerEdge Systems Microprocessor Upgrade Guide
Page 5
... strap for upgrading the Intel® Pentium® II or III microprocessors with either Intel Pentium II or Pentium III microprocessors in the following Dell PowerEdge systems: PowerEdge 1300 PowerEdge 2300 PowerEdge 4300 PowerEdge 4350 Installing one or more microprocessors in the following activities: Verifying the basic input/output system (BIOS) revision and saving the current configuration data...
Dell PowerEdge Systems Microprocessor Upgrade Guide
Page 10
..., which involves the following steps. c. e. NOTES: If you are installing a 600 MHz (or greater) microprocessor in the PowerEdge 2300, perform the following steps: a. See your computer Installation and Troubleshooting Guide for specific instructions, if needed. 1-6 Dell PowerEdge Systems - Removing the covers. Microprocessor Upgrade Disconnecting power and peripheral cables. Replacing the system board mounting plate...
Dell PowerEdge Systems Microprocessor Upgrade Guide
Page 12
h. To install the replacement mounting plate assembly (provided in your upgrade kit) in your PowerEdge 4300, the system board mounting tray must install the new cooling shroud. See "Removing and Replacing the Cooling Shroud", found later... To upgrade to replace the system board mounting tray. 1-8 Dell PowerEdge Systems - NOTES: If you are installing a 600-MHz (or greater) microprocessor in your PowerEdge 2300 system, perform the preceding steps in the PowerEdge 4300, perform the following steps. If you are upgrading a PowerEdge 4300 with a microprocessor with the upgrade kit.
Dell PowerEdge Systems Microprocessor Upgrade Guide
Page 21
... shroud is fully seated and the latches snap into place. Insert the new microprocessor into its connector until it is installed on PowerEdge 2300 systems only threaded stud support.dell.com Dell PowerEdge Systems - Microprocessor Upgrade 1-17 For Pentium III microprocessors, you do not need to install a terminator card. For Pentium II microprocessors, set the...
Dell PowerEdge Systems Microprocessor Upgrade Guide
Page 22
...'s other end resting over the bulk- Gently squeeze the tabs to snap securely into place with your microprocessor upgrade kit and your system is a PowerEdge 1300 or PowerEdge 2300, you lower the shroud on the heat sink(s). Carefully position the shroud into place on the microprocessor's heat sink and allow it to compress...
Dell PowerEdge Systems Microprocessor Upgrade Guide
Page 23
... NOTE: If a setup password has been assigned by changing Chassis Intrusion to PowerEdge 2300, 4300, and 4350 systems. For PowerEdge 1300 systems, see step 7 under "Installing Upgrade Microprocessors in the PowerEdge 1300", found earlier in the System Setup program. Enter the System Setup program...See your User's Guide and your Installation and Troubleshooting Guide for PowerEdge 4350 systems only) or replace the covers and front bezel, and reconnect your User's Guide for information on . support.dell.com Dell PowerEdge Systems - See the procedures in "Using the System Setup ...