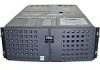
Dell PowerEdge Systems Microprocessor Upgrade Guide
Page 6
... tabs before you perform any of the procedures in the sequence listed: 1. The contents of your computer and devices from their power sources. Each kit will vary, depending on a card. Before you pull connectors apart, keep them evenly aligned to dissipate any... its edges or by its pins. If your computer and any telephone or telecommunication lines from the computer. For example, if the system you are installing has a 500-megahertz (MHz) Pentium III primary microprocessor, the secondary microprocessor must be a 500-MHz Pentium III microprocessor. 1-2 Dell PowerEdge Systems...
Dell PowerEdge 4350 System Upgrade Installation Guide
Page 9
... by its metal mounting bracket. Turn off the system. 2. Remove the system from its configuration. b. Dell PowerEdge 4350 System Upgrade Installation Guide 5 Hold a component such as a processor chip by its edges, not by its pins. The upgrade kit provides a third power supply, if one is all the way out (at the same time pressing the...
Dell PowerEdge 4350 System Upgrade Installation Guide
Page 14
If the air dam shroud is located at the right edge of the third power supply. See "SCSI Backplane" in Chapter 4 of the Service Manual for more information. 3. Orient the air dam shroud as shown in place. 5. Replace the bezel. 10 Dell PowerEdge 4350 System Upgrade Installation Guide Remove the top-cover panel. See "Front Bezel...