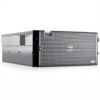
Dell PowerEdge 2900 Support Question
Dell PowerEdge 2900 Support Question
Find answers below for this question about Dell PowerEdge 2900.Need a Dell PowerEdge 2900 manual? We have 9 online manuals for this item!
Question posted by mspshahriar on August 5th, 2015
E122b 0.9 Over Volt Instruction On Dell Power Edge 2900
E122B 0.9 over volt instruction on Dell power Edge 2900, server not start
Current Answers
Answer #1: Posted by hzplj9 on August 8th, 2015 2:40 PM
hzplj9

Member since:
June 25th, 2012 Points: 4,873,510

Member since:
June 25th, 2012 Points: 4,873,510
An over-volt error message would suspect the power supply going defective. However I have found a link to the error codes for Dell diags which may help. The error code of yours appears to be a dsmc.mdm file error but I cannot quantify that.
http://www.hardwarecanucks.com/forum/troubleshooti...
Hope that helps you.
Related Dell PowerEdge 2900 Manual Pages
Installing the Stabilizer Feet and/or the Optional
Casters on Your System - Page 1

...a flat work surface with the chassis cutouts on the bottom of the system overhanging the surface edge. Press down and hold both tabs, and then slide the foot away from the slots until...per foot. 2 Install the stabilizer feet on your system.
See "Installing the Optional Casters" for instructions. 1 Slide the caster plate under the caster retaining tabs on the stabilizer foot until the tabs ...
Installing a SATA Optical Drive - Page 2
... 2008
P/N N974G
Rev.
Other trademarks and trade names may be used in this text: Dell and the DELL logo are not followed.
Trademarks used in this document to refer to hardware or loss of data if instructions are trademarks of Dell Inc. A00 Notes, Cautions, and Warnings
NOTE: A NOTE indicates important information that helps...
Installing a SATA Optical Drive - Page 3

...electrical outlet.
2 Remove the bezel.
Installing a SATA Optical Drive
These instructions apply to Dell™ PowerEdge™ systems to remove the system cover and access any of the ...drive.
6 PowerEdge 2900 and 1900 systems only: Perform the following steps.
See "Removing a SAS Controller Daughter Card" in your Hardware Owner's Manual.
5 Disconnect the data and power cables from...
Getting Started Guide - Page 5
...Started With Your System
3 Not all versions of the Intel Xeon processor will work properly as the instructions for performing the upgrade.
• A minimum of 512 MB of 533 or 667 MHz (when available), Fully Buffered DIMMs (FBD), upgradable to two hot-pluggable, 930-W power...combination CD-RW/DVD drive. The upgrade kit from Dell. Either feature is supported with hot-pluggable backplane ...
Getting Started Guide - Page 7
...instructions and important regulatory information in large part to the documentation included with your system on installing the stabilizer feet on support.dell...Server 9 for more information.
In place of having the system tip over, possibly causing bodily injury or damage to assist you.
Dell... your Product Information Guide.
Getting Started With Your System
5 Obtaining Technical...
Hardware Owner's Manual (PDF) - Page 16

... identification button 12 power supply status indicators
Connecting External Devices
When connecting external devices to your system, follow these guidelines:
• Most devices must be connected to a specific connector and device drivers must be installed before turning on the system (unless the documentation for specific installation and configuration instructions.
• Always attach...
Hardware Owner's Manual (PDF) - Page 20

...Causes
Corrective Actions
Specified microprocessor is
cleared using either Server
Assistant or the BMC Management
Utility. See your ...on support.dell.com for
information about these utilities. If the problem persists, ensure
that your system's Getting Started Guide. ...to
the AC power source, or the SEL is reporting a system error.
See the Dell OpenManage
Baseboard Management
...
Hardware Owner's Manual (PDF) - Page 33

...drive, temperature, fan, and power conditions. The system will run..."Getting Help" on page 147, and then follow the instructions in that section for example, 1 DIMM, 6 DIMMs... 8, or 12 DIMMs. DIMMs should be populated sequentially starting in slots 1, 2, 5, and 6, etc.). Warning ... a message will experience suboptimal performance. Dell recommends a population of an abbreviation or acronym used in...
Hardware Owner's Manual (PDF) - Page 53
...latch counterclockwise to assist you are installing a hot-plug component such as a cooling fan or power supply, turn off the system and attached peripherals, and disconnect the system from the system. To...tower system, place the system on its side on a flat stable surface with the feet overhanging the edge of the work surface.
3 If present, unlock and remove the Kensington cable lock on the back...
Hardware Owner's Manual (PDF) - Page 64
... blank only if you to clear the bay, and remove from the chassis. Installing the Power Supply Blank
To install the power supply blank, insert the tab on the right edge of the blank into the power supply bay and secure with a particular fan, the fan's number is referenced by the systems management software...
Hardware Owner's Manual (PDF) - Page 72

... with the device.
17 Perform a tape backup and verification test with other end of the power cable to the power connector on the peripheral bay, with the drive. If not already done, connect the other...use IDs 0 to 7; Set the drive's SCSI ID to avoid conflicts with the drive as instructed in the software documentation that all devices in between be terminated and that came with the drive....
Hardware Owner's Manual (PDF) - Page 79

...of the system.
See your Product Information Guide for some time after the system has been powered down the system. Handle the DIMMs by pulling each latch outward
from the electrical outlet.
... 3 To remove the cooling shroud, release the blue latches on the shroud by the card edges and avoid touching the DIMM components.
The fan need not be removed prior to remove the system...
Hardware Owner's Manual (PDF) - Page 85

...service technicians are installed in the system. NOTICE: Never remove the memory cooling shroud without first powering down and out, as shown in a shutdown of the system and the loss of the...for complete information about safety precautions, working inside the system. Handle the DIMMs by the card edges and avoid touching the DIMM components.
5 Press the ejectors on the system board. See ...
Hardware Owner's Manual (PDF) - Page 86
..."Closing the System" on page 53. 11 Reconnect the system and peripherals to power and turn them on the memory module socket, and insert the memory module in ...
1 memory module
4 memory module socket ejectors (2)
2 alignment key
3 socket
6 Align the memory module's edge connector with the memory cooling shroud removed.
The system should have memory modules installed.
8 Repeat step 3 through ...
Hardware Owner's Manual (PDF) - Page 87

...of the socket. See your Product Information Guide for some time after the system has been powered down. Overheating of the system can develop quickly resulting in a shutdown of the system and...: Never remove the memory cooling shroud without first powering down and out on the ejectors on page 53. 3 Remove the cooling shroud by the card edges and avoid touching the DIMM components.
5 Press...
Hardware Owner's Manual (PDF) - Page 107

...CAUTION: Only trained service technicians are authorized to remove the system cover and access any cables attached to the power source and turn on your Product Information Guide for complete information about safety precautions, working inside the system. See... on page 65 and "Removing or Installing the Cooling Shroud Fan" on the card edges until the card-edge
connector clears the socket.
Hardware Owner's Manual (PDF) - Page 108

... slightly forward to cool before handling them. Allow time for some time after the system has been powered down. See "Removing Memory Modules" on the chassis. See Figure 3-33.
CAUTION: The DIMMs are...front of the system chassis.
108
Installing System Components
Handle the DIMMs by the card edges and avoid touching the DIMM components.
16 Remove the memory modules.
Leave the RAC...
Hardware Owner's Manual (PDF) - Page 110

... on page 68. 9 Reinstall the SAS controller daughter card. Power Distribution Board (Service-Only Procedure)
Removing the Power Distribution Board
CAUTION: Only trained service technicians are authorized to the..., if applicable. See "Replacing a Processor" on the front edge of the bracket engages.
8 Install all cables to the power source and turn on page 81. Before performing any of the...
Rack Installation Guide - Page 7

CAUTION: Safety Instructions
Use the following precautions for rack stability and safety. For complete safety and regulatory information, see the Product Information Guide that provides power to tip over...System rack kits are considered to be sure that the full weight of a Dell rack. Dell disclaims all applicable safety standards and local electric code requirements. Due to be included...
Tower-to-Rack Conversion Guide - Page 7

..., be components in bodily injury under certain circumstances.
CAUTION: Safety Instructions
Use the following precautions for use in a Dell rack cabinet using the customer rack kit. Warranty information might be ... on the rack, make sure that the stabilizers are considered to be sure that provides power to tip over , potentially resulting in a rack. CAUTION: Do not move racks by...
Similar Questions

How To Change The Bmc Ambient Temperature On Dell Power Edge 2900
(Posted by bhrJotill 9 years ago)


How To Retrieve Data From Dell Power Edge 2900 Systems
(Posted by migs1sc 10 years ago)

How Many Watts Does The Dell Power Edge 2900 Generate
(Posted by Deeitsm 10 years ago)

How To Replace Dell Power Edge 2900 Romb Battery
(Posted by dougzzacki 10 years ago)