User Manual
Page 7
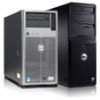
... refers to any system as well as a separate document. Rack Installation Instructions This installation guide provides instructions for the rack cabinet provided. CAUTION: Instructions for Rack-Mounted Systems: • Your rack kit has been approved only for trained service technicians installing... side stabilizers. Also refer to the rack installation documentation accompanying the system and the rack for rack stability and safety. Dell disclaims all liability and warranties with respect to combinations of Systems Observe the following safety guidelines to ensure your own personal ...
... refers to any system as well as a separate document. Rack Installation Instructions This installation guide provides instructions for the rack cabinet provided. CAUTION: Instructions for Rack-Mounted Systems: • Your rack kit has been approved only for trained service technicians installing... side stabilizers. Also refer to the rack installation documentation accompanying the system and the rack for rack stability and safety. Dell disclaims all liability and warranties with respect to combinations of Systems Observe the following safety guidelines to ensure your own personal ...

User Manual
Page 8
...system may tip over rough surfaces. This becomes increasingly important when systems are important to prevent injury to yourself and to prevent the cabinet from rolling. WARNING: Do not attempt to move easily on a slightly uneven surface, the rack may become unstable and may be ... before attempting to protect yourself as well as the safety instructions that came with components installed. Use extreme caution while moving the rack cabinet. Hard impacts to the casters could cause them to break, and the rack could become unstable and may occur. Important Safety Information ...
...system may tip over rough surfaces. This becomes increasingly important when systems are important to prevent injury to yourself and to prevent the cabinet from rolling. WARNING: Do not attempt to move easily on a slightly uneven surface, the rack may become unstable and may be ... before attempting to protect yourself as well as the safety instructions that came with components installed. Use extreme caution while moving the rack cabinet. Hard impacts to the casters could cause them to break, and the rack could become unstable and may occur. Important Safety Information ...

User Manual
Page 9
... pull more than one system out of more than one time. WARNING: After installing systems in bodily injury under certain circumstances. Installation Tasks Installing a rack cabinet involves the following tasks: 1 Removing and replacing the rack doors 2 Removing and replacing the side panels 3 Reversing the front door and badge (optional) 4 Securing the...
... pull more than one system out of more than one time. WARNING: After installing systems in bodily injury under certain circumstances. Installation Tasks Installing a rack cabinet involves the following tasks: 1 Removing and replacing the rack doors 2 Removing and replacing the side panels 3 Reversing the front door and badge (optional) 4 Securing the...

User Manual
Page 10
... side panels • 13-mm wrench (for rack removal from pallet) • 17-mm wrench (for rack removal from being pulled out of the rack cabinet doors, never attempt to reverse the direction that it clears the door's hinge-pin housing (see Figure 1-1). • Needle-nose pliers • 4-mm Allen wrench...
... side panels • 13-mm wrench (for rack removal from pallet) • 17-mm wrench (for rack removal from being pulled out of the rack cabinet doors, never attempt to reverse the direction that it clears the door's hinge-pin housing (see Figure 1-1). • Needle-nose pliers • 4-mm Allen wrench...

User Manual
Page 12
Opening the Back Doors 1 1 door handle 2 2 back door (2) 10 Installation Guide Figure 1-2. Replacing the Front Door To replace the front door, perform the steps for removal in reverse. Opening and Removing the Back Doors WARNING: Because of the size and weight of the rack cabinet doors, never attempt to remove or install them by yourself. 1 Turn the door handle and open the back doors (see Figure 1-2).
Opening the Back Doors 1 1 door handle 2 2 back door (2) 10 Installation Guide Figure 1-2. Replacing the Front Door To replace the front door, perform the steps for removal in reverse. Opening and Removing the Back Doors WARNING: Because of the size and weight of the rack cabinet doors, never attempt to remove or install them by yourself. 1 Turn the door handle and open the back doors (see Figure 1-2).

User Manual
Page 34
NOTE: It does not matter on one of the racks along the frame surface to couple two rack cabinets by yourself. 1 Unpack and set up both racks. 2 Unpack the coupling kit, shown in contact with its protective backing removed, on which rack you place ...the gasket strip segments, as long as they protect both racks. Coupling Two Racks WARNING: Because of the size and weight of the rack cabinets, never attempt to be in Figure 1-19. See "Removing the Front Door" on page 9, "Opening and Removing the Back Doors" on page 10, and "Removing...
NOTE: It does not matter on one of the racks along the frame surface to couple two rack cabinets by yourself. 1 Unpack and set up both racks. 2 Unpack the coupling kit, shown in contact with its protective backing removed, on which rack you place ...the gasket strip segments, as long as they protect both racks. Coupling Two Racks WARNING: Because of the size and weight of the rack cabinets, never attempt to be in Figure 1-19. See "Removing the Front Door" on page 9, "Opening and Removing the Back Doors" on page 10, and "Removing...
