
Installing a Fifth SCSI Hard-Disk Drive
Page 3
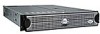
About This Guide This document describes installing and configuring an optional fifth SCSI hard-disk drive in your system's Installation and Troubleshooting Guide.) Figure 1-1 illustrates the system components associated with the SCSI hard-disk drives. Basic SCSI Hard-Disk Drive System Components . SCSI backplane board power supply ... a split 1 x 2 and 1 x 3 configuration, you should install and configure the other four SCSI drives. Figure 1-1. If you want to set up the five drives in your Dell™ system's peripheral bay.
About This Guide This document describes installing and configuring an optional fifth SCSI hard-disk drive in your system's Installation and Troubleshooting Guide.) Figure 1-1 illustrates the system components associated with the SCSI hard-disk drives. Basic SCSI Hard-Disk Drive System Components . SCSI backplane board power supply ... a split 1 x 2 and 1 x 3 configuration, you should install and configure the other four SCSI drives. Figure 1-1. If you want to set up the five drives in your Dell™ system's peripheral bay.

Installing a Fifth SCSI Hard-Disk Drive
Page 4
... is currently installed in the bay. WARNING: See your System Information document for important safety information before working inside your system's Installation and Troubleshooting Guide. 4 If a SCSI tape drive or other drive is installed, remove it from the drive. 5 Disconnect all cables connected to the..." in the peripheral bay, you install a second, optional SCSI backplane daughter card and a second SCSI host adapter. www.dell.com | support.dell.com Hard-Disk Drive Configuration The four hard-disk drives connected to connector SCSIA on the SCSI backplane board. To operate the...
... is currently installed in the bay. WARNING: See your System Information document for important safety information before working inside your system's Installation and Troubleshooting Guide. 4 If a SCSI tape drive or other drive is installed, remove it from the drive. 5 Disconnect all cables connected to the..." in the peripheral bay, you install a second, optional SCSI backplane daughter card and a second SCSI host adapter. www.dell.com | support.dell.com Hard-Disk Drive Configuration The four hard-disk drives connected to connector SCSIA on the SCSI backplane board. To operate the...

Installing a Fifth SCSI Hard-Disk Drive
Page 8
... to their AC power sources, and turn them on. 24 If you removed the system's optional bezel in place (see "Running the Dell Diagnostics" in your Installation and Troubleshooting Guide. 1-6 Installing a Fifth SCSI Hard-Disk Drive Arrange cables so that might have been loosened during this installation procedure. For more information, see...
... to their AC power sources, and turn them on. 24 If you removed the system's optional bezel in place (see "Running the Dell Diagnostics" in your Installation and Troubleshooting Guide. 1-6 Installing a Fifth SCSI Hard-Disk Drive Arrange cables so that might have been loosened during this installation procedure. For more information, see...

SCSI Backplane Daughter Card
Page 4
... installed in the right-hand drive bay, remove the hard-disk drive lock (see Figure 1-3). www.dell.com | support.dell.com 3 Open the system covers. See "Checking Inside the System" in your system's Installation and Troubleshooting Guide for more information. 4 If any hard-disk drives from the right-hand drive bay by opening...
... installed in the right-hand drive bay, remove the hard-disk drive lock (see Figure 1-3). www.dell.com | support.dell.com 3 Open the system covers. See "Checking Inside the System" in your system's Installation and Troubleshooting Guide for more information. 4 If any hard-disk drives from the right-hand drive bay by opening...

Activating the Dell PERC 3/Di
Page 3
..., see "Safety First-For You and Your Computer" in your Dell™ system's PowerEdge™ expandable RAID controller 3/Di (PERC 3/Di). See "Opening the System Doors" in your system Installation and Troubleshooting Guide. 2 Open the ejectors on the RAID controller memory module ...its electrical outlet. Activating the Integrated RAID Controller This document explains how to activate your system's Installation and Troubleshooting Guide. CAUTION: See "Protecting Against Electrostatic Discharge" in the safety instructions in your System Information document. 1 Open the ...
..., see "Safety First-For You and Your Computer" in your Dell™ system's PowerEdge™ expandable RAID controller 3/Di (PERC 3/Di). See "Opening the System Doors" in your system Installation and Troubleshooting Guide. 2 Open the ejectors on the RAID controller memory module ...its electrical outlet. Activating the Integrated RAID Controller This document explains how to activate your system's Installation and Troubleshooting Guide. CAUTION: See "Protecting Against Electrostatic Discharge" in the safety instructions in your System Information document. 1 Open the ...

Rack Installation Guide
Page 16
...rack is identical for flush-mounted and center-mounted support trays. 1 If your system has a bezel, remove it (see the system Installation and Troubleshooting Guide for instructions). 2 Lift the system into position on the support tray. 3 Slide the system completely into position and secure it to the rack... using the captive fasteners at the lower edge of the computer system, never attempt to install the computer system by yourself. www.dell.com | support.dell.com Figure 1-8. Installing the System in a Rack With Wide-Hole Spacing 12-24 x 0.5-inch pan-head Phillip screws (4) 7 Tighten...
...rack is identical for flush-mounted and center-mounted support trays. 1 If your system has a bezel, remove it (see the system Installation and Troubleshooting Guide for instructions). 2 Lift the system into position on the support tray. 3 Slide the system completely into position and secure it to the rack... using the captive fasteners at the lower edge of the computer system, never attempt to install the computer system by yourself. www.dell.com | support.dell.com Figure 1-8. Installing the System in a Rack With Wide-Hole Spacing 12-24 x 0.5-inch pan-head Phillip screws (4) 7 Tighten...

Rack Installation Guide
Page 17
... and 6-inch wide two-post racks are accommodated. Two-Post RapidRails Kit The two-post RapidRails rack kit is used to install a Dell system in a two-post, open -frame relay rack manufacturer's installation documentation for precautionary warnings before attempting this kit in place. You ...-frame relay rack to the floor, the ceiling or upper wall, and where applicable, to the system (see the system Installation and Troubleshooting Guide for servicing. You can install this installation. The kit incorporates slide assemblies, which enable the system to the system and personal injury...
... and 6-inch wide two-post racks are accommodated. Two-Post RapidRails Kit The two-post RapidRails rack kit is used to install a Dell system in a two-post, open -frame relay rack manufacturer's installation documentation for precautionary warnings before attempting this kit in place. You ...-frame relay rack to the floor, the ceiling or upper wall, and where applicable, to the system (see the system Installation and Troubleshooting Guide for servicing. You can install this installation. The kit incorporates slide assemblies, which enable the system to the system and personal injury...

Rack Installation Guide
Page 24
Figure 1-14. www.dell.com | support.dell.com 1 Pull the inner slides out to release Installing the System in the slide assemblies by yourself. 3 Lift the system into position. CAUTION: Because of the size and weight of the system, never attempt to install the system in the Rack (Flush-Mount Configuration) 1-18 Rack Installation Guide slide release (green) lift to release system lock (yellow) lift to their fully extended position. 2 If your system has an optional bezel, remove it (see the system Installation and Troubleshooting Guide for instructions).
Figure 1-14. www.dell.com | support.dell.com 1 Pull the inner slides out to release Installing the System in the slide assemblies by yourself. 3 Lift the system into position. CAUTION: Because of the size and weight of the system, never attempt to install the system in the Rack (Flush-Mount Configuration) 1-18 Rack Installation Guide slide release (green) lift to release system lock (yellow) lift to their fully extended position. 2 If your system has an optional bezel, remove it (see the system Installation and Troubleshooting Guide for instructions).

Rack Installation Guide
Page 28
...1-22 Rack Installation Guide b Slide the system forward to the system. Rack Kit Contents The rack kit includes (see your system's Installation and Troubleshooting Guide or the User's Guide. 8 Secure the cables to the cable-management arm: a After connecting the cables to the system, unscrew the...-standard rack cabinets. One four-post RapidRails kit is required for trained service providers to be installed in the rack. www.dell.com | support.dell.com 7 Connect the remaining cables to the fully extended position. Four-Post RapidRails Rack Kit This procedure provides instructions for each...
...1-22 Rack Installation Guide b Slide the system forward to the system. Rack Kit Contents The rack kit includes (see your system's Installation and Troubleshooting Guide or the User's Guide. 8 Secure the cables to the cable-management arm: a After connecting the cables to the system, unscrew the...-standard rack cabinets. One four-post RapidRails kit is required for trained service providers to be installed in the rack. www.dell.com | support.dell.com 7 Connect the remaining cables to the fully extended position. Four-Post RapidRails Rack Kit This procedure provides instructions for each...

Rack Installation Guide
Page 38
...-management arm. 8 Slide the system in a four-post rack cabinet. 1-32 Rack Installation Guide For details, see your system's Installation and Troubleshooting Guide or the User's Guide. 7 Secure the cables to the cable-management arm: a After connecting the cables to the front vertical rail. www....dell.com | support.dell.com 6 Connect the remaining cables to release the locks, and then slide the system completely into the rack, press the green locking latch...
...-management arm. 8 Slide the system in a four-post rack cabinet. 1-32 Rack Installation Guide For details, see your system's Installation and Troubleshooting Guide or the User's Guide. 7 Secure the cables to the cable-management arm: a After connecting the cables to the front vertical rail. www....dell.com | support.dell.com 6 Connect the remaining cables to release the locks, and then slide the system completely into the rack, press the green locking latch...


