
Information Update (.pdf)
Page 6
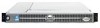
...connector on the backplane board. See Figure 1-2. 1-2 Installing or Replacing an ERA/O Card Opening the System Covers left cover optional security screw latch right cover 6 Remove the SCSI backplane board: a Pull each hard-drive carrier partially out of its connector and up out of its ...slot, approximately 2.5 cm (1 inch). See Figure 1-2. c Disconnect the CD drive interface cable from the FLOPPY connector on the backplane board. www.dell.com | support.dell.com Figure 1-1.
...connector on the backplane board. See Figure 1-2. 1-2 Installing or Replacing an ERA/O Card Opening the System Covers left cover optional security screw latch right cover 6 Remove the SCSI backplane board: a Pull each hard-drive carrier partially out of its connector and up out of its ...slot, approximately 2.5 cm (1 inch). See Figure 1-2. c Disconnect the CD drive interface cable from the FLOPPY connector on the backplane board. www.dell.com | support.dell.com Figure 1-1.

Information Update (.pdf)
Page 9
...security screw (if applicable). Installing or Replacing an ERA/O Card 1-5 See Figure 1-3; Installing the ERA/O Card ERA/O card ERA/O card connector retention clips (4) 10 If you removed a ROMB backup battery in the chassis. f Press all installed hard drives firmly back into the chassis, ensuring ...that the CD and diskette drive interface cables are not caught under the backplane. When closing the covers, close the right (larger)...
...security screw (if applicable). Installing or Replacing an ERA/O Card 1-5 See Figure 1-3; Installing the ERA/O Card ERA/O card ERA/O card connector retention clips (4) 10 If you removed a ROMB backup battery in the chassis. f Press all installed hard drives firmly back into the chassis, ensuring ...that the CD and diskette drive interface cables are not caught under the backplane. When closing the covers, close the right (larger)...


