

Hardware Installation Guide
Page 5
... Cabling a fiber optic module 39 Fiber-optic connectors 39 Replacing a power supply 39 Installation precautions and warnings 40 Determining which power supply failed 40 AC power supplies 41 Replacing the fan tray 45 Installation precautions and warnings 46 Removing the fan tray 46 Hardware Specifications Device specifications 50 Physical dimensions...Immunity 61 Regulatory statements 62 U.S.A 62 Industry Canada statement 62 Europe and Australia 62 Japan 62 Japan power cords 63 Korea 63 China RoHS 64 Dell PowerConnect B-Series TI24X Hardware Installation Guide v 53-1002265-01
... Cabling a fiber optic module 39 Fiber-optic connectors 39 Replacing a power supply 39 Installation precautions and warnings 40 Determining which power supply failed 40 AC power supplies 41 Replacing the fan tray 45 Installation precautions and warnings 46 Removing the fan tray 46 Hardware Specifications Device specifications 50 Physical dimensions...Immunity 61 Regulatory statements 62 U.S.A 62 Industry Canada statement 62 Europe and Australia 62 Japan 62 Japan power cords 63 Korea 63 China RoHS 64 Dell PowerConnect B-Series TI24X Hardware Installation Guide v 53-1002265-01

Hardware Installation Guide
Page 16
... enough power for all of the ports. FIGURE 4 AC power supply front panel 1 1 AC LED The power supplies are hot-swappable.Figure 4 shows the front panel of the AC power supplies used in the PowerConnect B-Series TI24X (at the rear of the device). Power supplies can... not powered on, or has been powered on page 55. 6 Dell PowerConnect B-Series TI24X Hardware Installation Guide 53-1002265-01 Power supplies Each PowerConnect B-Series TI24X device comes with dual alternating-current (AC) power supplies (RPS-TI24X). Indicated power supply is installed and is powered on and has enough...
... enough power for all of the ports. FIGURE 4 AC power supply front panel 1 1 AC LED The power supplies are hot-swappable.Figure 4 shows the front panel of the AC power supplies used in the PowerConnect B-Series TI24X (at the rear of the device). Power supplies can... not powered on, or has been powered on page 55. 6 Dell PowerConnect B-Series TI24X Hardware Installation Guide 53-1002265-01 Power supplies Each PowerConnect B-Series TI24X device comes with dual alternating-current (AC) power supplies (RPS-TI24X). Indicated power supply is installed and is powered on and has enough...
Hardware Installation Guide
Page 19
Please review the list and verify the contents. Package contents Verify the package contents listed below . Dell PowerConnect systems ship with all of the items listed below : • Dell PowerConnect B-Series TI24X device with dual AC power supplies installed • AC PDU power cords (C13-C14) • Document kit • Retainer nuts and screws • Rubber feet •...
Please review the list and verify the contents. Package contents Verify the package contents listed below . Dell PowerConnect systems ship with all of the items listed below : • Dell PowerConnect B-Series TI24X device with dual AC power supplies installed • AC PDU power cords (C13-C14) • Document kit • Retainer nuts and screws • Rubber feet •...
Hardware Installation Guide
Page 22
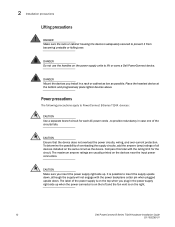
...the power supply right-side up when the power connector is on the left and the fan vent is on the right. 12 Dell PowerConnect B-Series TI24X Hardware Installation Guide 53-1002265-01 It is possible to insert the supply upside down . To determine the possibility of overloading the...engage with the rating limit for each AC power cords , to provide redundancy in case one of all devices installed on the top when you install in the power supply right-side up . Power precautions The following precautions apply to PowerConnect B-Series TI24X devices: CAUTION Use a separate branch ...
...the power supply right-side up when the power connector is on the left and the fan vent is on the right. 12 Dell PowerConnect B-Series TI24X Hardware Installation Guide 53-1002265-01 It is possible to insert the supply upside down . To determine the possibility of overloading the...engage with the rating limit for each AC power cords , to provide redundancy in case one of all devices installed on the top when you install in the power supply right-side up . Power precautions The following precautions apply to PowerConnect B-Series TI24X devices: CAUTION Use a separate branch ...
Hardware Installation Guide
Page 24
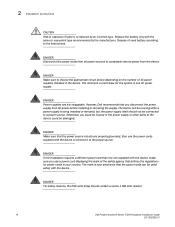
...of used safely with the device, make sure you disconnect the power supply from AC power before installing or removing the supply. DANGER If the installation requires a different power cord than the one AC power supply. DANGER For safety reasons, the ESD wrist strap should not be... for the system is being installed or removed, but the power supply itself should contain a series 1 MB ohm resistor. 14 Dell PowerConnect B-Series TI24X Hardware Installation Guide 53-1002265-01 The minimum current draw for power cords in the device. DANGER Power supplies are properly grounded, ...
...of used safely with the device, make sure you disconnect the power supply from AC power before installing or removing the supply. DANGER If the installation requires a different power cord than the one AC power supply. DANGER For safety reasons, the ESD wrist strap should not be... for the system is being installed or removed, but the power supply itself should contain a series 1 MB ohm resistor. 14 Dell PowerConnect B-Series TI24X Hardware Installation Guide 53-1002265-01 The minimum current draw for power cords in the device. DANGER Power supplies are properly grounded, ...

Hardware Installation Guide
Page 28
... the device, make sure you obtain a PDU power cords (C13-C14) displaying the mark of the safety agency that defines the regulations for the AC outlet. • If your country. The mark is your assurance that the PDU power cords (C13-C14) can be easily accessible. • ...cords (C13-C14) from the shipping package. • Attach the AC PDU power cords (C13-C14) to "Powering on the system". Proceed to the AC connector on the system Note the following before inserting. 18 Dell PowerConnect B-Series TI24X Hardware Installation Guide 53-1002265-01 Powering on the rear panel as shown...
... the device, make sure you obtain a PDU power cords (C13-C14) displaying the mark of the safety agency that defines the regulations for the AC outlet. • If your country. The mark is your assurance that the PDU power cords (C13-C14) can be easily accessible. • ...cords (C13-C14) from the shipping package. • Attach the AC PDU power cords (C13-C14) to "Powering on the system". Proceed to the AC connector on the system Note the following before inserting. 18 Dell PowerConnect B-Series TI24X Hardware Installation Guide 53-1002265-01 Powering on the rear panel as shown...

Hardware Installation Guide
Page 29
... proper operation by cables to "Verifying proper operation".) Powering off the system To turn an AC system OFF: • Unplug the PDU power cords(C13-C14) from the power source. Dell PowerConnect B-Series TI24X Hardware Installation Guide 19 53-1002265-01 After the diagnostics are complete, the LEDs will light... properly. 1. Table 4 provides more details on , the link LEDs will be lit while the device performs diagnostics. FIGURE 7 Attaching the AC PDU power cords (C13-C14) 1 • Repeat this procedure for those that the device is working properly (refer to other devices.
... proper operation by cables to "Verifying proper operation".) Powering off the system To turn an AC system OFF: • Unplug the PDU power cords(C13-C14) from the power source. Dell PowerConnect B-Series TI24X Hardware Installation Guide 19 53-1002265-01 After the diagnostics are complete, the LEDs will light... properly. 1. Table 4 provides more details on , the link LEDs will be lit while the device performs diagnostics. FIGURE 7 Attaching the AC PDU power cords (C13-C14) 1 • Repeat this procedure for those that the device is working properly (refer to other devices.

Hardware Installation Guide
Page 30
... address using the CLI. TABLE 4 Power LEDs LEDs Position State Pwr (Power) Left-most LED on the On front panel Off AC OK On power supply 1 front On panel AC OK Off On power supply 2 front On panel Off Meaning The device is powered on but does not have access to attach... the terminal emulation program and set the session parameters as follows: • Baud: 9600 bps • Data bits: 8 • Parity: None • Stop bits: 1 20 Dell PowerConnect B-Series TI24X Hardware Installation Guide 53-1002265-01
... address using the CLI. TABLE 4 Power LEDs LEDs Position State Pwr (Power) Left-most LED on the On front panel Off AC OK On power supply 1 front On panel AC OK Off On power supply 2 front On panel Off Meaning The device is powered on but does not have access to attach... the terminal emulation program and set the session parameters as follows: • Baud: 9600 bps • Data bits: 8 • Parity: None • Stop bits: 1 20 Dell PowerConnect B-Series TI24X Hardware Installation Guide 53-1002265-01

Hardware Installation Guide
Page 50
...1: NM30 deg-C Speed 2: 2540 deg-C Speed 3: 3590 deg-C (shutdown) 40 Dell PowerConnect B-Series TI24X Hardware Installation Guide 53-1002265-01 CAUTION Never leave tools inside the device. NA - However, Dell recommends that you could be injured or the power supply or other parts of the ...the supply. DANGER Before beginning the installation, refer to a power source. Determining which Power supply has failed or you not applid AC Voltage, enter the following topics: • Installation precautions and warnings • Determining which power supply failed • Replacing a...
...1: NM30 deg-C Speed 2: 2540 deg-C Speed 3: 3590 deg-C (shutdown) 40 Dell PowerConnect B-Series TI24X Hardware Installation Guide 53-1002265-01 CAUTION Never leave tools inside the device. NA - However, Dell recommends that you could be injured or the power supply or other parts of the ...the supply. DANGER Before beginning the installation, refer to a power source. Determining which Power supply has failed or you not applid AC Voltage, enter the following topics: • Installation precautions and warnings • Determining which power supply failed • Replacing a...

Hardware Installation Guide
Page 51
... power cords (C13-C14) from the power source. 2. Dell PowerConnect B-Series TI24X Hardware Installation Guide 41 53-1002265-01 DANGER Before beginning the installation, refer to right. You will need a #2 Phillips-head screwdriver to remove an AC power supply. 1. If the display indicates "Installed (Failed)" for AC power supplies in "Power precautions" on page 12...
... power cords (C13-C14) from the power source. 2. Dell PowerConnect B-Series TI24X Hardware Installation Guide 41 53-1002265-01 DANGER Before beginning the installation, refer to right. You will need a #2 Phillips-head screwdriver to remove an AC power supply. 1. If the display indicates "Installed (Failed)" for AC power supplies in "Power precautions" on page 12...

Hardware Installation Guide
Page 53
Dell PowerConnect B-Series TI24X Hardware Installation Guide 43 53-1002265-01 Replacing a power supply 5 Installing an AC power supply NOTE If the empty power supply bay has a cover plate, remove it as shown below before continuing. Remove the new power supply from ...
Dell PowerConnect B-Series TI24X Hardware Installation Guide 43 53-1002265-01 Replacing a power supply 5 Installing an AC power supply NOTE If the empty power supply bay has a cover plate, remove it as shown below before continuing. Remove the new power supply from ...
Hardware Installation Guide
Page 62
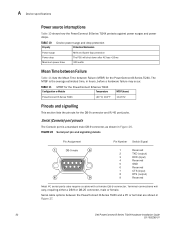
... signalling This section lists the pinouts for the PowerConnect B-Series TI24X. Terminal connections will shut down after AC loss >20ms 300 watts Mean Time between Failure Table 11 lists the Mean Time between the PowerConnect B-Series TI24X and a PC or terminal are shown in Figure 27. 52 Dell PowerConnect B-Series TI24X Hardware Installation Guide 53-1002265-01 Serial...
... signalling This section lists the pinouts for the PowerConnect B-Series TI24X. Terminal connections will shut down after AC loss >20ms 300 watts Mean Time between Failure Table 11 lists the Mean Time between the PowerConnect B-Series TI24X and a PC or terminal are shown in Figure 27. 52 Dell PowerConnect B-Series TI24X Hardware Installation Guide 53-1002265-01 Serial...
Hardware Installation Guide
Page 65
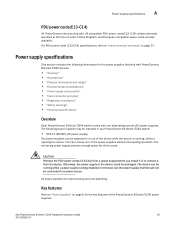
...power cords (C13-C14) from the device. All power supplies are also available. You can remove one alternating-current (AC) power supplies. Otherwise, the power supply or the device could be connected to "Input connector and plug" on ...Input connector and plug" • "Regulatory compliance" • "Safety warnings" • "Electrical specifications" Overview Each PowerConnect B-Series TI24X switch comes with US-compatible PDU power cords(C13- Dell PowerConnect B-Series TI24X Hardware Installation Guide 55 53-1002265-01 C14) unless otherwise specified at the time of the...
...power cords (C13-C14) from the device. All power supplies are also available. You can remove one alternating-current (AC) power supplies. Otherwise, the power supply or the device could be connected to "Input connector and plug" on ...Input connector and plug" • "Regulatory compliance" • "Safety warnings" • "Electrical specifications" Overview Each PowerConnect B-Series TI24X switch comes with US-compatible PDU power cords(C13- Dell PowerConnect B-Series TI24X Hardware Installation Guide 55 53-1002265-01 C14) unless otherwise specified at the time of the...

Hardware Installation Guide
Page 66
...;F) 95% maximum, non-condensing 4545.45 meter (15,000 feet) maximum 56 Dell PowerConnect B-Series TI24X Hardware Installation Guide 53-1002265-01 A Power supply specifications Physical dimensions and weight TABLE 13 Physical dimensions and weight of power supplies Power Supply Dimensions Weight AC 4.06 cm (1.6 in.) (H) x 10.67 cm (2.84 lbs) (4.2 in.) (W) x 22.86...
...;F) 95% maximum, non-condensing 4545.45 meter (15,000 feet) maximum 56 Dell PowerConnect B-Series TI24X Hardware Installation Guide 53-1002265-01 A Power supply specifications Physical dimensions and weight TABLE 13 Physical dimensions and weight of power supplies Power Supply Dimensions Weight AC 4.06 cm (1.6 in.) (H) x 10.67 cm (2.84 lbs) (4.2 in.) (W) x 22.86...

Hardware Installation Guide
Page 67
... supplies Power Supply Input Connector Properties RPS11 Standard IEC 320 C14 type: UL/cUL 15A/250V, VDE 10A/250V Orientation: Ground pin up. FIGURE 29 AC PDU power cords (C13-C14) plug and input connector Dell PowerConnect B-Series TI24X Hardware Installation Guide 57 53-1002265-01
... supplies Power Supply Input Connector Properties RPS11 Standard IEC 320 C14 type: UL/cUL 15A/250V, VDE 10A/250V Orientation: Ground pin up. FIGURE 29 AC PDU power cords (C13-C14) plug and input connector Dell PowerConnect B-Series TI24X Hardware Installation Guide 57 53-1002265-01

Hardware Installation Guide
Page 69
Dell PowerConnect B-Series TI24X Hardware Installation Guide 59 53-1002265-01 TABLE 19 Power supply electrical specifications Description Ranges AC Input Specifications Input voltage range 100 to 240 VAC Input current 5 Amps Inrush current 70 amps peak maximum at cold start for a 1/2 cycle at any ...
Dell PowerConnect B-Series TI24X Hardware Installation Guide 59 53-1002265-01 TABLE 19 Power supply electrical specifications Description Ranges AC Input Specifications Input voltage range 100 to 240 VAC Input current 5 Amps Inrush current 70 amps peak maximum at cold start for a 1/2 cycle at any ...