P1500personalmono Laser Printer Paper - Dell P1500 Personal Mono
P1500personalmono Laser Printer Paper
View Results Below
Free Dell P1500 Personal Mono Laser Printer manuals!
Problems with Dell P1500 Personal Mono Laser Printer?
Ask a Question
Free Dell P1500 Personal Mono Laser Printer manuals!
Problems with Dell P1500 Personal Mono Laser Printer?
Ask a Question
Related Manual Pages


Similar Questions

Dell Printer C1760nw - Paper Jam
Hi,I've cleared a paper jam from the dell printer yet it still shows the paper jam error message.
Hi,I've cleared a paper jam from the dell printer yet it still shows the paper jam error message.
(Posted by saiyedsanaa 8 years ago)

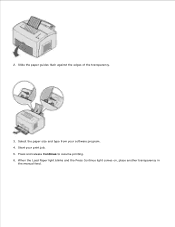
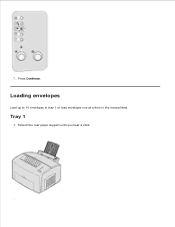
Paper
I don't seem to be able to put glossy inkjet photo paper in my machine for printing photo's
I don't seem to be able to put glossy inkjet photo paper in my machine for printing photo's
(Posted by launderlaunde 9 years ago)

Problem With Print Repeating On Paper
When we print out anything, the print repeats on theleft side of the paper, like it hasn't dried pro...
When we print out anything, the print repeats on theleft side of the paper, like it hasn't dried pro...
(Posted by info71149 11 years ago)