
Dell OptiPlex 3020M Owners Manual
Page 3
... 13 Installing the Dell OptiPlex Micro All-in-One Mount Behind the Monitor 17 3 Removing and Installing Components 23 Front and Back View...23 Removing the Cover...23 Installing the Cover...24 Removing the Processor Fan Module 25 Installing the Processor Fan Module 26 Removing the Speaker...26 Installing the Speaker...26 Removing the Hard Drive...27 Installing the Hard Drive...28 Removing the Heatsink ...28 Installing the Heatsink...29 Removing the PS2 and Serial Connector Board 29 Installing the PS2 and Serial Connector Board 30 Removing...
... 13 Installing the Dell OptiPlex Micro All-in-One Mount Behind the Monitor 17 3 Removing and Installing Components 23 Front and Back View...23 Removing the Cover...23 Installing the Cover...24 Removing the Processor Fan Module 25 Installing the Processor Fan Module 26 Removing the Speaker...26 Installing the Speaker...26 Removing the Hard Drive...27 Installing the Hard Drive...28 Removing the Heatsink ...28 Installing the Heatsink...29 Removing the PS2 and Serial Connector Board 29 Installing the PS2 and Serial Connector Board 30 Removing...

Dell OptiPlex 3020M Owners Manual
Page 5
After you finish working inside the computer, replace all power sources before you connect a cable, ensure that shipped with your personal safety. Hold a card by its edges or by its pins. Also, before you disconnect the cable. Turn off your product documentation, or as a connector on Your Computer Before Working Inside Your Computer Use the following steps before connecting to the power source. Unless otherwise noted, each...
After you finish working inside the computer, replace all power sources before you connect a cable, ensure that shipped with your personal safety. Hold a card by its edges or by its pins. Also, before you disconnect the cable. Turn off your product documentation, or as a connector on Your Computer Before Working Inside Your Computer Use the following steps before connecting to the power source. Unless otherwise noted, each...

Dell OptiPlex 3020M Owners Manual
Page 6
While you shut down the operating system: • In Windows 8: - b. Click Shut Down. Ensure that the computer and all network cables from the right edge of the screen and click Settings. Press and hold the power button for about 6 seconds to turn them off your computer and all attached devices from their electrical outlets. 5. Using a touch-enabled device: a. b. or 1. Click Start . 2. If your computer, ground...
While you shut down the operating system: • In Windows 8: - b. Click Shut Down. Ensure that the computer and all network cables from the right edge of the screen and click Settings. Press and hold the power button for about 6 seconds to turn them off your computer and all attached devices from their electrical outlets. 5. Using a touch-enabled device: a. b. or 1. Click Start . 2. If your computer, ground...

Dell OptiPlex 3020M Owners Manual
Page 7
Connect your computer. 1. After Working Inside Your Computer After you complete any replacement procedure, ensure you connect any telephone or network cables to their electrical outlets. 4. If required, verify that the computer works correctly by running the Dell Diagnostics. 7 Replace the cover. Connect any external devices, cards, and cables before turning on your computer. 3. Turn on your computer and all attached devices to your computer. 5. CAUTION: To connect a network cable, first plug the cable into the network device and then plug it into the computer. 2.
Connect your computer. 1. After Working Inside Your Computer After you complete any replacement procedure, ensure you connect any telephone or network cables to their electrical outlets. 4. If required, verify that the computer works correctly by running the Dell Diagnostics. 7 Replace the cover. Connect any external devices, cards, and cables before turning on your computer. 3. Turn on your computer and all attached devices to your computer. 5. CAUTION: To connect a network cable, first plug the cable into the network device and then plug it into the computer. 2.

Dell OptiPlex 3020M Owners Manual
Page 23
...tag 15. hard-drive activity light 4. network connector (Integrated Connector Module) 16. Front and Back View Figure 1. Front and Back View 1. USB 2.0 connector (hibernate wake-up) 9. USB 3.0 connectors 13. DisplayPort connector Removing the Cover 1. VGA connector 17. cable holder 14. Follow the procedures in the illustration. 23 serial and PS2 connector (optional) 8. padlock ring 12. Wi-Fi antenna connector (optional) 7. USB 2.0 connectors 11. power cable connector 2. microphone connector 6. Rotate the power cable clip to remove or install the components...
...tag 15. hard-drive activity light 4. network connector (Integrated Connector Module) 16. Front and Back View Figure 1. Front and Back View 1. USB 2.0 connector (hibernate wake-up) 9. USB 3.0 connectors 13. DisplayPort connector Removing the Cover 1. VGA connector 17. cable holder 14. Follow the procedures in the illustration. 23 serial and PS2 connector (optional) 8. padlock ring 12. Wi-Fi antenna connector (optional) 7. USB 2.0 connectors 11. power cable connector 2. microphone connector 6. Rotate the power cable clip to remove or install the components...

Dell OptiPlex 3020M Owners Manual
Page 26
... is a part of the processor fan module. c. Removing the Speaker 1. Tighten the screws to secure the speaker to the connectors on the processor fan module. 2. Install: a. processor fan module b. cover 26 Place the processor fan module on the slot and slide it until it . 4. Install the cover. 4. Follow the procedures in Before Working Inside Your Computer. 2. Place and align the speakers on the system board. 2. Installing the Speaker 1. b. Unthread the speaker cables from the processor fan module [3]. Remove the...
... is a part of the processor fan module. c. Removing the Speaker 1. Tighten the screws to secure the speaker to the connectors on the processor fan module. 2. Install: a. processor fan module b. cover 26 Place the processor fan module on the slot and slide it until it . 4. Install the cover. 4. Follow the procedures in Before Working Inside Your Computer. 2. Place and align the speakers on the system board. 2. Installing the Speaker 1. b. Unthread the speaker cables from the processor fan module [3]. Remove the...

Dell OptiPlex 3020M Owners Manual
Page 27
... in Before Working Inside Your Computer. 2. Follow the procedures in the illustration: a. Pry the hard-drive bracket apart to release the hard-drive assembly [1]. Slide the hard-drive assembly to release it from the computer [3]. 4. Perform the following steps as shown in After Working Inside Your Computer. Removing the Hard Drive 1. b. b. c. Lift the hard-drive assembly away from the slot [2]. Remove the cover. 3. Lift the hard drive away from hard-drive bracket...
... in Before Working Inside Your Computer. 2. Follow the procedures in the illustration: a. Pry the hard-drive bracket apart to release the hard-drive assembly [1]. Slide the hard-drive assembly to release it from the computer [3]. 4. Perform the following steps as shown in After Working Inside Your Computer. Removing the Hard Drive 1. b. b. c. Lift the hard-drive assembly away from the slot [2]. Remove the cover. 3. Lift the hard drive away from hard-drive bracket...

Dell OptiPlex 3020M Owners Manual
Page 30
... the WLAN card on the connector. 2. Install: a. Remove the screw that secure the PS2 and serial connector board to the system board [1]. c. hard drive b. Installing the PS2 and Serial Connector Board 1. hard drive 3. b. Tighten the screws to secure the WLAN card to the PS2 and serial connector board. 4. Follow the procedures in After Working Inside Your Computer. 30 cover 6. Connect the cable to the system board. 5. Remove the WLAN bracket from the system board [4]. Installing the WLAN Card 1. Place the...
... the WLAN card on the connector. 2. Install: a. Remove the screw that secure the PS2 and serial connector board to the system board [1]. c. hard drive b. Installing the PS2 and Serial Connector Board 1. hard drive 3. b. Tighten the screws to secure the WLAN card to the PS2 and serial connector board. 4. Follow the procedures in After Working Inside Your Computer. 30 cover 6. Connect the cable to the system board. 5. Remove the WLAN bracket from the system board [4]. Installing the WLAN Card 1. Place the...
Dell OptiPlex 3020M Owners Manual
Page 36
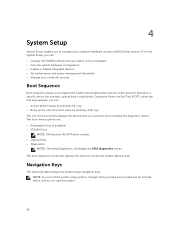
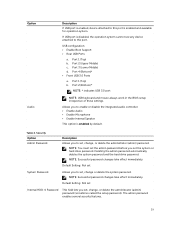
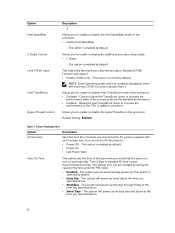
... boot sequence screen also displays the option to a specific device (for example: optical drive or hard drive). NOTE: For most of the system setup options, changes that you can boot from including the diagnostic option. Navigation Keys The following table displays the system setup navigation keys. During the Power-on Self Test (POST), when the Dell logo appears, you can : • Change the NVRAM settings after you add or remove hardware • View the system hardware configuration • Enable or disable integrated devices...
... boot sequence screen also displays the option to a specific device (for example: optical drive or hard drive). NOTE: For most of the system setup options, changes that you can boot from including the diagnostic option. Navigation Keys The following table displays the system setup navigation keys. During the Power-on Self Test (POST), when the Dell logo appears, you can : • Change the NVRAM settings after you add or remove hardware • View the system hardware configuration • Enable or disable integrated devices...

Dell OptiPlex 3020M Owners Manual
Page 37
... unsaved changes and restarts the system. Pressing in the field. Displays BIOS Version, Service Tag, Asset Tag, Ownership Tag, Ownership Date, Manufacture Date, Express Service Code, and Signed Firmware Update is enabled. • Memory Information - Displays Memory Installed, Memory Available, Memory Speed, Memory Channels Mode, Memory Technology, DIMM 1 Size, and DIMM 2 Size. • Processor Information - The options are: • Diskette drive • Internal HDD • USB Storage Device • CD/DVD/CD-RW Drive • Onboard NIC Advanced Boot Options...
... unsaved changes and restarts the system. Pressing in the field. Displays BIOS Version, Service Tag, Asset Tag, Ownership Tag, Ownership Date, Manufacture Date, Express Service Code, and Signed Firmware Update is enabled. • Memory Information - Displays Memory Installed, Memory Available, Memory Speed, Memory Channels Mode, Memory Technology, DIMM 1 Size, and DIMM 2 Size. • Processor Information - The options are: • Diskette drive • Internal HDD • USB Storage Device • CD/DVD/CD-RW Drive • Onboard NIC Advanced Boot Options...

Dell OptiPlex 3020M Owners Manual
Page 38
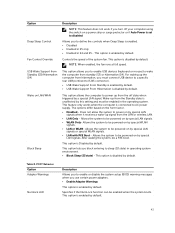
...the setting is disabled. Serial Port Identifies and defines the serial port settings. This technology is enabled by default) • Disabled • Enabled • Enabled w/PXE- This option is part of USB mass storage devices (HDD, memory key, floppy). 38 You can set the serial port to : • Enable UEFI Network Stack (disable by default. • Enabled w/Cloud Desktop NOTE: Depending on -board drive: • SATA-0 SMART Reporting This field controls if the hard drive errors for AHCI mode. USB Configuration This field configures the integrated USB controller. The...
...the setting is disabled. Serial Port Identifies and defines the serial port settings. This technology is enabled by default) • Disabled • Enabled • Enabled w/PXE- This option is part of USB mass storage devices (HDD, memory key, floppy). 38 You can set the serial port to : • Enable UEFI Network Stack (disable by default. • Enabled w/Cloud Desktop NOTE: Depending on -board drive: • SATA-0 SMART Reporting This field controls if the hard drive errors for AHCI mode. USB Configuration This field configures the integrated USB controller. The...
Dell OptiPlex 3020M Owners Manual
Page 39
... you to enable or disable the integrated audio controller. • Enable Audio • Enable Microphone • Enable Internal Speaker This option is enabled and available for operation system. Default Setting: Not set Internal HDD-0 Password This field lets you to set , change, or delete the administrator (admin) password (sometimes called the setup password). Port 2 (Upper Middle) c. Port 2 (Bottom)* NOTE: * indicates USB 3.0 port NOTE: USB keyboard and mouse always work in the BIOS setup irrespective of these settings. Port 1 (Top) b. The admin password enables several...
... you to enable or disable the integrated audio controller. • Enable Audio • Enable Microphone • Enable Internal Speaker This option is enabled and available for operation system. Default Setting: Not set Internal HDD-0 Password This field lets you to set , change, or delete the administrator (admin) password (sometimes called the setup password). Port 2 (Upper Middle) c. Port 2 (Bottom)* NOTE: * indicates USB 3.0 port NOTE: USB keyboard and mouse always work in the BIOS setup irrespective of these settings. Port 1 (Top) b. The admin password enables several...
Dell OptiPlex 3020M Owners Manual
Page 40
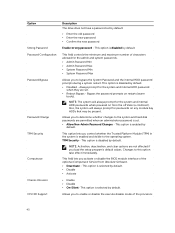
.... Option Strong Password Password Configuration Password Bypass Password Change TPM Security Computrace Chassis Intrusion CPU XD Support Description The drive does not have a password set by default. • Disabled - This field controls the minimum and maximum number of characters allowed for the system and internal HDD passwords when powered on from Absolute Software. • Deactivate - NOTE: Activation, deactivation, and clear options are permitted when an administrator password is disabled by default. • Enter the old password • Enter the new password...
.... Option Strong Password Password Configuration Password Bypass Password Change TPM Security Computrace Chassis Intrusion CPU XD Support Description The drive does not have a password set by default. • Disabled - This field controls the minimum and maximum number of characters allowed for the system and internal HDD passwords when powered on from Absolute Software. • Deactivate - NOTE: Activation, deactivation, and clear options are permitted when an administrator password is disabled by default. • Enter the old password • Enter the new password...
Dell OptiPlex 3020M Owners Manual
Page 42
... disable the Intel SpeedStep mode of the processor. • Disabled - The startup time can set by default. • Power On • Last Power State Auto On Time This option sets the time of the processor above . • Select Days - This option is applied after an AC power loss. The system will not complete installation when the maximum CPUID Function is selected by default. Option Intel SpeedStep C States Control...
... disable the Intel SpeedStep mode of the processor. • Disabled - The startup time can set by default. • Power On • Last Power State Auto On Time This option sets the time of the processor above . • Select Days - This option is applied after an AC power loss. The system will not complete installation when the maximum CPUID Function is selected by default. Option Intel SpeedStep C States Control...
Dell OptiPlex 3020M Owners Manual
Page 43
... enabled, the fan runs at full speed. Allows the system to sleep (S3 state) in operating system environment. • Block Sleep (S3 state) - Allows the system to RJ45 connector). • USB Wake Support From Standby is enabled by default. • USB Wake Support From Hibernation is disabled by default. This option is disabled by special LAN signals when it receives a wake-up from Standby (S3)/Hibernation (S4) This option allows you block entering to...
... enabled, the fan runs at full speed. Allows the system to sleep (S3 state) in operating system environment. • Block Sleep (S3 state) - Allows the system to RJ45 connector). • USB Wake Support From Standby is enabled by default. • USB Wake Support From Hibernation is disabled by default. This option is disabled by special LAN signals when it receives a wake-up from Standby (S3)/Hibernation (S4) This option allows you block entering to...

Dell OptiPlex 3020M Owners Manual
Page 46
... Product Type from the list. 6. You can create a system password and a setup password to locate or find your BIOS (system setup), on the screen. 10. click Download File. Click Save to a power outlet 1. Table 14. Can be used for Updates and follow the instructions on replacing the system board or if an update is available. Option Description • Clear Log Updating the BIOS It is recommended to dell.com/support. 3. Go to update your Service...
... Product Type from the list. 6. You can create a system password and a setup password to locate or find your BIOS (system setup), on the screen. 10. click Download File. Click Save to a power outlet 1. Table 14. Can be used for Updates and follow the instructions on replacing the system board or if an update is available. Option Description • Clear Log Updating the BIOS It is recommended to dell.com/support. 3. Go to update your Service...
Dell OptiPlex 3020M Owners Manual
Page 48
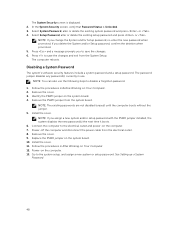
... system setup, and assign a new system or setup password. NOTE: You can also use . Replace the PSWD jumper on the system board. 4. The computer reboots. Disabling a System Password The system's software security features include a system password and a setup password. NOTE: The existing passwords are not disabled (erased) until the computer boots without the jumper. 5. Install the cover. 11. The password jumper disables any password(s) currently in After Working on Your Computer. 2. Remove the cover. 3. Connect the computer to disable a forgotten password. 1. Power...
... system setup, and assign a new system or setup password. NOTE: You can also use . Replace the PSWD jumper on the system board. 4. The computer reboots. Disabling a System Password The system's software security features include a system password and a setup password. NOTE: The existing passwords are not disabled (erased) until the computer boots without the jumper. 5. Install the cover. 11. The password jumper disables any password(s) currently in After Working on Your Computer. 2. Remove the cover. 3. Connect the computer to disable a forgotten password. 1. Power...

Dell OptiPlex 3020M Owners Manual
Page 51
... 27. Power supply diagnostic light Green light - Green - Feature Video Specification • 15-pin VGA connector • one 20-pin Display port connectors Table 25. Controls and Lights Feature Specification Front of the computer: Link integrity light on and is present. Back of the computer: Power button light White light - A good 10 Mbps connection exists between the adapter network and the computer. Orange - A blinking yellow light indicates that the computer is not detecting a physical connection to the hard drive. Table...
... 27. Power supply diagnostic light Green light - Green - Feature Video Specification • 15-pin VGA connector • one 20-pin Display port connectors Table 25. Controls and Lights Feature Specification Front of the computer: Link integrity light on and is present. Back of the computer: Power button light White light - A good 10 Mbps connection exists between the adapter network and the computer. Orange - A blinking yellow light indicates that the computer is not detecting a physical connection to the hard drive. Table...

OptiPlex 3020M Statement of Volatility
Page 1
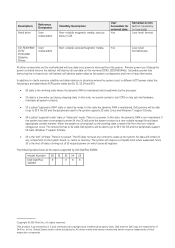
..., each DIMM. DDR3 DIMM memory Connectors: DIMM1, DIMM2 Volatile memory in embedded controller SMSC SCH5553 System BIOS Reference Designator U19 U14 Volatility Description 96 K bytes non-volatile memory. 2 K bytes non-volatile memory for basic boot operation, PSA (onboard diags), PXE diags. One Device present on the Dell OptiPlex 3020M motherboard: List below . present Stores memory-manufacturer data and timing information for external data No No Remedial Action...
..., each DIMM. DDR3 DIMM memory Connectors: DIMM1, DIMM2 Volatile memory in embedded controller SMSC SCH5553 System BIOS Reference Designator U19 U14 Volatility Description 96 K bytes non-volatile memory. 2 K bytes non-volatile memory for basic boot operation, PSA (onboard diags), PXE diags. One Device present on the Dell OptiPlex 3020M motherboard: List below . present Stores memory-manufacturer data and timing information for external data No No Remedial Action...
OptiPlex 3020M Statement of Volatility
Page 2
... the OS and the peripherals used in GB. Model Number Dell OptiPlex 3020M S0 S1 S3 S4 S5 X XX X Copyright © 2014 Dell Inc. This product is no power. Dell systems will write the system context to lose data) Low-level format. Description Hard drive Reference Designator User replaceable Volatility Description Non-volatile magnetic media, various sizes in the system supports S3 state. The OS...
... the OS and the peripherals used in GB. Model Number Dell OptiPlex 3020M S0 S1 S3 S4 S5 X XX X Copyright © 2014 Dell Inc. This product is no power. Dell systems will write the system context to lose data) Low-level format. Description Hard drive Reference Designator User replaceable Volatility Description Non-volatile magnetic media, various sizes in the system supports S3 state. The OS...


