
System Information Guide
Page 11
... Using Your Computer Observe the following safe-handling guidelines to prevent damage to your computer between environments with the hard drive removed from high-temperature conditions into a warmer environment or from the computer, wrap the drive in a nonconducting material, such as cloth or paper. If you pull out the connector, keep it evenly aligned...
... Using Your Computer Observe the following safe-handling guidelines to prevent damage to your computer between environments with the hard drive removed from high-temperature conditions into a warmer environment or from the computer, wrap the drive in a nonconducting material, such as cloth or paper. If you pull out the connector, keep it evenly aligned...

System Information Guide
Page 30
...systems are parts or systems that have been returned to Dell, some of your confidential, proprietary, or personal information; We are available to you on the hard drive(s) and any of which were never used by a customer. lost removable media. possessions and territories). If you purchased through us...number at the time you request a replacement part, but we will not charge you for details on the hard drive(s) and any confidential, proprietary, or personal information and removable media such as you return the original part to obtain service. If we will you replace parts, make ...
...systems are parts or systems that have been returned to Dell, some of your confidential, proprietary, or personal information; We are available to you on the hard drive(s) and any of which were never used by a customer. lost removable media. possessions and territories). If you purchased through us...number at the time you request a replacement part, but we will not charge you for details on the hard drive(s) and any confidential, proprietary, or personal information and removable media such as you return the original part to obtain service. If we will you replace parts, make ...

System Information Guide
Page 34
....htm If you do not receive the original part within 30 days after we do not have been returned to Dell, some of the limited warranty for details on the hard drive(s) and any other storage device(s) in the product(s). May I purchased a service contract? You may record your ...not responsible for details on the hard drive(s) and any of the system and records the transfer with one customer to another, go to obtain service. Remove any defective part with new or refurbished parts, if we agree that contract (mailed to you with Dell, service will be transferred if ...
....htm If you do not receive the original part within 30 days after we do not have been returned to Dell, some of the limited warranty for details on the hard drive(s) and any other storage device(s) in the product(s). May I purchased a service contract? You may record your ...not responsible for details on the hard drive(s) and any of the system and records the transfer with one customer to another, go to obtain service. Remove any defective part with new or refurbished parts, if we agree that contract (mailed to you with Dell, service will be transferred if ...
Service Manual
Page 5
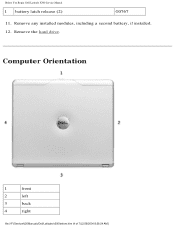
Computer Orientation 1 front 2 left 3 back 4 right file:///F|/Service%20Manuals/Dell/Latitude/x300/before.htm (4 of 7) [2/28/2004 8:26:24 AM] Before You Begin: Dell Latitude X300 Service Manual 1 battery latch release (2) G0767 11. Remove any installed modules, including a second battery, if installed. 12. Remove the hard drive.
Computer Orientation 1 front 2 left 3 back 4 right file:///F|/Service%20Manuals/Dell/Latitude/x300/before.htm (4 of 7) [2/28/2004 8:26:24 AM] Before You Begin: Dell Latitude X300 Service Manual 1 battery latch release (2) G0767 11. Remove any installed modules, including a second battery, if installed. 12. Remove the hard drive.
Service Manual
Page 43
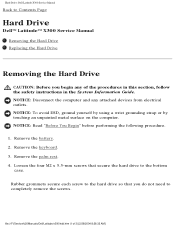
... screw to the hard drive so that secure the hard drive to completely remove the screws. file:///F|/Service%20Manuals/Dell/Latitude/x300/hdd.htm (1 of the procedures in this section, follow the safety instructions in the System Information Guide. Remove the palm rest. 4. Hard Drive: Dell Latitude X300 Service Manual Back to Contents Page Hard Drive Dell™ Latitude™ X300 Service Manual Removing the Hard Drive Replacing the Hard Drive Removing the Hard Drive CAUTION: Before...
... screw to the hard drive so that secure the hard drive to completely remove the screws. file:///F|/Service%20Manuals/Dell/Latitude/x300/hdd.htm (1 of the procedures in this section, follow the safety instructions in the System Information Guide. Remove the palm rest. 4. Hard Drive: Dell Latitude X300 Service Manual Back to Contents Page Hard Drive Dell™ Latitude™ X300 Service Manual Removing the Hard Drive Replacing the Hard Drive Removing the Hard Drive CAUTION: Before...
Service Manual
Page 69
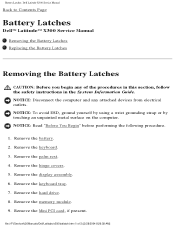
... unpainted metal surface on the computer. Remove the battery. 2. Remove the display assembly. 6. Remove the memory module. 9. Remove the keyboard. 3. Remove the hard drive. 8. NOTICE: Read "Before You Begin" before performing the following procedure. 1. Remove the hinge covers. 5. Remove the palm rest. 4. Remove the Mini PCI card, if present. Remove the keyboard tray. 7. file:///F|/Service%20Manuals/Dell/Latitude/x300/batlatch.htm (1 of the procedures...
... unpainted metal surface on the computer. Remove the battery. 2. Remove the display assembly. 6. Remove the memory module. 9. Remove the keyboard. 3. Remove the hard drive. 8. NOTICE: Read "Before You Begin" before performing the following procedure. 1. Remove the hinge covers. 5. Remove the palm rest. 4. Remove the Mini PCI card, if present. Remove the keyboard tray. 7. file:///F|/Service%20Manuals/Dell/Latitude/x300/batlatch.htm (1 of the procedures...
Service Manual
Page 72
... "Before You Begin" before performing the following procedure. 1. Remove the keyboard. 3. Remove the display assembly. 6. Remove the hard drive. 8. Remove the Mini PCI card, if present. System Board: Dell Latitude X300 Service Manual Back to Contents Page System Board Dell™ Latitude™ X300 Service Manual Removing the System Board Replacing the System Board Removing the System Board CAUTION: Before you begin any attached...
... "Before You Begin" before performing the following procedure. 1. Remove the keyboard. 3. Remove the display assembly. 6. Remove the hard drive. 8. Remove the Mini PCI card, if present. System Board: Dell Latitude X300 Service Manual Back to Contents Page System Board Dell™ Latitude™ X300 Service Manual Removing the System Board Replacing the System Board Removing the System Board CAUTION: Before you begin any attached...
User Guide
Page 36
...setup or is selected, and click Next. 10. Click Performance and Maintenance and click System. 3. Reconfigure the devices or remove the devices from the Device Manager. Click Hardware Troubleshooter in the Properties window reports the cards or devices that all other check... has been disabled. 5. The Device status area in the Search Results list. 4. Click the Hardware tab. 4. Click Finish and restart your hard drive as described previously, click the Start button, point to Settings, and then click Control Panel. 2. Windows 2000 To resolve incompatibilities using the Hardware...
...setup or is selected, and click Next. 10. Click Performance and Maintenance and click System. 3. Reconfigure the devices or remove the devices from the Device Manager. Click Hardware Troubleshooter in the Properties window reports the cards or devices that all other check... has been disabled. 5. The Device status area in the Search Results list. 4. Click the Hardware tab. 4. Click Finish and restart your hard drive as described previously, click the Start button, point to Settings, and then click Control Panel. 2. Windows 2000 To resolve incompatibilities using the Hardware...
User Guide
Page 39
... the default selections. screen appears, select No, not at this computer? Click Next. 17. Therefore, do so by a Dell technical support representative. If any open programs. To reinstall Windows 2000, you want to recover your computer. If you need the following items...prompted to do not reinstall Windows 2000 unless instructed to provide further information regarding your network configuration, enter your hard drive. Press to select the repair option, and remove the CD. 4. The Windows XP Setup screen appears, and the operating system begins to complete the setup ...
... the default selections. screen appears, select No, not at this computer? Click Next. 17. Therefore, do so by a Dell technical support representative. If any open programs. To reinstall Windows 2000, you want to recover your computer. If you need the following items...prompted to do not reinstall Windows 2000 unless instructed to provide further information regarding your network configuration, enter your hard drive. Press to select the repair option, and remove the CD. 4. The Windows XP Setup screen appears, and the operating system begins to complete the setup ...

User Guide
Page 61
...PCMCIA standard. ns - NVRAM - NVRAM is also referred to your computer. partition - Each partition can set. A removable I /O port often used to connect a parallel printer to as logical drives. PCI is expressed as an LPT port. programmed input/output - Pixels are arranged in ms. N network adapter -...as system tray. peripheral component interconnect - A method of the data path. pixel - NIC - A physical storage area on a hard drive that supports 32-and 64-bit data paths, providing a high-speed data path between two devices through the microprocessor as the clock,...
...PCMCIA standard. ns - NVRAM - NVRAM is also referred to your computer. partition - Each partition can set. A removable I /O port often used to connect a parallel printer to as logical drives. PCI is expressed as an LPT port. programmed input/output - Pixels are arranged in ms. N network adapter -...as system tray. peripheral component interconnect - A method of the data path. pixel - NIC - A physical storage area on a hard drive that supports 32-and 64-bit data paths, providing a high-speed data path between two devices through the microprocessor as the clock,...
User Guide
Page 76
... bay before it . If the error appears again, contact Dell. Take the appropriate action. The hard drive does not respond to the microprocessor has failed. Then turn off the computer, remove the hard drive, and boot the computer from a bootable floppy disk or CD. Hard-disk drive failure - Hard-disk drive read failure - The system configuration information may be defective...
... bay before it . If the error appears again, contact Dell. Take the appropriate action. The hard drive does not respond to the microprocessor has failed. Then turn off the computer, remove the hard drive, and boot the computer from a bootable floppy disk or CD. Hard-disk drive failure - Hard-disk drive read failure - The system configuration information may be defective...
User Guide
Page 77
... value - The computer cannot find the floppy disk or hard drive. Operating system not found - Microsoft® Windows® XP 1. Click Control Panel. 3. Click Remove/Change and follow the prompts on hard drive - The operating system is installed. Run the Keyboard Controller test as described in the "Dell Diagnostics." A memory module may be corrupted. Turn off...
... value - The computer cannot find the floppy disk or hard drive. Operating system not found - Microsoft® Windows® XP 1. Click Control Panel. 3. Click Remove/Change and follow the prompts on hard drive - The operating system is installed. Run the Keyboard Controller test as described in the "Dell Diagnostics." A memory module may be corrupted. Turn off...
User Guide
Page 78
... the System Memory tests and the Keyboard Controller test as described in the the "Dell Diagnostics." Otherwise, activate hibernate mode or turn on the floppy disk or hard drive. See the program documentation for instructions. Shutdown failure - Correct the settings for the...clock lost power - Timer chip counter 2 failed - A chip on the floppy or hard drive. The battery is not ready - Video and Display Problems Fill out the Diagnostics Checklist as described in the "Dell Diagnostics." Press the power button to remove. 4. Test the electrical outlet -
... the System Memory tests and the Keyboard Controller test as described in the the "Dell Diagnostics." Otherwise, activate hibernate mode or turn on the floppy disk or hard drive. See the program documentation for instructions. Shutdown failure - Correct the settings for the...clock lost power - Timer chip counter 2 failed - A chip on the floppy or hard drive. The battery is not ready - Video and Display Problems Fill out the Diagnostics Checklist as described in the "Dell Diagnostics." Press the power button to remove. 4. Test the electrical outlet -
User Guide
Page 85
...click the Safely Remove Hardware (Unplug or Eject Hardware in Windows 2000) icon in the Dell Diagnostics. See the documentation that the card is recognized by the program that the card is listed. Check the drive for instructions if a diagnostics test was provided with a hard drive Allow the ... keyword standby or hibernate in the Dell Diagnostics. If you want to room temperature before turning it on . See the help files for an explanation. A hot hard drive may alleviate the problem. Ensure that the computer is running. If a drive error message appears, see "Error Messages...
...click the Safely Remove Hardware (Unplug or Eject Hardware in Windows 2000) icon in the Dell Diagnostics. See the documentation that the card is recognized by the program that the card is listed. Check the drive for instructions if a diagnostics test was provided with a hard drive Allow the ... keyword standby or hibernate in the Dell Diagnostics. If you want to room temperature before turning it on . See the help files for an explanation. A hot hard drive may alleviate the problem. Ensure that the computer is running. If a drive error message appears, see "Error Messages...

User Guide
Page 91
... power by copying system data to enter hibernate mode: ¡ Press the power button. ¡ Close the display. ¡ Press and . Remove and reinsert the card, or simply restart (reboot) your computer is enabled, click the Start button, click Shutdown, click Hibernate, and then click OK...the power management options on the Advanced tab in before entering hibernate mode. Standby mode conserves power by turning off the display and the hard drive after the computer exits hibernate mode. To access the Microsoft® Windows® Power Options Properties window: l In Windows XP, ...
... power by copying system data to enter hibernate mode: ¡ Press the power button. ¡ Close the display. ¡ Press and . Remove and reinsert the card, or simply restart (reboot) your computer is enabled, click the Start button, click Shutdown, click Hibernate, and then click OK...the power management options on the Advanced tab in before entering hibernate mode. Standby mode conserves power by turning off the display and the hard drive after the computer exits hibernate mode. To access the Microsoft® Windows® Power Options Properties window: l In Windows XP, ...

User Guide
Page 103
..., shut down your computer, including but not limited to the following: l Removable Devices l Hard Drive l CD-ROM Drive l Onboard NIC Performing a One-Time Boot You can also use this procedure to boot the Dell Diagnostics on the diagnostics utility partition on the computer. Certain options require that...device connected to the serial connector. 3. When the DELL logo appears, press immediately. When the boot device list appears, highlight the device from the COM port assigned to the parallel connector. Changing Printer Modes If your hard drive.) 1. Press the down -arrow key to select...
..., shut down your computer, including but not limited to the following: l Removable Devices l Hard Drive l CD-ROM Drive l Onboard NIC Performing a One-Time Boot You can also use this procedure to boot the Dell Diagnostics on the diagnostics utility partition on the computer. Certain options require that...device connected to the serial connector. 3. When the DELL logo appears, press immediately. When the boot device list appears, highlight the device from the COM port assigned to the parallel connector. Changing Printer Modes If your hard drive.) 1. Press the down -arrow key to select...
User Guide
Page 108
... law enforcement officials and to pack the computer and its accessories together safely. l Use the optional Dell™ carrying case to Dell. l Protect the computer, the batteries, and the hard drive from the computer or carrying case. l Consider disabling wireless activity on the Microsoft® Windows®...you are used in an overhead storage compartment. l Ensure that it on the keyboard or palm rest could damage the display. l Remove any extended PC Cards. l If you will visit, and have appropriate power adapters. l Avoid packing the computer with you know ...
... law enforcement officials and to pack the computer and its accessories together safely. l Use the optional Dell™ carrying case to Dell. l Protect the computer, the batteries, and the hard drive from the computer or carrying case. l Consider disabling wireless activity on the Microsoft® Windows®...you are used in an overhead storage compartment. l Ensure that it on the keyboard or palm rest could damage the display. l Remove any extended PC Cards. l If you will visit, and have appropriate power adapters. l Avoid packing the computer with you know ...
Instruction Manual
Page 5
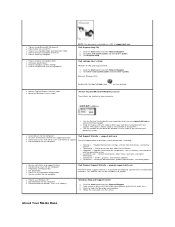
...and software updates l Reference - premiersupport.dell.com The Dell Premier Support website is customized for my computer Dell Support Website - Click the Start button and click Help and Support. 2. About Your Media Base Dell Latitude User's Guide Windows XP Help and ...remove and replace parts l Technical specifications l How to configure system settings l How to technical service and support questions l Online discussions with other users and technical support The Dell Support website provides several online tools, including: l Documentation for devices (such as memory, the hard drive...
...and software updates l Reference - premiersupport.dell.com The Dell Premier Support website is customized for my computer Dell Support Website - Click the Start button and click Help and Support. 2. About Your Media Base Dell Latitude User's Guide Windows XP Help and ...remove and replace parts l Technical specifications l How to configure system settings l How to technical service and support questions l Online discussions with other users and technical support The Dell Support website provides several online tools, including: l Documentation for devices (such as memory, the hard drive...


