System Information Guide
Page 12
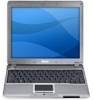
...Apply the water to moisture can damage the display. Do not use a commercial window cleaner to reduce the potential for the appropriate contact information). Remove moisture from the module bay. 10 System Infor mation Guide Also, disconnect any attached devices. 2 Disconnect your computer ...to the system board. 1 Shut down your computer.This portable computer is not operating properly, contact Dell (see the User's Guide for personal injury or shock. www.dell.com | support.dell.com When Using Your Computer (continued) • Clean the display with a soft, clean cloth and...
...Apply the water to moisture can damage the display. Do not use a commercial window cleaner to reduce the potential for the appropriate contact information). Remove moisture from the module bay. 10 System Infor mation Guide Also, disconnect any attached devices. 2 Disconnect your computer ...to the system board. 1 Shut down your computer.This portable computer is not operating properly, contact Dell (see the User's Guide for personal injury or shock. www.dell.com | support.dell.com When Using Your Computer (continued) • Clean the display with a soft, clean cloth and...
System Information Guide
Page 25
...Assessment, a series of initial tests of tracing the problem quickly. This test typically takes 10 to 20 minutes and requires no diagnostics utility partition has been found, run the Dell Diagnostics from the diagnostics utility partition on to answer questions periodically. Tests a specific device.... System Infor mation Guide 23 NOTE: If you see the Windows desktop. Run Express Test first to increase the ...
...Assessment, a series of initial tests of tracing the problem quickly. This test typically takes 10 to 20 minutes and requires no diagnostics utility partition has been found, run the Dell Diagnostics from the diagnostics utility partition on to answer questions periodically. Tests a specific device.... System Infor mation Guide 23 NOTE: If you see the Windows desktop. Run Express Test first to increase the ...
Service Manual
Page 23
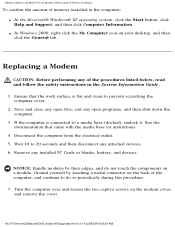
...any attached devices. 6. If the computer is flat and clean to do so periodically during this procedure. 7. file:///F|/Service%20Manuals/Dell/Latitude/x300/upgrades.htm (6 of 14) [2/28/2004 8:26:29 AM] Ensure that came with the media base for instructions. 4. ...Windows 2000, right-click the My Computer icon on the modem cover, and remove the cover. Wait 10 to a media base (docked), undock it. Remove any open programs, and then shut down the computer. 3. Disconnect the computer from the electrical outlet. 5. Memory, Modem, and Mini PCI Card Modules: Dell Latitude X300...
...any attached devices. 6. If the computer is flat and clean to do so periodically during this procedure. 7. file:///F|/Service%20Manuals/Dell/Latitude/x300/upgrades.htm (6 of 14) [2/28/2004 8:26:29 AM] Ensure that came with the media base for instructions. 4. ...Windows 2000, right-click the My Computer icon on the modem cover, and remove the cover. Wait 10 to a media base (docked), undock it. Remove any open programs, and then shut down the computer. 3. Disconnect the computer from the electrical outlet. 5. Memory, Modem, and Mini PCI Card Modules: Dell Latitude X300...
User Guide
Page 35
... information about the driver or utility that you run the CD, it does not, start Windows Explorer, click your computer. 6. Reinstalling Drivers and Utilities NOTICE: The Dell Support website at support.dell.com and your preferred language for the driver or utility (if available). Click the Drivers tab...hard drive as the Resource CD). 1. The CD automatically scans your computer. 5. Click the link of the appropriate driver appears, click Next. 10. Click the Hardware tab and click Device Manager. 4. Click System. 4. If it might not work correctly. Click Browse and browse to the...
... information about the driver or utility that you run the CD, it does not, start Windows Explorer, click your computer. 6. Reinstalling Drivers and Utilities NOTICE: The Dell Support website at support.dell.com and your preferred language for the driver or utility (if available). Click the Drivers tab...hard drive as the Resource CD). 1. The CD automatically scans your computer. 5. Click the link of the appropriate driver appears, click Next. 10. Click the Hardware tab and click Device Manager. 4. Click System. 4. If it might not work correctly. Click Browse and browse to the...
User Guide
Page 36
...Resolving Software and Hardware Incompatibilities If a device is either not detected during the operating system setup or is selected, and click Next. 10. In the Hardware Troubleshooter list, click I need to be reconfigured. 6. Double-click the System icon. 3. Click Performance and ...7. Double-click the name of the appropriate driver appears, click Next. 13. Ensure that need to your computer. Microsoft® Windows® XP To resolve incompatibilities using Device Manager: 1. Click Device Manager. After extracting the driver files to resolve a hardware conflict...
...Resolving Software and Hardware Incompatibilities If a device is either not detected during the operating system setup or is selected, and click Next. 10. In the Hardware Troubleshooter list, click I need to be reconfigured. 6. Double-click the System icon. 3. Click Performance and ...7. Double-click the name of the appropriate driver appears, click Next. 13. Ensure that need to your computer. Microsoft® Windows® XP To resolve incompatibilities using Device Manager: 1. Click Device Manager. After extracting the driver files to resolve a hardware conflict...
User Guide
Page 39
... Settings screen appears, click Typical and click Next. 12. If you are reinstalling Windows XP Professional and you need the following items: l Dell™ Operating System CD l Dell Drivers and Utilities CD NOTE: The Drivers and Utilities CD contains drivers that were ...enter the requested information and click Next. 10. Windows XP installs the operating system components and configures the computer. Reinstalling Microsoft Windows 2000 NOTICE: The Operating System CD provides options for your computer has a RAID controller. Windows XP Setup 1. When the Regional and Language...
... Settings screen appears, click Typical and click Next. 12. If you are reinstalling Windows XP Professional and you need the following items: l Dell™ Operating System CD l Dell Drivers and Utilities CD NOTE: The Drivers and Utilities CD contains drivers that were ...enter the requested information and click Next. 10. Windows XP installs the operating system components and configures the computer. Reinstalling Microsoft Windows 2000 NOTICE: The Operating System CD provides options for your computer has a RAID controller. Windows XP Setup 1. When the Regional and Language...

User Guide
Page 40
...window, and click Next. 15. The computer automatically restarts. 19. If the operating system logo appears, wait until you chose. 10...Windows 2000 Professional Setup window appears, press the arrow keys to select the Windows 2000 partition option that you want Windows 2000 to boot from the drive and click Finish. Windows... Password window appears, enter a name for the partition option you see the Windows desktop,... Next. 16. 3. When the Windows 2000 Setup window appears, ensure that To setup Win2000... window, and click Next. When the Completing the Windows 2000 Setup Wizard window ...
...window, and click Next. 15. The computer automatically restarts. 19. If the operating system logo appears, wait until you chose. 10...Windows 2000 Professional Setup window appears, press the arrow keys to select the Windows 2000 partition option that you want Windows 2000 to boot from the drive and click Finish. Windows... Password window appears, enter a name for the partition option you see the Windows desktop,... Next. 16. 3. When the Windows 2000 Setup window appears, ensure that To setup Win2000... window, and click Next. When the Completing the Windows 2000 Setup Wizard window ...
User Guide
Page 71
...create a bootable floppy disk. 7. The computer displays the new or modified asset tag and the Service Tag. 10. When the computer prompts you to verify the owner tag, type y. Click Dell Portables Asset Tag, click Extract, and then click Setup. 6. b. If the operating system logo appears, wait...you to verify the asset tag, type y. You can also use the bootable floppy disk to exit the Asset Tag utility. When the Welcome Dell System Owner window appears, click Next. 4. For example, type the following command line and press : asset /o ABC Company 3. When the computer prompts you ...
...create a bootable floppy disk. 7. The computer displays the new or modified asset tag and the Service Tag. 10. When the computer prompts you to verify the owner tag, type y. Click Dell Portables Asset Tag, click Extract, and then click Setup. 6. b. If the operating system logo appears, wait...you to verify the asset tag, type y. You can also use the bootable floppy disk to exit the Asset Tag utility. When the Welcome Dell System Owner window appears, click Next. 4. For example, type the following command line and press : asset /o ABC Company 3. When the computer prompts you ...

User Guide
Page 81
... company or network administrator for a dial tone. Check the telephone line - Turn off call waiting, dial: is 3 m (10 ft) or more information. Windows 2000 1. Click the Start button, point to the telephone wall jack - Run the printer self-test. Contact the printer manufacturer....port(s): setting is listed, right-click the printer icon. 5. NOTICE: Modem and network connectors look similar. In the Edit Location window, ensure that the telephone line is probably defective. Contact your telephone directory for instructions on deactivating this feature. Click Control Panel. ...
... company or network administrator for a dial tone. Check the telephone line - Turn off call waiting, dial: is 3 m (10 ft) or more information. Windows 2000 1. Click the Start button, point to the telephone wall jack - Run the printer self-test. Contact the printer manufacturer....port(s): setting is listed, right-click the printer icon. 5. NOTICE: Modem and network connectors look similar. In the Edit Location window, ensure that the telephone line is probably defective. Contact your telephone directory for instructions on deactivating this feature. Click Control Panel. ...
User Guide
Page 86
...to the network again. If the status light is off, the computer is solid green, at 10 Mbps, Amber at 100 Mbps, and yellow at 1 Gps connection speed. Verify that your network ...the Applications tab, and then select the program that may help you complete these checks. Windows XP The computer restarts. Many software manufacturers maintain websites with information that is firmly connected to... keystroke or a proper shutdown, press the power button until the computer turns off - Contact Dell. Ensure that the network cable connector is no longer responding. 3. The status light is not ...
...to the network again. If the status light is off, the computer is solid green, at 10 Mbps, Amber at 100 Mbps, and yellow at 1 Gps connection speed. Verify that your network ...the Applications tab, and then select the program that may help you complete these checks. Windows XP The computer restarts. Many software manufacturers maintain websites with information that is firmly connected to... keystroke or a proper shutdown, press the power button until the computer turns off - Contact Dell. Ensure that the network cable connector is no longer responding. 3. The status light is not ...

User Guide
Page 87
...continuing with the rest of this procedure only after you were not able to perform a proper Windows shutdown. Turn off any open files, exit any attached external devices, and disconnect them from.... 12. If all around it. Remove any attached external devices, and disconnect them in the Dell Diagnostics. If Your Computer Gets Wet CAUTION: Perform this procedure. 9. Use the utmost caution when...the electrical outlet. Let the computer dry for information on the back of the computer. 10. If You Drop or Damage Your Computer 1. Ground yourself by touching one of the ...
...continuing with the rest of this procedure only after you were not able to perform a proper Windows shutdown. Turn off any open files, exit any attached external devices, and disconnect them from.... 12. If all around it. Remove any attached external devices, and disconnect them in the Dell Diagnostics. If Your Computer Gets Wet CAUTION: Perform this procedure. 9. Use the utmost caution when...the electrical outlet. Let the computer dry for information on the back of the computer. 10. If You Drop or Damage Your Computer 1. Ground yourself by touching one of the ...
User Guide
Page 90
.... You must set the power scheme through QuickSet (not Microsoft® Windows®) for the alarms. For example, you can set the low-battery...161; Enter standby mode. ¡ Enter hibernate mode. ¡ Shut down Windows and turn off the computer. NOTE: Brightness shortcut keys only affect the display on...; Enter standby mode. ¡ Enter hibernate mode. ¡ Shut down Microsoft Windows and turn off the computer. ¡ Prompt a user for each scheme in ...to AC power, and you can set the critical-battery alarm to 10% to change the brightness level, the Brightness Meter appears, but ...
.... You must set the power scheme through QuickSet (not Microsoft® Windows®) for the alarms. For example, you can set the low-battery...161; Enter standby mode. ¡ Enter hibernate mode. ¡ Shut down Windows and turn off the computer. NOTE: Brightness shortcut keys only affect the display on...; Enter standby mode. ¡ Enter hibernate mode. ¡ Shut down Microsoft Windows and turn off the computer. ¡ Prompt a user for each scheme in ...to AC power, and you can set the critical-battery alarm to 10% to change the brightness level, the Brightness Meter appears, but ...
User Guide
Page 97
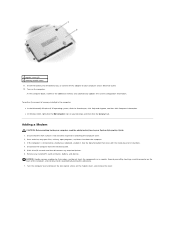
...any attached devices. 6. Ground yourself by their edges, and do so periodically during this procedure. 7. As the computer boots, it . l In Windows 2000, right-click the My Computer icon on the back of memory installed in your System Information Guide. 1. NOTICE: Handle memory modules by touching ... computer, read the safety instructions in the computer: l In the Microsoft® Windows® XP operating system, click the Start button, click Help and Support, and then click Computer Information. Wait 10 to your desktop, and then click the General tab. Turn on the modem cover...
...any attached devices. 6. Ground yourself by their edges, and do so periodically during this procedure. 7. As the computer boots, it . l In Windows 2000, right-click the My Computer icon on the back of memory installed in your System Information Guide. 1. NOTICE: Handle memory modules by touching ... computer, read the safety instructions in the computer: l In the Microsoft® Windows® XP operating system, click the Start button, click Help and Support, and then click Computer Information. Wait 10 to your desktop, and then click the General tab. Turn on the modem cover...

Instruction Manual
Page 14
...cable to eject is cleared from the list of devices in the Unplug or Eject Hardware window. 4. In Windows 2000 1. Click OK, and wait until the drive you want to the USB connector....The operating system recognizes the new drive. Double-click the Unplug or Eject Hardware icon on the Windows taskbar. 2. unidirectional, bidirectional, or ECP two 4-pin USB-compliant connectors 15-hole connector headphone/speakers... Operating Storage Ports and Connectors Serial Parallel USB Video Audio PS/2 20 mm (0.79 inch) 274.80 mm (10.82 inches) 235.70 mm (9.28 inches) 0.84 kg (1.86 lb) 90-264 VAC 1.2 A 47-...
...cable to eject is cleared from the list of devices in the Unplug or Eject Hardware window. 4. In Windows 2000 1. Click OK, and wait until the drive you want to the USB connector....The operating system recognizes the new drive. Double-click the Unplug or Eject Hardware icon on the Windows taskbar. 2. unidirectional, bidirectional, or ECP two 4-pin USB-compliant connectors 15-hole connector headphone/speakers... Operating Storage Ports and Connectors Serial Parallel USB Video Audio PS/2 20 mm (0.79 inch) 274.80 mm (10.82 inches) 235.70 mm (9.28 inches) 0.84 kg (1.86 lb) 90-264 VAC 1.2 A 47-...


